Red Ted Art - Make crafting with kids easy & fun

Cute & Easy Crafts for Kids

  • Home
  • START HERE
  • Preschool Crafts
  • Easy Kids Crafts
  • Paper Crafts
  • Free Printables
  • About
  • Join Our Newsletter
  • Cookies, Privacy Policies & Disclosure

Easy Pinata – Paper bags and Post-Its

March 8, 2019

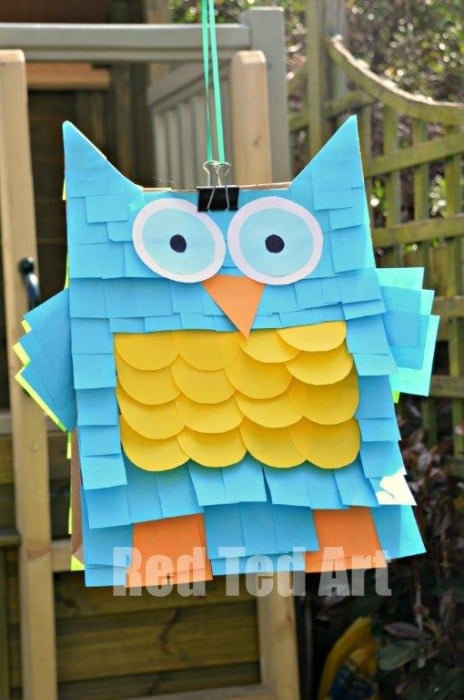
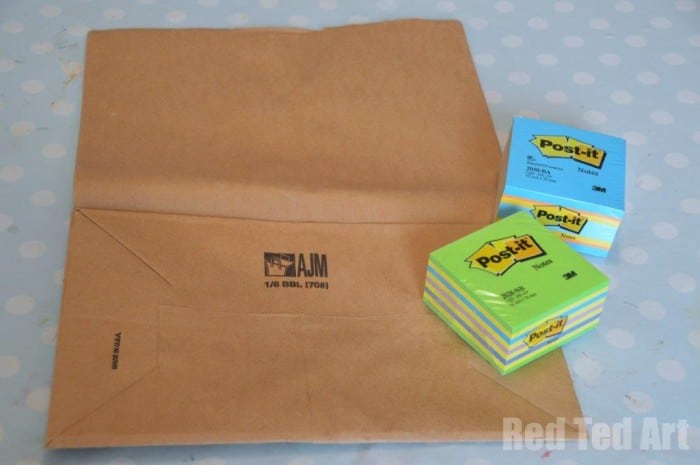
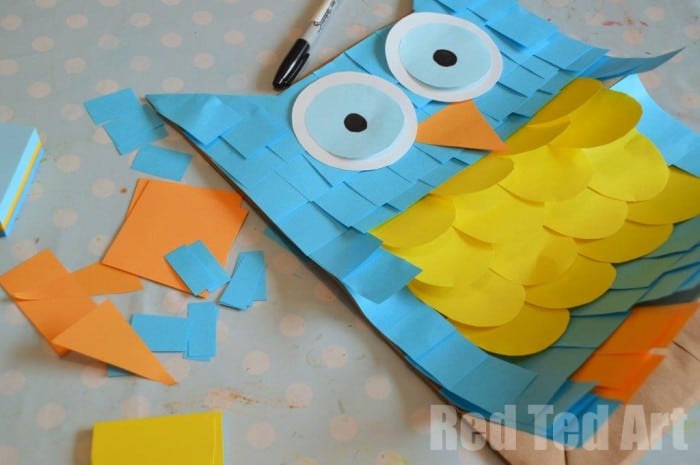
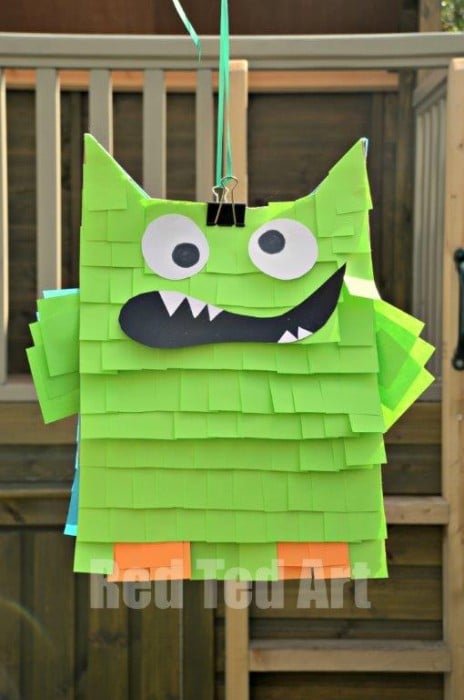
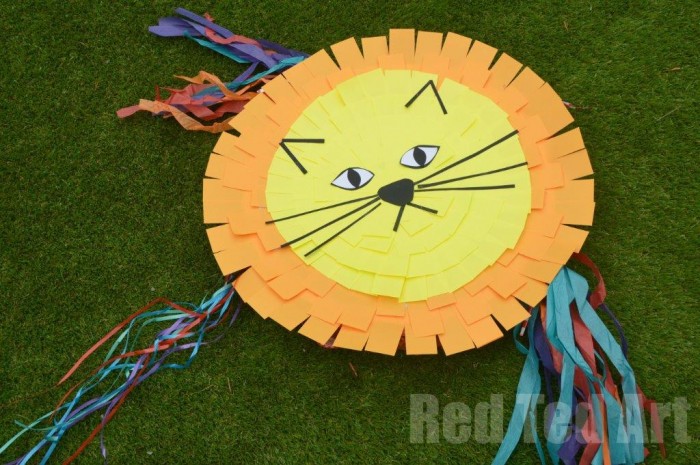
Oh the things you can make from Paper. We love Paper Crafts.. I made the EASIEST PINATA ever at the weekend. I am sharing an Owl Pinata, a Monster Pinata and a Lion Pinata. All you really need are some Post-its from 3M and a brown paper bag. The Post-it Brand from 3M challenged me to decorate a ready made pinata (see our lion below) and I that gave me the idea of how simple it would be to make a Pinata from scratch – using a paper bag – i.e. our Owl Pinata and Monster Pinata.

Easy Pinata - Paper bags and Post-Its. Need to make a quick and easy pinata? Turn paper bags into this adorable OWL Post It Not Pinata. SO CUTE! So fun. We have a fantastic Monster Pinata version too. The kids will love it! #Pinata #easy #paperbag #postitsThis easy no mess pinata DIY was first shared in May 2013 and has been updated for your convenience!

UPDATE: Since these pinatas, we have also made a Sulley Pinata from Monsters Inc. He is adorable. Check him out!!!

Paper Bag Crafts

Materials: Paper bag, Post-it Brand from 3M, Paper & Glue (for embellishments), String (for hanging)

Easy Pinatas

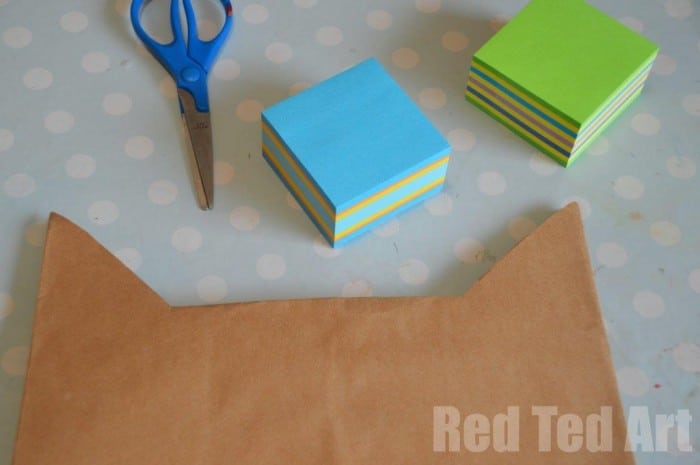
1) Snip into your paper bag at the top opening to shape for ears. I folded the excess paper inside the bag – which also gives it a couple of extra layers for hanging later.

Quick DIY Pinata

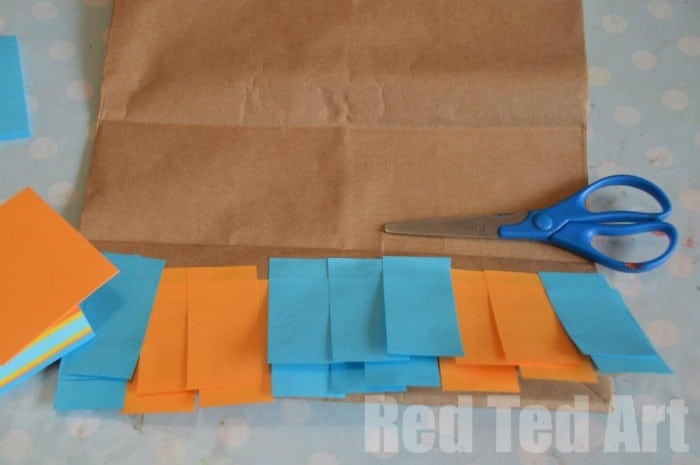
2) Then take your 3M Post-its – cut them in half length wise and start your easy pinata at the bottom. I made an owl pinata on one side and a monster on the other, as couldn’t decide on which to do. The orange is for the owl’s feet. It isn’t too important to layer these neatly… Pinatas are not an exact science and a bit of disorder goes with the that Pinata feel.

If I made these for a party (rather than a challenge), I would then cover the back of the pinata in the appropriate coloured Post-its – blue for the owl, green for the monster.

Owl Pinata

3) For the Owl’s “stomach”, I cut a semi circle/ curve into my square Post-it. Then added some layers and blue “feathers” all around my Owl Pinata. When I got to the ears, I tucked the post it round the triangle to shape. You can always use a little glue stick to secure. Then cut an orange Post-it beak and some large eyes from odinary paper. Layer a second circle and add pupils. I also stuck three square posts down the side of the owl to represent wings.

The front of your owl is done. Wasn’t that an easy pinata craft?

Easy Pinata - Paper bags and Post-Its. Need to make a quick and easy pinata? Turn paper bags into this adorable MONSTER Post It Not Pinata. SO CUTE! So fun. We have a fantastic Owl Pinata version too. The kids will love it! #Pinata #easy #paperbag #postits

4) Similarly the Monster! He got orange feet (like the owl) and a black paper mouth with white teeth stuck on. This time the 3 green square Post-its (lined up with the Owl’s wings on the other side) made for the Monster’s arms.

5) Fill with treats, stuff a little with bubble wrap to give shape. Cut some slits at the bottom to assist the “breaking” when hitting with a stick” and hang!

Easy Pinata - Paper bags and Post-Its. Need to make a quick and easy pinata? Turn paper bags into this adorable MONSTER Post It Not Pinata. SO CUTE! So fun. We have a fantastic Owl Pinata version too. The kids will love it! #Pinata #easy #paperbag #postits

On to the Post-it Brand from 3M challenge of embellishing an existing Pinata (check out Post it UK on Facebook for more Post-it fun!) – and the LION! ROAR!

Lion Pinata

Happy Easy Pinata Craft making!!
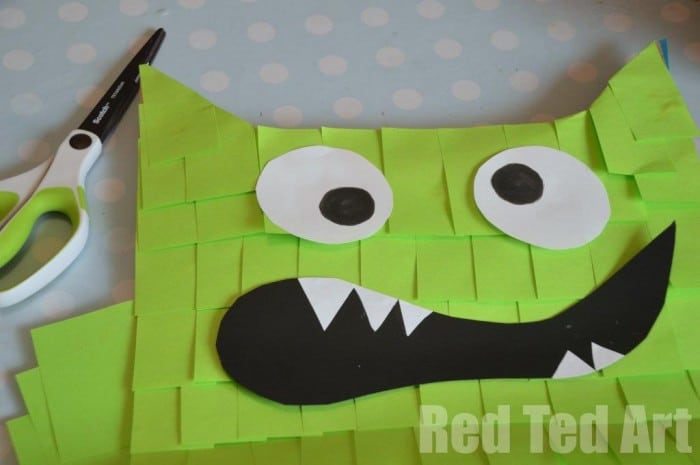
Image tag


«
»

Filed Under: How To's, Kids Craft, Party Ideas 17 Comments

Comments

  1. Brittany @ Crafty Mischief says

    May 8, 2013 at 10:45 pm

    You are a genius, my friend! I have spent hours- even days making pinatas! What a great idea!

    Reply
    • Red Ted Art says

      May 9, 2013 at 12:40 pm

      I know, I have made a paper mache one before… and this was just SO MUCH QUICKER! And just as pretty I think!

      Reply
  2. katepickle says

    May 10, 2013 at 12:18 pm

    Oh that is such a cool way to make a pinata! One of my twins is mad about Owls right now so I am pretty sure she is going to want one of these for her birthday!

    Reply
    • Red Ted Art says

      May 10, 2013 at 1:32 pm

      Perfect! So pleased!

      Reply
  3. Sian says

    May 10, 2013 at 1:27 pm

    Brilliant! we’ve loads of birthdays coming up : )

    Reply
    • Red Ted Art says

      May 10, 2013 at 1:32 pm

      Hooray! Wishing you lots of fun!!

      Reply
  4. PragmaticMom says

    May 12, 2013 at 2:52 pm

    That’s really cute!

    Reply
  5. Angelique Tonge says

    May 13, 2013 at 9:42 pm

    Hi This is brilliant! I have so many post it notes. Never thought they could be so useful. I once saw a pinata made by cup cake cases, but it used glue and would be more messy. This is definitely on my to make list. Thanks for sharing

    Reply
  6. Sarah Lynn says

    May 15, 2013 at 1:34 am

    What a great idea! I’ve only done paper mache once, but this looks way easier and less messy! The pinata is adorable! I’d love for you to share this on my blog link party, Sweet Tooth Tuesdays. It’s not just for recipes, but also DIY projects and crafts.
    http://sarahlynnssweets.blogspot.com/2013/05/sweet-tooth-tuesdays.html

    Reply
  7. creativejewishmom/sara says

    May 16, 2013 at 4:47 pm

    fabulous project, hope the sponsors love it too! thanks for sharing on Craft schooling Sunday!

    Reply
  8. Amy Green says

    September 28, 2016 at 3:15 am

    I love all of these designs! My personal favorite is the owl. You can even use it all year round, and promoting reading books, like Harry Potter!

    Reply
    • Red Ted Art says

      September 28, 2016 at 10:05 am

      So pleased you like them!!

      Reply

Trackbacks

  1. 3M Pinata Challenge | This Mummy Loves says:
    May 11, 2013 at 7:13 pm

    […] first arrived I had absolutely no idea what to do with it to be quite honest and then I saw what Red Ted Art had done with theirs and had a little chat with Maggy on twitter for a bit of inspiration. Maisie […]

    Reply
  2. 104 things to do with kids this summer - C.R.A.F.T. says:
    June 7, 2013 at 2:56 pm

    […] 35. Make an easy pinata […]

    Reply
  3. Easy Piñata – Paper Bags and Post-Its by Red Tart Art | says:
    March 25, 2014 at 7:34 pm

    […] Check out this Easy Piñata how-to from Red Tart Art! […]

    Reply
  4. Easy Piñata - Paper Bags and Post-Its by Red Tart Art - Educents Blog says:
    October 2, 2015 at 5:25 pm

    […] Check out this Easy Piñata how-to from Red Tart Art! […]

    Reply
  5. Paper Bag Crafts Your Kids Will Love - Buggy and Buddy says:
    July 8, 2018 at 7:34 pm

    […] Easy Paper Bag Pinata from redtedart.com […]

    Reply

Leave a Reply Cancel reply

Your email address will not be published.

Recipe Rating


Welcome!

Welcome

Hello! I am Maggy and I love all things crafty and sharing my craft ideas and how tos.

The aim of this site is to provide easy, do-able and fun crafts for all ages.

Categories

Archives

Crafty Blogs

Copyright © 2021 · Website Design By Jumping Jax Designs