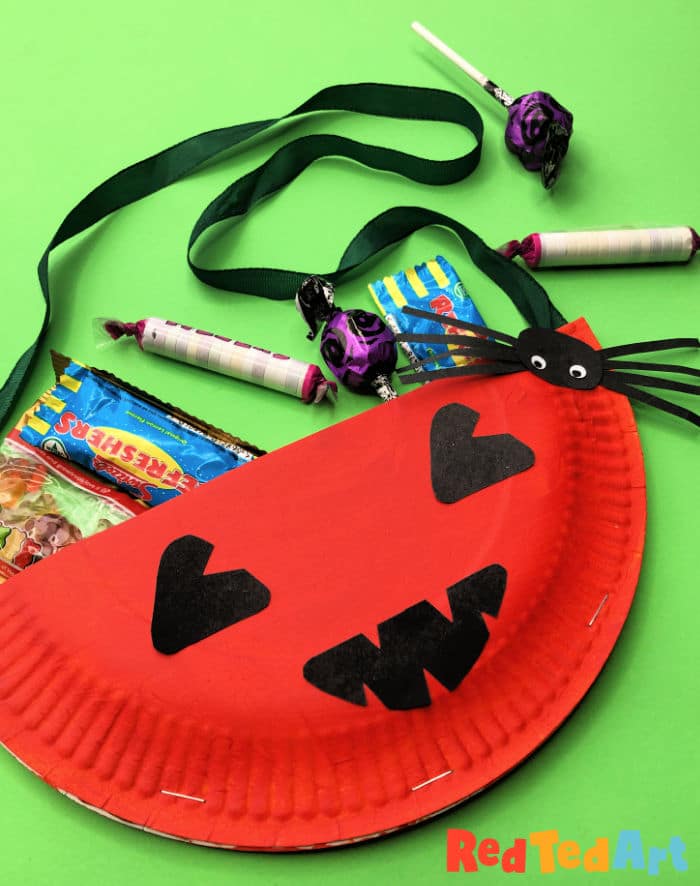
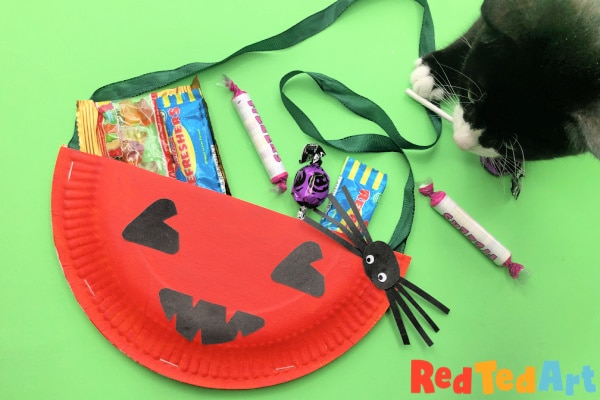
Pumpkin Paper Plate Purse for Halloween
Awww we have a super lovely little Halloween Craft for preschoolers for you today! It has been a while since we made paper plate purses – preschoolers absolutely ADORE these… they are so cute and so easy to make and you can decorate them for ALL occasions. Today, we are making a super duper cute and easy Pumpkin Paper Plate purse!
So sweet! And perfect for taking trick or treating with toddlers and preschoolers!!!
To make a paper plate purse you will need:
- one paper plate per pumpkin purse
- ribbon/ string/ t-shirt yarn – whatever you have already and your preschooler prefers
- orange paint & brushes (newspaper for painting on)
- black paper or paint for features (we went for paper – as you can try out shapes first)
- glue or staples or sticky tape (to secure the paper plate)
How to make a pumpkin paper plate purse for trick or treating
For now our chick video purse is on auto play.. but we will update it with the pumpkin plate SOON!
Get yourself and your toddler ready for crafting – put on your old painting clothes and spread out some newspapers. Though this isn’t a particularly messy craft, the painting element does ask for a little prep. You could of course buy orange paper plates to begin with to make this a super easy preschool Halloween craft!

First paint the back your paper plate in orange.
Of course you can just use orange paint, but your toddler or preschooler, will love seeing the magic of colour theory.. why not mix your own orange with yellow and red? Remember to always use more of the “weaker” colour (yellow) and gradually add the “stronger” colour (red).
It needs to be the back as that is where the plate curves outwards. If you do the front, you can’t bring the two sides together to create the pocket.
Once fully dry, cut your paper plate in half.
Decorate the Paper Plates with Jack O’Lantern Features

Take one half and decorate as a pumpkin – you can do this with more paints, felt tip pens, or cut out paper shapes and glue on. Take a look online for cute kawaii pumpkin faces for example these.
You can keep it simple – and just add a face or you can also add little features or you can also add extras like a friendly spider!
We love using black paper shapes, as you can experiment with the positioning of your features and maybe cut out a few different ones before settling on your favouite.
I cut two simple triangle eyes with rounded corners and a simple mouth.
Then take your scissors and snip some triangle eye balls and teeth in – super easy!
Adding your paper plate purse string and connecting the paper plates

Take some ribbon or t-shirt yarn – measure the length you want to “fit” your child and cut a strip.
Now either glue or staple your paper plates halves together – with your ribbon positioned in place.
We prefer to staple as it is instant and feels more secure. If gluing – use some clothe pegs to hold it in place whilst it dries.
We also made a little paper spider as a pumpking “hair piece”

Cut a black circle or oval.
Cut 4 thin strips of paper.
Glue them to back of the oval – to make 8 legs.
Whole punch two white eyes and add a black pupil.
Your paper spider is done – just stick it to the corner of your pumpkin paper plate.
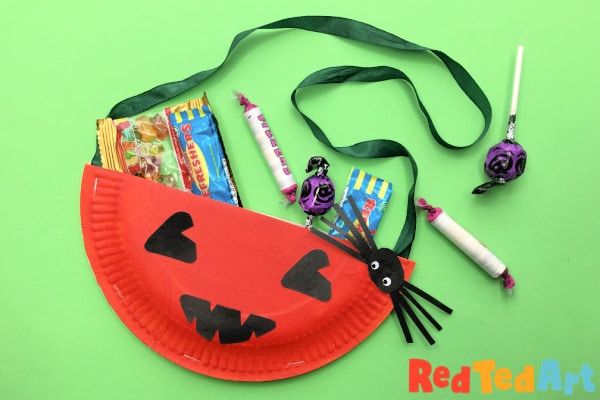
You are now ready to go trick or treating with your preschooler or toddler this Halloween!
Don’t forget to bring your black cat!
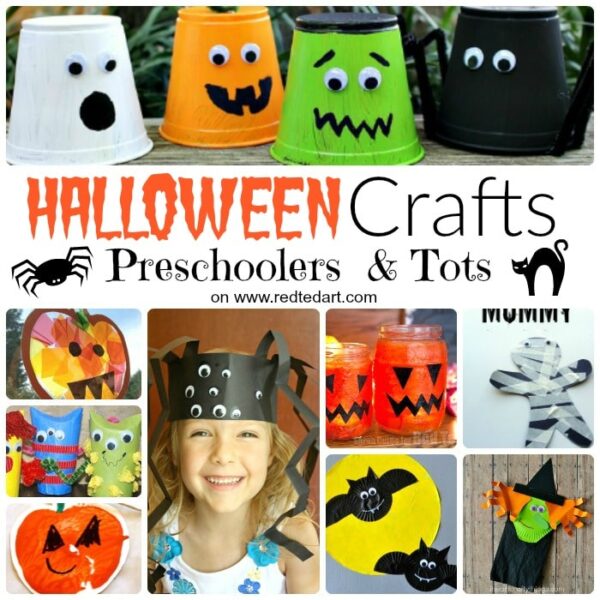
More Halloween Craft for toddlers & preschoolers here: