Food Dye Coloured Easter Eggs
We love Egg Decorating at Easter and have had a go at many different Egg Decorating techniques and ideas… one method that we ALWAYS come back to, is the traditional Food Dye Coloured Easter Egg Method.
How to dye eggs with food coloring

PLEASE NOTE: This post was originally sponsored by by Scotch Tape. But we love it so much, we know you want to see it again and again! So have republished it for your convenience.
The lovely people from 3M recently challenged me to come up with some fun crafts using Scotch Magic Tape and it’s special properties. Scotch Magic Tape is a wonderful tape – that is instantly repositionable, has a great matt finish that you can write on with a pencil or pen, won’t yellow or go brittle with time and is simply great for crafting with kids. Today we are going to have fun with Easter Eggs! You can do this craft with either DIY Blown-out Eggs or Hard Boiled Easter Eggs for the Easter Breakfast table or the Easter nests… These Easter Eggs are easy to make and above all time efficient – i.e. if you are going to be eating them, you don’t want to spend hours decorating thease Easter Eggs.
Natural Dyeing of Eggs

We also have a GREAT post on how to dye eggs naturally. Making your own dyeing agent using vegetables and herbs. This method is especially beneficial when dyeing boiled eggs for the Easter table (e.g. Orthodox Easter celebrations!). That said, food coloring is appropriate for consumption too!
And here is how we Dye Easter Eggs with Food Dye.
Food Dye Easter Egg Materials:
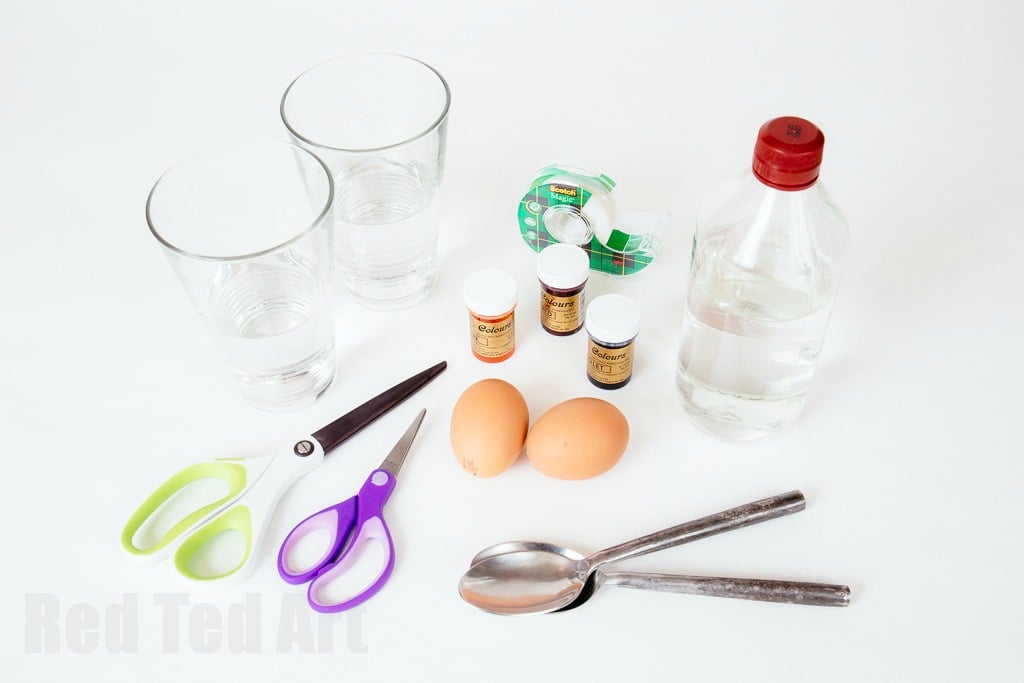
- A cup of water per egg (or use a bowl with “multiples” of the ingredients to fit in more eggs)
- 1-2 table spoons of vinegar (this helps bind the colour)
- Food colouring in various colours
- Hard boiled or blown-out eggs
- Spoons
- Tissue paper
Optional:
- Scotch Magic Tape for creating patterns/ tape resist art
- Scissors
How to dye eggs with food coloring – step by step photos
If adding tape resist patterns
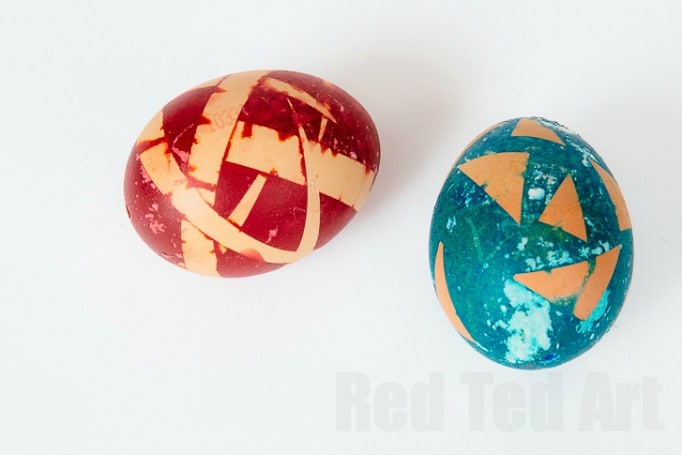
Start off by cutting strips of tapes for your patterns. You can add lines or create chunky shapes, such a squares and triangles using your magic tape. I love how Pip Squeak finds Magic Tape really easy to handle. It doesn’t keep folding back on itself and sticking shut.
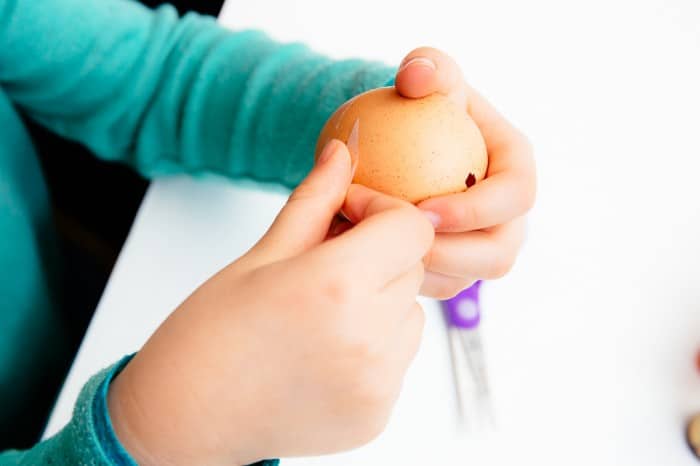
Place the Magic Tape onto your eggs and smooth down the edges. As the tape is instantly repositionable, you can take the tape off and add it somewhere else (my children have a tendency of sticking the tape all on one side!!!).
Preparing your egg food dye mixture
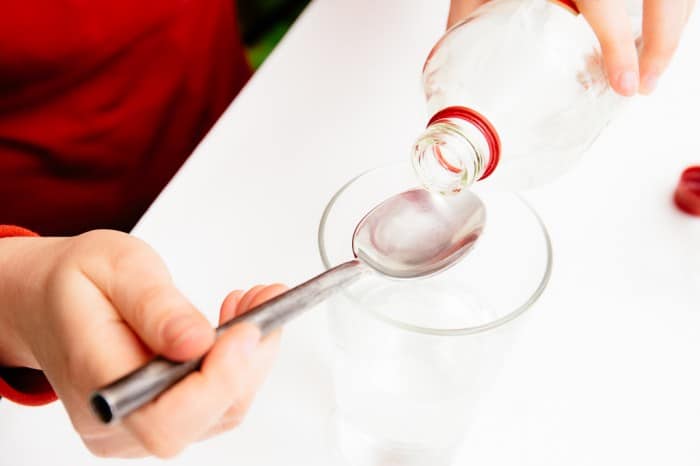
Now your eggs are ready for dying. Take your cup of water and add 1-2 spoonsfull of vinegar to it.
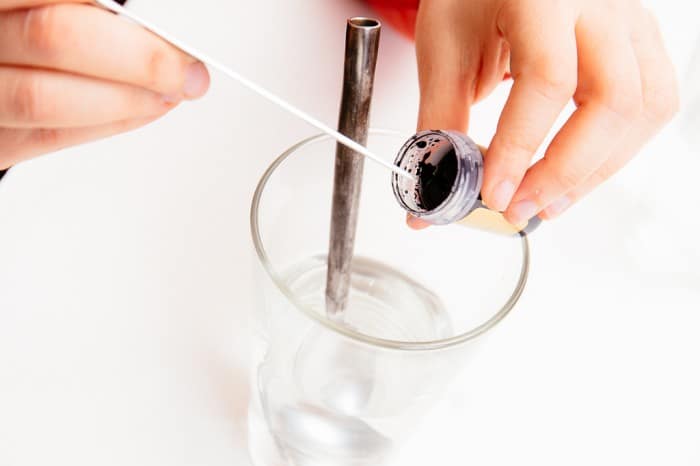
Add your food dye – probably about 1-2 tea spoons full. This TOTALLY depends on the quality of your food dye. Low quality dye will need MORE.. Also, some food dyes, will result in “strange” colours, e.g. some yellow food dyes are actually made from a red colour base, and may give you a red egg. So, see this as an experiment watching the MAGIC of using food dyes as they colour your eggs… you never quite know what you are going to get. Some blues come out purple, others come out green! It doesn’t matter and is all part of the fun!

Submerge your eggs for 10 – 15min
Add your eggs! As these are blown out eggs, the table spoons help “weigh down” the eggs to keep them submerged. If you are using hardboiled eggs, they stay submerged more easily.
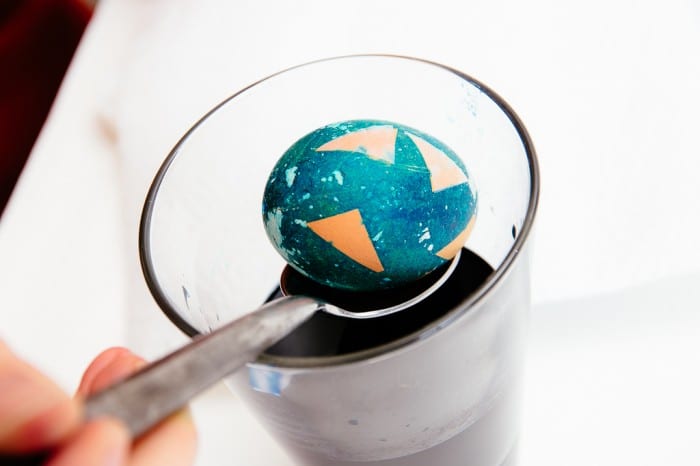
After about 10-15min they should be ready to be removed… you can fish them out and have a little look and if need be leave them a little longer.

Pat your Easter Egg dry in kitchen towel. It is important that you pat them dry like this. If you take them out and rest them on a kitchen towel, you are likely to get a little “absorption” patch on the underside of your egg.
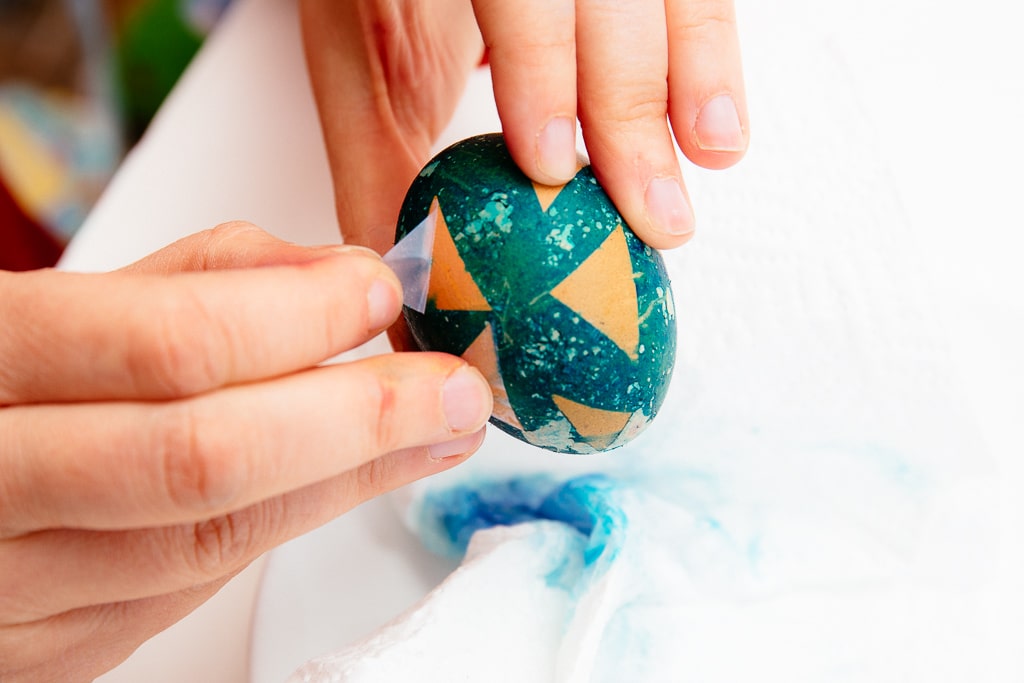
Peel off your Magic Tape… and DONE!!! Aren’t Easter Eggs dyed with Food Dyes simply too pretty!? The Magic Tape is wonderful and comes off really easily.
You can create all sorts of patterns… we even managed a “Red Union Jack” egg, by adding the strips across each other in the familiar star pattern.
More Easter Egg Decorating ideas: