
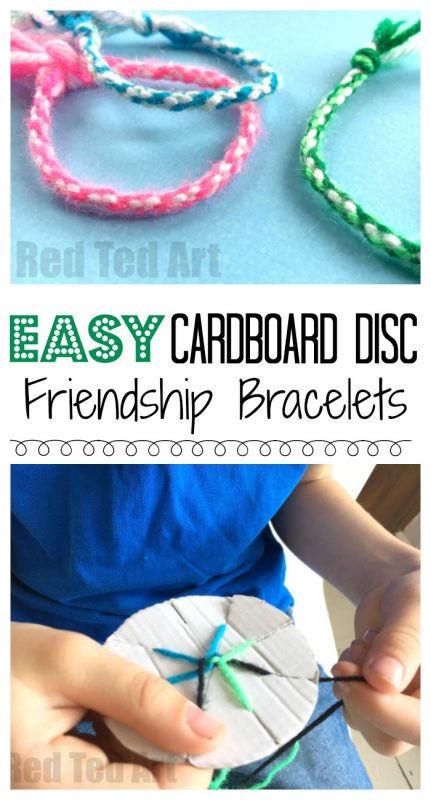
Easy Friendship Bracelets with Cardboard Loom
Time for some DIY Friendship Bracelets. My kids are finally getting into the age where they are starting to love classic summer crafts such as friendship bracelets making. I used to love making easy friendship bracelets when I was young – it was great to make these at summer camp and give to my new friends, and also during those loooong summer afternoons. This technique uses a super simple DIY Cardboard Loom – which is quick and easy to make. The bracelets are super easy and pretty to knot using these technique and instructions!
As we plan our first “longer” holiday this summer, which will require a fair amount of travelling, I think these easy friendship bracelets make a great road trip craft too.
They are easy to prep, take a long and of course make. The kids will hopefully find plenty of friends to give them to whilst we are away, as well as bring them back as gifts for their friends at home! This is a great cardboard circle bracelet technique that I am sure you will love too!
This cardboard loom bracelet DIY is brilliant for beginners! It is easy to get going and easy to take a break if you wish (though these instructions are quick and easy to follow, so you will probably finish the bracelet in one sitting)!
Using a cardboard Loom to make friendship bracelets! Ideal for beginners!
Today we are showing you how to make a friendship bracelet with a Cardboard Loom or Cardboard Circle. Cardboard Circle Bracelet DIYs are easy and fun.
We have shared classic friendship bracelets before – great for friendship bracelet patterns with diagnoals and chevrons. Though they are easy once you get the hang of them – can be a bit confusing for young kids and only really look nice with embroidery floss.
I love the cardboard loom bracelets, as they really are so very very very easy to make for kids of all abilities AND look great with both ordinary wool / yarn as well as embroidery thread. Perfect for beginners and kids of all ages (even preschoolers!).
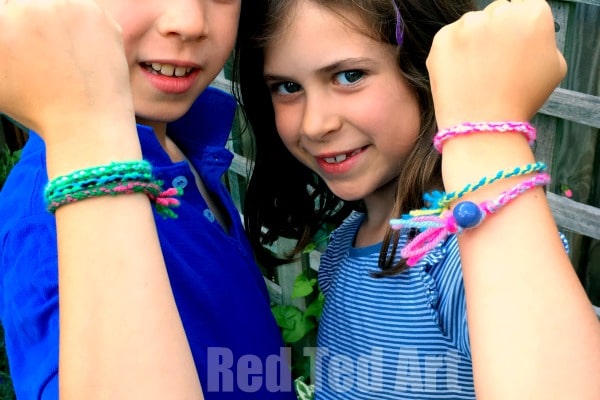
As with the “classic” embroidery floss bracelets, you can make these cardboard disc bracelets using lots of different colors if you wish. Though we liek to focus on 3 colors at a time. Best friends can have matching colors. The final look is that of thick braids. It is gorgeous!
The Kumihimo Technique – the Cardboard Circle Bracelet!
This cardboard loom friendship bracelets has it’s origins in the Kumihimo technique – but I feel it is easier than the traditional Kumihimo patterns AND doesn’t require the slightly more complicated Kumihimo cardboard loom.
Making this a great Friendship Bracelet DIY. Having said that, we do love the Kumihimo and will be exploring more friendship bracelet patterns in future! This however is your basic cardboard loom friendship bracelet how to!!!
How to make friendship bracelets with cardboard – Materials needed
- yarn/ wool in different colors, you will need 7 strands of approximately 50cm
- a piece of cardboard (we used a tin can to measure out the circle)
- rule, pencil and scissors for making the disc
- bead/ button OPTIONAL for closing mechanisms
You can get a great printable with instructions pack in my Teacher’s Pay Teacher’s store. This includes some Valentine’s Day Cards (with puns) so they can be made as friendship bracelets on Valentine’s.

How to make friendship bracelets with cardboard

I find the video really does show how best to use your cardboard disc in order to make your yarn friendship bracelets. however, you can read below the instructions for making your cardboard discs.. AND.. from about 5 minutes into the video I show you 3 different ways of closing your Kumihimo friendship bracelets.
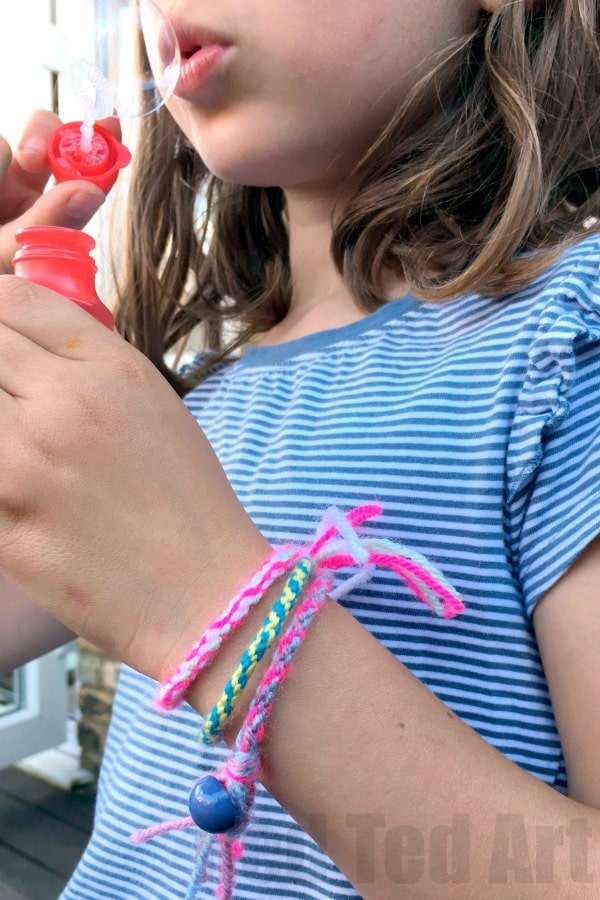
I do waffle on a bit (ahem sorry…), but hopefully the different ways of closing your friendship bracelets will be useful. My son likes the “permanent” knots best, whilst my daughter likes using beads.
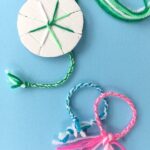
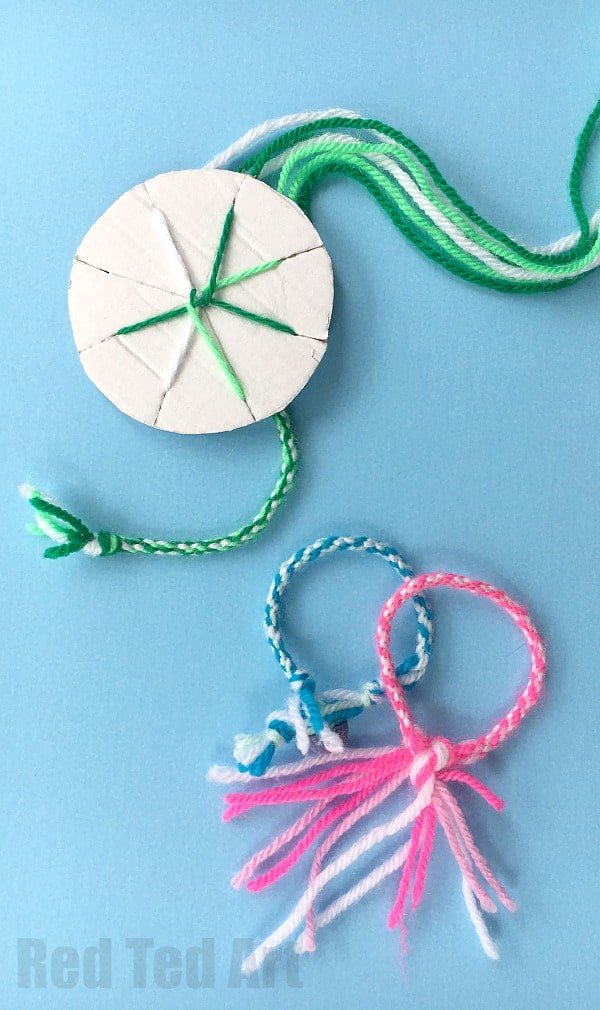
How to make your cardboard loom for friendship bracelets –
- Using a tin can or similar, cut out a cardboard circle
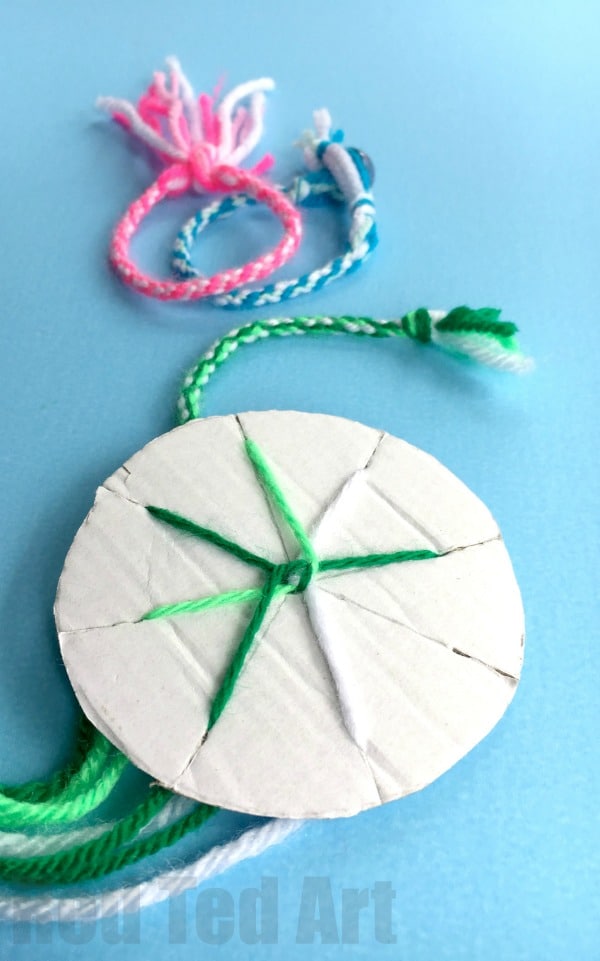
- Draw 4 lines across your kumihimo cardboard disc to create 8 equal segments. I found that if they are not exactly equal it isn’t really a problem. Just get it as neat as possible.
- Make a hole in the middle (big enough to thread all 7 pieces of yarn through, I use small scissors to push them through)
- Cut 1cm into each line you drawn – so you have approximately 1cm cut, 2 cm uncut and then the hole
Your DIY Kumihimo disc is ready to get crafty with!!
How to make kumihimo friendship bracelets using a cardboard loom –
For this section refer to the video as it really makes it easier to understand.. however here are some written instructions.
- Take your seven strands of yarn and tie a knot at one end – now depending on how you finish off your bracelet, you may want to vary how you make this knot – see below for different options
- Thread your strands through the hole in the disc. I find using scissors to push them through really helps!
- Now you 7 strands dangling down. Take one strand at a time and slot it through one of the 1 cm strips. So the first strand through one slot, the second strand through the next. The order of the strands doesn’t really matter!
- You should now have a disc that looks like the image below:
- 7 strands tucked in, with one “space slot”.
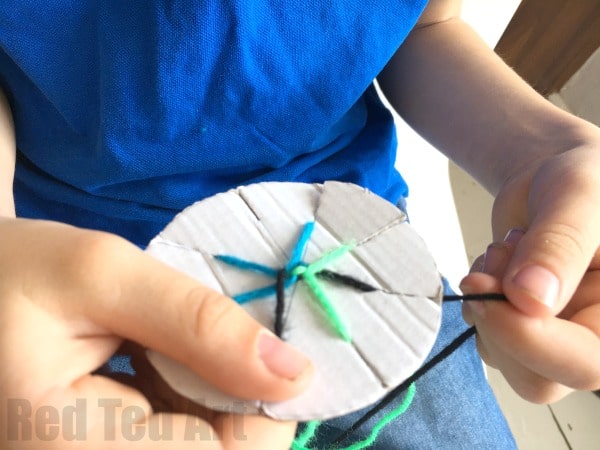
- Take the 3rd strand to the LEFT of the spare slot, lift it up, bring it down and put across the spares slot. This creates a new space.
- Rotate your disc for this to point down (you don’t have to rotate, but my kids find it easier) and now again, pick the strand 3 to the left and fold down.. repeat. Your yarn friendship bracelet will begin to “grow” on the other side of the disc, give it a gentle tug every so often.
I do think the video above helps for this section!
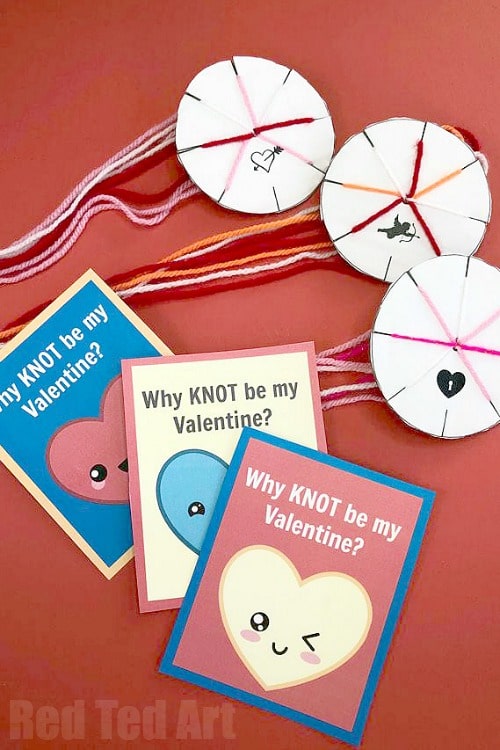
We have a cute printable Valentines Friendship Bracelet printable set too (with extra instructions).
Find printable step instructions here:
Easy Friendship Bracelets
Equipment
- 7 Threads in desired colours x 50cm
- Cardboard
- Scissors
- Tin can for making template (though templates are available for download)
Instructions
- Using a tin can or similar, cut out a cardboard circle. Draw 4 lines across your disc to create 8 equal segments.Make a hole in the middle.Cut 1cm into each line you drawn – so you have approximately 1cm cut, 2 cm uncut and then the hole.
- Take your seven strands of yarn and tie a knot at one end.Thread your strands through the hole in the disc.Take one strand at a time and slot it through one of the 1 cm strips. You should have 7 strands tucked in, with one “space slot”.
- Take the 3rd strand to the LEFT of the spare slot, lift it up, bring it down and put across the spares slot. This creates a new space.Rotate your disc for this to point down and pick the strand 3 to the left and fold down.Repeat. Your yarn friendship bracelet will begin to “grow” on the other side of the disc, give it a gentle tug every so often.
Video
Notes
How to secure your yarn friendship bracelets
- A simple knot. My son prefers this method. I basically “unknot” the knot you made at the beginning and the knot together beginning an end securely onto the wrist. These friendship bracelets are harder to remove!
- A loop and knot. Instead of using 7 strands, you can use 3 1m strands, fold them in half, creating a loop. Add the 7th strand and knot. This loop forms part of your closing mechanism.. either later tie the ends to this (which means you can make a shorter friendship bracelet), OR add a bead/ button to the end which can be pushed through the loop.
- Use 3 longer pieces of yarn (like in N2) thread a bead or button threw them and create a loop. Add the 7th strand and again knot. Then make proceed as above. Once your friendship bracelet is finished. Make two knots next to each other – wide apart enough for the bead/ button to fit between the knots.
We have more Friendship Bracelet DIYs for you here:
