How to make a cute Paper Hedgehog craft
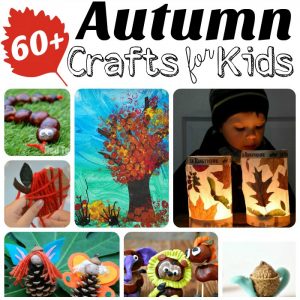
We love showcasing fellow crafters and bloggers and their skills! Today, we have a lovely Autumn Craft for kids shared with us by Ria from Crafts By Ria. She will show you how to make a cute Paper Hedgehog Craft for Autumn. Lovely! How we love a cute Hedgehog Craft!

Hello, I am Ria from Crafts By Ria. I love sharing easy and creative craft tutorials for kids. I am a mom of a 4-year-old little girl and I believe crafting is a fantastic way for parents and kids to spend quality time together. I am so glad to share this easy paper hedgehog craft on Red Ted Art which is a fun fall craft idea.
Hedgehogs are cute little animals, often associated with the fall season. Their spines, otherwise called quills help them keep predators away and one hedgehog can have about 5000 spines! Hedgehogs can be white or light brown or black and their spines can have several shades on them. It will be interesting for the kids to learn more about these little mammals and this paper hedgehog craft is a fantastic idea to stimulate their curiosity!
Join us on Instagram for more fun crafty ideas!
So, let’s see how to make this cute hedgehog paper craft!
Supplies you need
- White A4 paper
- Brown acrylic paint/watercolor
- Paint brush
- Black marker
- Glue
- Scissor
- Cardstock
- Maple leaf and hedgehog craft templates.

How to make a paper hedgehog craft
Step 1: Make the hedgehog’s face
Download and print the paper hedgehog printable. Paint the hedgehog’s face with brown paint. We used acrylic paint for this. Color the eyes and nose with black marker and cut them out. Stick the eyes and nose on the hedgehog’s face.

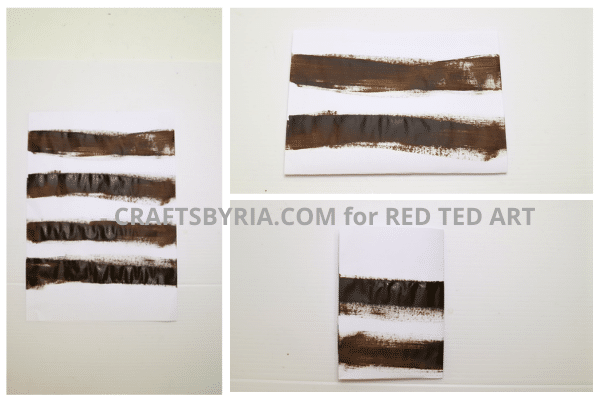
Step 2: Making Spikes – paint the paper with brown paint
Paint thick brown stripes on a white A4 paper. Smudge the brown stripes a little bit here and there. Let it dry. Fold it in half two times.
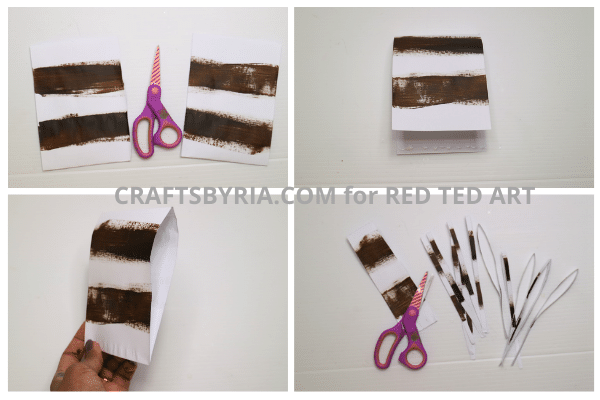
Step 3: Make the longer spikes
Open the second fold. Now, cut it along the crease and you will get two smaller pieces of paper. Keep one of them aside. Take the other piece and stick both the ends together by applying some glue inside along the shorter edge. Now, cut it into thin strips in the form of loops to make the spines of the hedgehog.
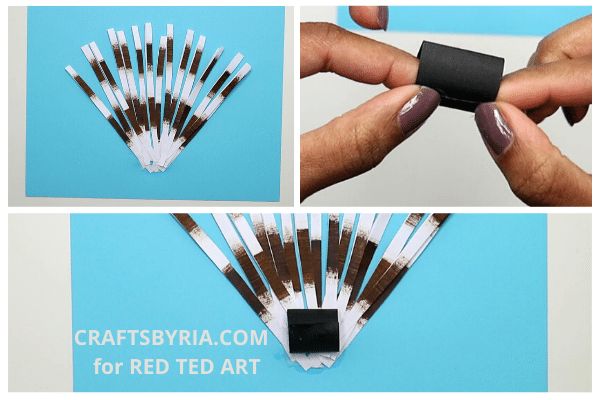
Step 4: Stick the spikes on a cardstock
Stick the spines on a cardstock as shown below. Make a tiny loop with a black/brown cardstock paper and stick it on top of the spines.
Step 5: Stick the shorter hedgehog quills and face.
Let’s make one more set of quills/ spikes which are a bit shorter. For that, take the piece of paper which we kept aside in step 3. Cut it a bit shorter and glue the edges together as we did with the other piece. Now cut it into several strips and stick them on top of the cardstock loop. Then stick the hedgehog’s face on top of the spines.
Lastly, you can download and print our maple leaf template, color it and stick it on the cardstock paper to add a fall theme to the craft. And the paper hedgehog craft is ready! Isn’t it super cute?!

Love this craft? See more ideas from Crafts By Ria here:
More Autumn Crafts for Kids here:
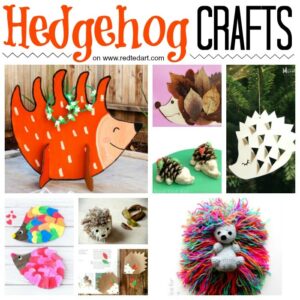
More Hedgehog Crafts here: