Red Ted Art - Make crafting with kids easy & fun

Cute & Easy Crafts for Kids

  • Home
  • START HERE
  • Preschool Crafts
  • Easy Crafts for Kids
  • Paper Crafts
  • Free Printables
  • About
  • Join Our Newsletter
  • Cookies, Privacy Policies & Disclosure

How to… make Cookie Cutter Candles

February 3, 2012

 You may have seen my post about how to make candle wicks and a brief intro to making your own “test candles” (aka ice cube tray candles!). Since then I had a little play and started making all sorts of different candles in a variety of colours! You can use old broken crayons to colour your candles. I had heard before, but not believed, that you could make candles using cookie cutters on aluminium foil… surely all the wax would just run out?

  • homemade candles tips
  • Home made candles
Cookie Cutters can be used as candle moulds and broken crayons as pigment

So I decided to sacrifice the order of my kitchen (not that it is very orderly) and make some cookie cutter candles… and then that lead to another idea! So today I have for you Star Candles and Car Candles made with cookie cutters!

To make cookie cutter crayons you will need:

  • Old white “church candles” (or any candle will do),
  • broken crayons,
  • cookie cutters (star & car shaped),
  • homemade candle wicks, 
  • cello tape,
  • aluminium foil,
  • some clothes pegs,
  • a pan,
  • an old tin,
  • cardboard for cutting on.

There is a fad going around of recycling old crayons, by melting them down and making new crayons… however, much more effective you can use the same crayons to colour your wax. And you really don’t need much crayon to colour quite a lot of wax. Just goes to show how much pigment is in a crayon! I do like to recycle.. so why not use old old crayons rather than go out and buy some more. Most of us have some in a **drawer somewhere**… or steal some off a small child (only joking).

How to make your cookie cutter crayons – star:

  • how to make candles
  • how to make candles

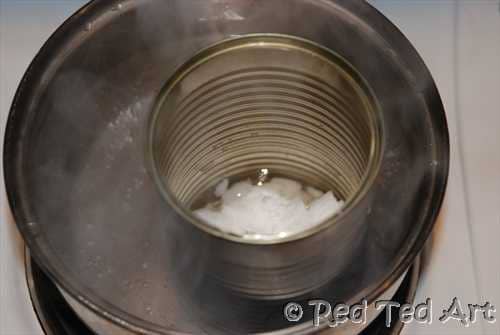
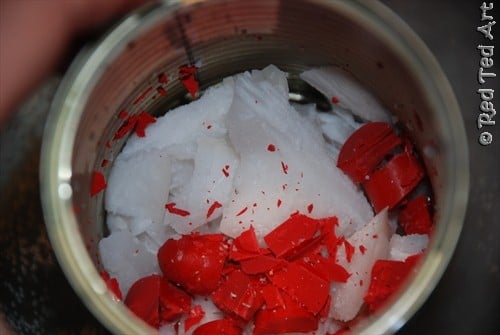
1) Place a pan of water on your stove. Add the tin containing your broken down wax and half a crayon of your desired colour. Heat until the wax is melting.

candle making ideas

2) Get a piece of paper. Place your foil on top of it as crease proof as possible. Cut a piece of wick of the desired length. Cello tape a little bit of the wick town to secure it in place. Centre your star over the wick. Hold wick in place with a cloth peg.

candle making ideas

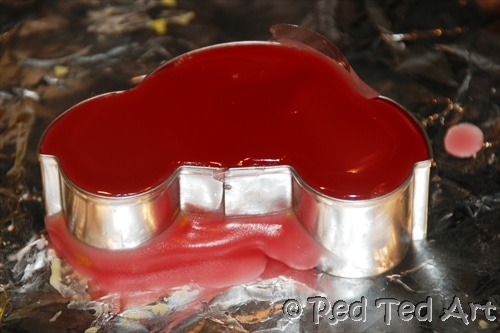
3) Now here is the tricky bit. Take the tin of wax out. Let it cool a little – but not set. After say 2-3min, start pouring – hold the cookie cutter firmly onto the foil. I found it helpful to put a 2nd clothes peg across the top and push that down. Pour your wax. You will probably have SOME wax escape (see my photo above), but just keep holding down the peg and wait. Yes. It is boring, but it is worth the pretty shape at the end. Wait some more, wait some more. If a lot of wax escaped, do top it up. But remember adding hot wax, will melt the wax below and more may come out – so always let it cool a little and hold that cutter in place whilst it sets.

candle making ideas

And look here, TONS escaped here!! But the candle is still lovely! And all the escaped wax went back in the pot!

4) Let it cool. Once cooled, remove the “escaped” wax and reuse in the tin. Wiggle the cookie cutter shape a little and prise you candle free… lovely.

Home made candles

How to make the candle wick stick out the top of your shape:

homemade candles tips

I had the idea to make car candles – as Red Ted wants a “Cars Party”… and I bought these car cookie cutters for the party bags (I have 2 extra for Red Ted & Pip Squeak and used one of those car cookie cutters to make these candles). Red Ted will be four.. so I need four candles… I made them one after the other. Not time efficient, but I was doing other things in the meantime!

  • candle making tips
  • homemade candle making tips

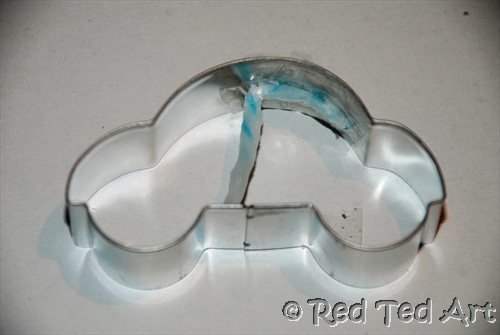
Basically you are going through the same process as above, but you are have to tape your wick across your cutter. Note – when you then remove your candle at the end, it will be “taped” in. So try and use “just the right amount of tape – a little for the bottom part of the candle and a little more, but not too much for the part of the wick you will light. Yes, it is fiddly, but again, worth it! You will also find, that you candle will not be “perfect” – where you wick was resting, there will be a groove. Follow the steps above. When it comes to wriggling the candle free, it will be stuck to the cookie shape because of the cello tape. Just keep trying gently until it comes loose!

homemade candles
making candles at home

Notes:

1) You only need about half a crayon for a whole tin of wax. More crayon will not result in a deeper colour.

2) I tried some “colour theory” by adding a blue cray0n to red wax and got a browny purple (instead of a nice purple) – colour theory will not work well with crayons – I am guessing that commercial blues and red are not “pure colours” and will contain a mix of primary colours, which you will only notice once you melt it all down. To keep your colours pretty, just use one crayon per tin. I have 5 tins standing around my house… it is fine of course to add a dark blue to a light blue, but avoid yellow + blue unless you want to be dissappoint etc.

3) Make sure all the wax and crayons are fully melted. Give it a good swirl to get it all mixed up.

4) The “neater” your foil, the “neater” your final candle. My cars have creases on them that they got from the foil. I don’t think the creases matter too much, but if you are perfectionist…..

5) Take your melted wax off the heat and let it cool a little (but not set), before pouring into your cookie cutter, this will mean it will set quicker and you will have to hold it in place less long. You may want to cool your cookie cutter in the fridge first to speed up the setting process and get less leakage.

6) Make sure your candle is fully cooled before removing it from the shape. Else you will squish it. If need be place it in the fridge for five minutes.

**this is a slow craft, as you have to wait for your wax to cool and set**

Right, I hope I have convinced you, that you do not need store bought kits to make candles at home. Apart from the borax for the homemade candle wicks , I had all the materials needed at home (I in fact had borax too). So you really can recycle your old candles and make new ones at home. Homemade candles rock!

More great and unexpected uses for broken crayons:

recycle broken crayons

«
»

Filed Under: How To's, Party Ideas, Recycling 42 Comments

Comments

  1. Aly says

    February 3, 2012 at 10:49 am

    Ok so you can use metal cutters and silicone moulds.But I have plastic cookie cutters will wax stick?

    Reply
  2. Red Ted Art says

    February 3, 2012 at 10:51 am

    Aly, I haven\’t tried it with plastic cookie cutters – sorry! I think you will have to experiment? I still have some \”wax in a tin\”.. if you like I can test the plastic cookie cutters later this week for you?

    I would have thought that it SHOULD be fine…?

    Reply
  3. Multiple Mummy says

    February 3, 2012 at 11:32 am

    Wow that is so clever and looks so easy. where do you get the wick from?

    They would make great presents too.

    Thanks for linking to Family Frolics.

    Kerry
    x

    Reply
  4. Red Ted Art says

    February 3, 2012 at 11:58 am

    I made the wicks here: https://www.redtedart.com/2012/02/03/how-to-make-a-candle-wick/ but you can buy them online. I also recycled some of the wick from our old candles!

    Reply
  5. Beth says

    February 3, 2012 at 12:01 pm

    Super cute!! What a fun, CLEVER idea!!
    Beth =-)

    Reply
  6. Red Ted Art says

    February 3, 2012 at 12:12 pm

    Thank you 🙂

    Reply
  7. Liz Burton says

    February 3, 2012 at 2:56 pm

    You are all kinds of wonderful lady!

    *Rushes off to make these!*

    Reply
  8. Aly says

    February 3, 2012 at 3:51 pm

    I got my candle making kit out and ‘borrowed’ the kids wax crayons, so I’m going to have a play tomorrow whilst they’re at their dad’s.

    Reply
  9. Red Ted Art says

    February 3, 2012 at 4:42 pm

    Ooooh fab! Let me know how you get on with the plastic cutters!

    Reply
  10. Emma @mummymummymum says

    February 3, 2012 at 7:09 pm

    they are gorgeous Maggy! xx

    Reply
  11. Keitha says

    February 4, 2012 at 2:10 am

    Amazing! Thanks for sharing this great idea and step by step tutorial.

    Reply
  12. Roopa @Putti prapancha says

    February 4, 2012 at 3:44 am

    Oh my Maggy, they look Lovely!! You are so patient lady and I am sure ur boy would love these. I have seen my mother making fancy candles, but never have ventured it myself.

    Reply
  13. Kate Takes 5 says

    February 4, 2012 at 9:23 am

    Oh I remember making these as a kid – had forgotten all about them. Gorgeous!

    Reply
  14. Rebecca says

    February 4, 2012 at 9:38 am

    That\’s a great idea. Does it ruin e cookie cutters?

    Reply
  15. Red Ted Art says

    February 4, 2012 at 9:54 am

    Rebecca – no all my cookie cutters seem fine. I pour boiling water over it and it helps \”flush off\” all the excess wax!

    Reply
  16. Jude says

    February 4, 2012 at 4:09 pm

    I was trying to melt some wax the other day, in exactly the way you describe, but gave up because nothing seemed to be happening – perhaps I was too impatient and didn\’t give it long enough – how long does it usually take to melt?

    Reply
    • Red Ted Art says

      February 4, 2012 at 5:59 pm

      I didn’t “notice” how long it took, which makes me think not too long? Maybe 5 minutes? The crayons definitely take a little longer, but once the wax is hot and I swirl it all around a bit, it all melts down reasonably quickly. I guess I was doing this whilst doing other things (e.g. tidying up) and it wasn’t like watching waiting for it to melt??

      Reply
  17. Stevie says

    February 4, 2012 at 6:07 pm

    My daughter is really going to love these! I have never really put much thought into this type of actgivity. My daughter has boxes and boxed of crayons that we have bought for her, and she never uses them. Maybe we can finally put them to good use! Thanks for the info!

    Reply
    • Red Ted Art says

      February 4, 2012 at 6:15 pm

      Yes! You will be able to make so many different coloured candles! Hooray!

      Reply
  18. April says

    February 4, 2012 at 9:34 pm

    What a fun craft, I love candles, and would love to try making them. How fun to use cookie cutters as forms. Great tutorial! 🙂

    Reply
  19. ScienceSparks says

    February 6, 2012 at 10:29 pm

    Melting wax is so much fun!

    Very colourful and a great idea Maggy.

    Thanks for linking to Science Sparks

    Reply
  20. Red Ted Art says

    February 7, 2012 at 7:49 am

    @April thank you!

    @ScienceSparks Red Ted was FASCINATED! Though he hasn\’t seen the car candles yet… hope he likes them!

    Reply
  21. Cindy deRosier says

    February 8, 2012 at 4:42 pm

    What a great tutorial! I used to make candles all the time using actual candle molds, but I love the idea of using cookie cutters! I\’m adding this to my \”must try\” folder. 🙂

    Reply
    • Red Ted Art says

      February 8, 2012 at 9:20 pm

      Ooh what a lovely comment from someone who has made lots of candles!! So pleased you like the tutorial!!!

      Reply
  22. creativejewishmom/sara says

    February 9, 2012 at 4:49 pm

    great project Maggy, love those cars too. My daughter would just love this! thanks so much for sharing on Craft Schooling Sunday!

    Reply
  23. Red Ted Art says

    February 9, 2012 at 4:50 pm

    Thank you Sara 🙂 and always love coming to link up at your party!

    Reply
  24. Lindsi B says

    February 10, 2012 at 10:26 pm

    I love this! So cute! I saw this on Skip to My Lou I would love it if you would share this with our readers too for Fun Stuff Fridays! http://www.toysinthedryer.com/2012/02/14-days-of-valentines-fun-stuff-fridays_10.html

    Reply
    • Red Ted Art says

      February 11, 2012 at 8:04 am

      Done!

      Reply
  25. Amber says

    May 9, 2012 at 6:15 pm

    I love making candles because i can do them scent free for my mom w horrible allergies! Thanks so much for your time in these amazing tutorials.
    Have u ever tried using parowax (e.g. For canning and household stuff) to make candles? Does it work do u no? I made some w it and the candles wouldnt stay lit, so im wondering if it was the wax or the wicks… 🙂
    Thanks again!!!

    Reply
    • Red Ted Art says

      May 9, 2012 at 6:20 pm

      Oh a good question Amber – I have just recycled old canldes so far!

      Reply
  26. Carrie @ Crafty Moms Share says

    May 9, 2012 at 8:04 pm

    What a wonderful idea!! Thank you for sharing it at my Mother’s Day Gift Idea link party!! Happy Mother’s Day!!

    Reply
  27. serra says

    August 9, 2012 at 12:38 pm

    I just tried this with my children. Maybe the cutter was a little too big and too thick (an anchor) we had difficulties taking it out of the cut and one part got broken 🙁 Should we maybe have some oil onto the inner parts of the cutter, would the candle come better in that way? Or any other suggestions? Thanks.

    Reply
    • Red Ted Art says

      August 9, 2012 at 1:06 pm

      That is a good question – I can imagine that an anchor has some “thin fragile” parts (more so than a car or star, if that makes sense). What I would try and do, giving the cookie cutter “more of a wiggle – gently pulling it away from your candle and back. Almost as if you are about to bend it off?? OR only use shapes, with less fragile extensions?

      Reply
      • Red Ted Art says

        August 9, 2012 at 1:07 pm

        (I am not sure that oil would make any difference)

        Reply
  28. Raylene says

    November 19, 2012 at 11:00 pm

    Awesome tutorial, I’ve been making and selling candles for quite some time and never thought to get creative with my cookie cutters! Here are some tips I’d like to share:

    – Do NOT use parowax, canning wax, etc. You must use actual candle wax (paraffin, soy, beeswax) or your candle will not light or hold its form.

    – Use a thermometer! A candy thermometer will do the trick. Your wax can and will burst into flames if it gets too hot, and you will not be able to gauge the temperature just by looking at the wax or watching the clock.

    – Using crayons to dye your candles is iffy. For experimenting, making ornamental candles or quick-use candles (for example, atop a birthday cake) it’s a thrifty, fun shortcut. However, making candles completely out of crayon wax, or using crayons to dye votive or larger candles does not usually work well. Your candle flame may sputter or die out quickly. Crayons contain *pigment* not *dye*, and you need dye to colour a candle properly. If you don’t want to invest in candle dye, you can also experiment by adding pieces of old, colored candles to your uncolored wax.

    Have fun. 🙂

    Reply
  29. Raylene says

    November 19, 2012 at 11:01 pm

    And to serra– Yes, a candle will come out of its mold easier if you have applied a thin coating of olive or vegetable oil first.

    Reply
  30. Lynn says

    December 16, 2012 at 5:35 am

    I read Raylene.s comment not to use canning wax or Parowax to make candles, but yet she said we should use paraffin wax. Thing is, canning wax and Parowax is paraffin wax. In fact, food grade paraffin. THese waxes sometimes even say right on the package to be used for canning or candle making.

    Reply
    • Red Ted Art says

      December 16, 2012 at 8:06 am

      Thank you Lynn, I guess we need to read the packaging and make a decision based on that!

      Reply
  31. eva says

    May 28, 2013 at 4:28 pm

    made a heart-shaped one today. wax took a little while to melt but it looks really great! i put the cookie cutter upside dow (on top there is a ridge) and nothing leaked!

    Reply

Trackbacks

  1. Crafts for Kids Blog » Tutorial: Cookie Cutter Candles says:
    May 7, 2013 at 1:42 pm

    […] Follow This Link to the Tutorial […]

    Reply
  2. BLOG, PIN AND LINK UP says:
    December 13, 2013 at 2:44 pm

    […] Instead of leaving my pins to rust and be forgotten I’ve decided to make something from the Cool Family Stuff board and I decided on  Maggy’s homemade candles. […]

    Reply
  3. 101 Mother’s Day Gift and Craft Ideas : Parenting Healthy Babies says:
    April 22, 2015 at 1:01 pm

    […] Star Shaped Candles: Here’s a craft to make star shaped fragrant candles that can be gifted to your mom on the occasion of Mothers Day. […]

    Reply

Leave a Reply Cancel reply

Your email address will not be published. Required fields are marked *

Recipe Rating


Welcome!

Welcome

Hello! I am Maggy and I love all things crafty and sharing my craft ideas and how tos.

The aim of this site is to provide easy, do-able and fun crafts for all ages.

Categories

Archives

Crafty Blogs

Copyright © 2022 · Website Design By Jumping Jax Designs