Red Ted Art - Make crafting with kids easy & fun

Cute & Easy Crafts for Kids

  • Home
  • START HERE
  • Preschool Crafts
  • Easy Crafts for Kids
  • Paper Crafts
  • Free Printables
  • About
  • Join Our Newsletter
  • Cookies, Privacy Policies & Disclosure

How to make seedling pots from Newspapers

February 11, 2022

Over the years we have made these easy newspaper seedling pots many a time. Whenever I run low on plant pots, newspapers come to the rescue. We love thrifty garden ideas (most are eco friendly too!!), and this is the best one yet! Let me show you how to make seedling pots from newspapers today!

Newspaper pots
We have been making seedling pots from newspaper since March 2010!!

To make Newspaper Seedling Pots you will need:

  • newspaper
  • a glass

If you are using a broadsheet, use a single newspaper sheet, if using a smaller newspaper, use a double sheet!

If you want different sizes, just used different glass diameters. I am sure you could make this using a tin too…

What is also fab about these, is that when your seedlings are ready to go in the ground, you can plant the whole pot as they “biodegrade”! Though I do still like to “Unwrap” the plans before planting in the ground.

How to make seedling pots from Newspapers

You can watch out easy to follow video tutorial or follow the step by step how to instructions below!

gardening with kids

Time needed:ย 3 minutes.

You will see that making these DIY Seedling Pots is super quick and easy. You can set up a production line and make lots in one go!

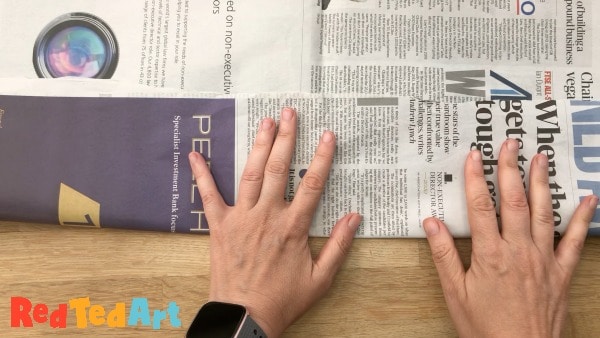
  1. Fold up one long side of the newspaper

    Take the long side of your newspaper and fold it up approximately 1/3 of the way.
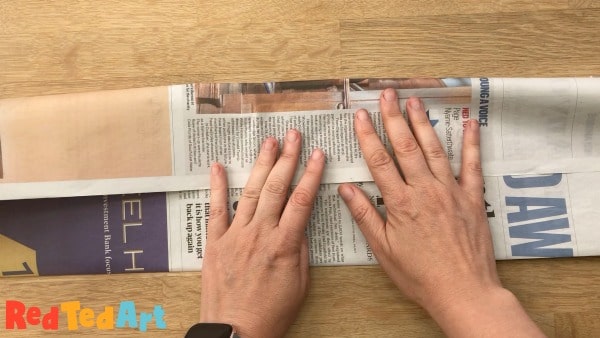
    Fold the newspaper

  2. Fold down the top

    Now take the other side and fold down, so they overlap a reasonable amount.
    Newspaper pots

  3. Position your glass

    Position your glass so that you have 2-3 cm sticking out over the top. The distance sticking out needs to be just a little bigger than the radius of the glass to avoid holes.

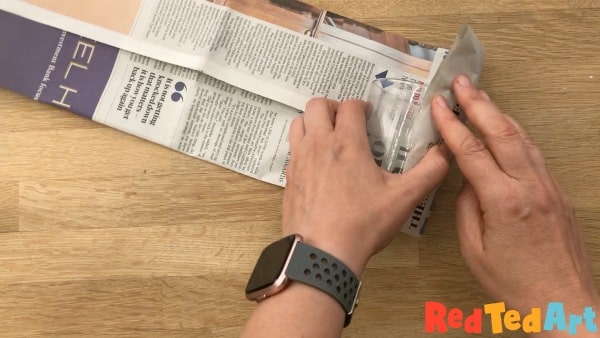
  4. Fold in the newspaper

    Roll up the glass in the paper.
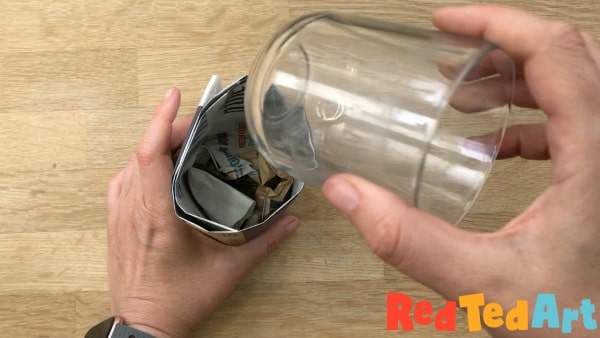
    Newspaper pots

  5. Ease out the glass

  6. Fold down the insides

    seedling pots

  7. Secure the insides/ bottom of the seedling pot

    Take your glass and push the bottom of the glass back in, this will help secure the bottom part of the seedling pot and push it into shape.
    Newspaper pots

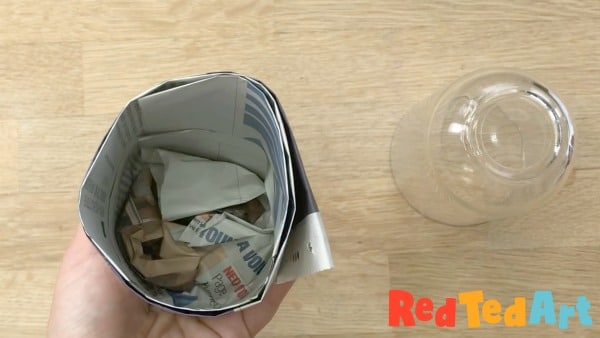
Your DIY seedling pots are now finished. Don’t worry if there are small holes of if the sides flap a little. They will work well once filled with earth and snuggly sitting together.

newspaper plant pot diy

Final thoughts on the seedling pots

Note: newspaper seedling pots are fabulous, thrifty and eco friendly, BUT I do find the dry out a little quicker than plastic plant pots, so do keep an eye on watering them.

Also: many people plant these straight into the ground – which is totally acceptable as the newspaper biodegrades overtime.. but I feel the plant does better when you free out the roots! So, personally I always remove the newspaper before planting.

Check out the rest of our thrifty gardening ideas here:

Upcycled garden ideas

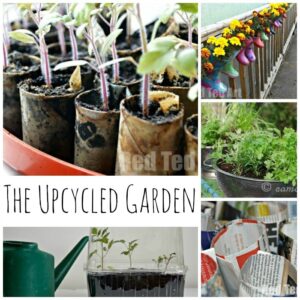
Plus lots of fun Garden Crafts here:

garden craft ideas

If you want a “laugh” you can see an ancient video of me making these on YouTube!

«
»

Filed Under: Gardening, Recycling, Spring, vlogs 25 Comments

Comments

  1. Ali at Green Baby says

    March 20, 2010 at 9:50 pm

    oh I like to see a Mummy with Green Fingers, is that little Pip under her baby gym in the background? sweetheart!
    Will show my mum your vlog, she’ll love it (and may pot some seedlings up for me too!)

    Nice one Red Ted Art ! x

    Reply
    • Red Ted Art says

      March 21, 2010 at 3:19 pm

      That is indeed Pip Squeak – you “first heard her” on “how to make funky party bags” and now she “debuts” on “seedling plant pots”. Glad your mum will enjoy!!! Maggy

      Reply
  2. Chris at Thinly Spread says

    February 25, 2011 at 8:01 am

    Ahhh! Lovely to see you! Fab vlog, BB thinks you are a lovely lady!

    Reply
  3. icklebabe_com says

    February 25, 2011 at 8:10 am

    Ahh such a fab idea (need to do some with milly, so will defo be making) and such a cute vlog! with ickle baby in the background… looks like domestic bliss in your house ๐Ÿ˜‰ adorable!

    Reply
  4. Red Ted Art says

    February 25, 2011 at 8:28 am

    Aah thanks icklebabe – was last year when Pip Squeak was only 4 mths old!
    And Chris – your BB is just too lovely ๐Ÿ˜‰

    Reply
  5. Red Ted Art says

    February 25, 2011 at 8:29 am

    PS EVERYONE: I got the Daily Mail for free… not our standard read. Hahahaha

    Reply
  6. Bev says

    February 25, 2011 at 9:14 am

    I was thinking about this yesterday and was all set to buy one of those contraption thingys so thanks for a great post!

    Reply
  7. Bev says

    February 25, 2011 at 9:17 am

    ps watched again and noticed cute bubba in background awww how well behaved! :o)

    Reply
  8. @simply_Hayley says

    February 25, 2011 at 9:56 am

    Those are really cool! May just have to give that a try!

    Came over from Diary of a first child ๐Ÿ˜‰

    Mwah xx

    Reply
  9. Luschka @ Diary of a First Child says

    February 25, 2011 at 10:42 am

    Those are fab Maggy! I’ll be bookmarking that, since my personal project this summer is to grow my own veggie garden!

    Reply
    • Red Ted Art says

      February 25, 2011 at 12:55 pm

      That is great Luschka – K will in enjoy it so much!!!

      Reply
  10. becky says

    February 25, 2011 at 9:50 pm

    Really cool maggie i will have a go this w/e thank you!

    Reply
  11. Inside the Wendy House says

    February 28, 2011 at 9:44 am

    Great idea for some green fingered crafts! My daughter would love doing this! (Visiting from Blog Gems!)xxx

    Reply
  12. SAHMlovingit says

    February 28, 2011 at 10:18 am

    Aw how fab! I wish I had green fingers…popped across from blog gems ๐Ÿ™‚

    Reply
  13. googiemomma says

    March 1, 2011 at 3:00 pm

    great tutorial! thanks so much for sharing! we’re getting ready to start our seedlings…and i think we try a different way of doing it EVERY YEAR!
    (bonus for me–as my dad is a newspaper pressman, i have access to unprinted news sheets–no ink whatsoever to worry about! whoot!)

    Reply
  14. Betsy says

    December 14, 2011 at 5:45 pm

    Newspapers contain \”mineral oils\” which technically are not edible, so if these are edible plants, I suggest finding something different to use as a planter. The colored inks are made from different oils, like linseed and also pose a risk if ingested. From what I can gather, they are recyclable but that doesn\’t neccessarily mean they will not harm the environment.

    Reply
    • Red Ted Art says

      December 14, 2011 at 5:50 pm

      Ah that is interesting to know! What about black and white plant newspapers?

      Reply
  15. Betsy says

    December 14, 2011 at 5:46 pm

    I meant to add, egg shells work great as eco-friendly planters.

    Reply
  16. Old Fashioned Mummy says

    March 15, 2012 at 11:46 am

    How eco friendly are loo rolls for the same thing? I’ve just used newspaper (wine bottles are good to wrap round, as are kids drinks bottles)and also used toilet rolls cut in half to make them shorter with a tiny square of newspaper pressed in the bottom.

    Reply

Trackbacks

  1. vlog vlog vlog away « Redtedart’s Blog says:
    March 22, 2010 at 3:45 pm

    […] Woodley Art « How to… make seedling pots! […]

    Reply
  2. Red Ted Art's Blog » Blog Archive » How To… Get Started on a Recycled Container Garden (Guest Post) says:
    March 11, 2011 at 8:44 am

    […] piece of paper to show me what is going where this year. I have seeds planted in loo rolls and newspaper tubes all over the house all ready and […]

    Reply
  3. Resource Centre – Week 8 | says:
    June 9, 2011 at 12:14 am

    […] posted was a great idea for working with children on such topics as Spring, Growing. It came from Maggie Woodley (@RedTedArt) and shows how to make seedling pots. Another had some ideas for assemblies. These were […]

    Reply
  4. Summer Crafts Roundup! | | says:
    June 1, 2012 at 12:16 pm

    […] redtedart.com via Rebecca on […]

    Reply
  5. Gardening & Writing with Kids | Life At The ZooLife At The Zoo says:
    February 19, 2013 at 4:20 pm

    […] Newspaper seedling potsย (check out our how to) with handwritten labels. […]

    Reply
  6. Gardening with kids – watching the seeds grow | Kids Chaos says:
    March 25, 2013 at 11:26 am

    […] So, you may have read my previous post about the lovely @soggywelly sending us some random seeds and beans? Well… look how they are shooting up! my Mother used to make these newspaper planters (and, having shot the video of lovely Maggy Red Ted Art demonstrating how to make them). […]

    Reply

Leave a Reply Cancel reply

Your email address will not be published. Required fields are marked *

Recipe Rating


Welcome!

Welcome

Hello! I am Maggy and I love all things crafty and sharing my craft ideas and how tos.

The aim of this site is to provide easy, do-able and fun crafts for all ages.

Categories

Archives

Crafty Blogs

Copyright © 2022 ยท Website Design By Jumping Jax Designs