
How to make tissue paper pom poms DIY
Learn how to mkae tissue paper pom poms! An easy DIY. This pom pom making technique is great for both giant tissue paper pom poms and smaller ones. They can be made without wire (we used a little twine)!
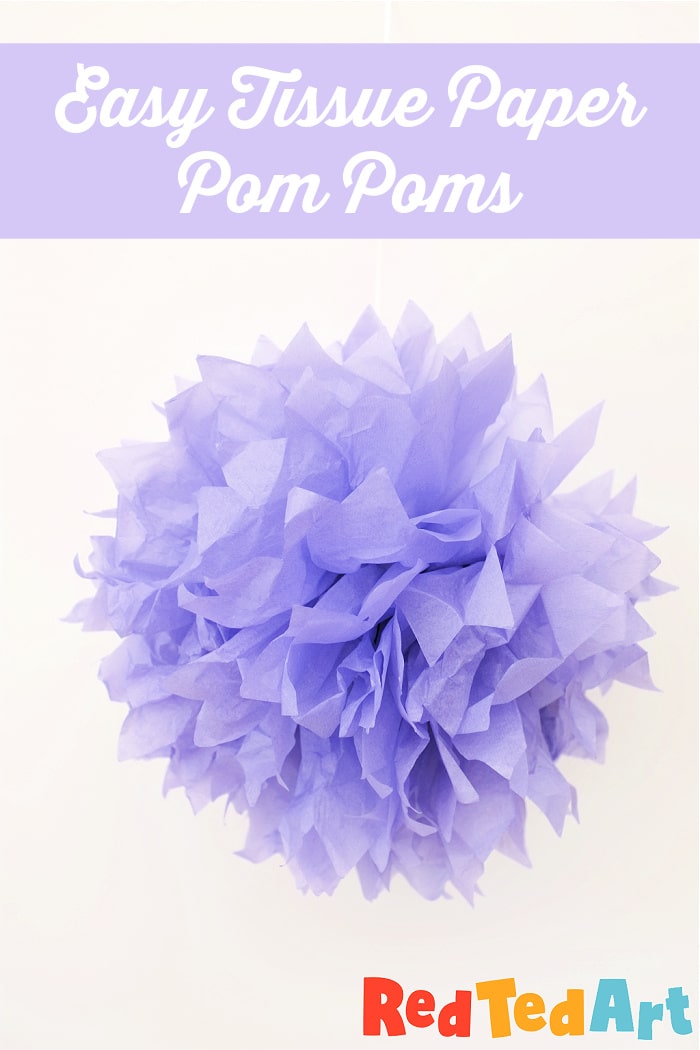
These Tissue Paper Poms are GREAT for decorating large spaces. They are particularly popular as Wedding pom pom decor, Baby Show or Prom pom pom decor. As you tissue paper comes in wonderful wedding colours or prom pastels. You can also go gold, silver, black and white for that sophisticated look!
At the beginning of the pom pom craft, you also need to shape your tissue paper a little. This shaping gives you pom pom a final look. Rounded ends, give you a more tissue paper pom pom look. Pointed ends, give it a little bit more of a spikey look – perfect for the giant pom pom spider we made using this technique!
These giant pom poms can be made by adults, teens or kids. They are super fun and easy!
Supplies needed to for pom pom making:
- one packet of tissue paper per giant pom pom – or make two large ones
- scissors for shaping
- twine, a little yarn or wire
- hanging twine or ribbon
You do not need pom-pom makers for this DIY!
Tissue Paper Pom Pom DIY – Video Tutorial
We have created both a tissue paper pom pom video tutorial but also have step by step photo instructions for you! Choose your preferred way of learning!
How to make Ginat Tissue Paper Pom Poms – Step by Step
We used 8 sheets of tissue per giant pom pom. But you can experiment with different numbers and sizes!
We are making one super large tissue paper pom pom. But you could cut the 8 sheets in half (across the width) and make two small pom poms!

Take all 8 tissues out of the packed. Unfold completely.
Now concertina fold all 8 sheets at the same time. Make the folds baout 1-2 inch (2-4cm) wide.
Make the creases as neat as possible.
Get some string or yarn and tie around the middle and secure with a small knot. It doesn’t have to be super tight.
Now get some scissors to shape the ends – you can either make curves or triangles. They will give you a different final shape!
Now fluff the tissue paper pom poms

Fan out one half.
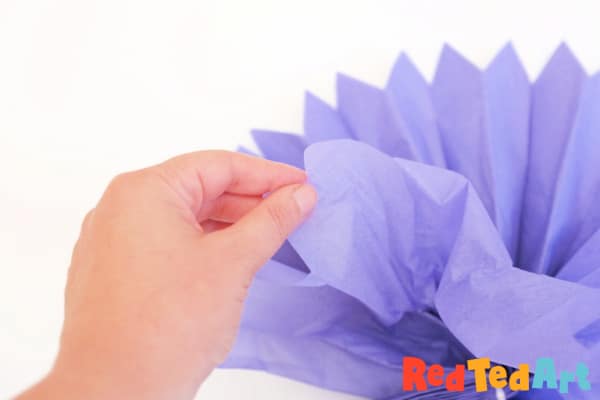
Start fluffing out the individual sheets of your tissue paper pom pom.

Alternate each side until all 8 sheets have been separated!

Once all 8 sheets have been “fluffed”. Turn the pom pom around and fan out the bottom half of the pom pom.
Then repeat the “fluffing process”.
Keep going round until you are finished and happy with the final look of your tissue paper pom pom!
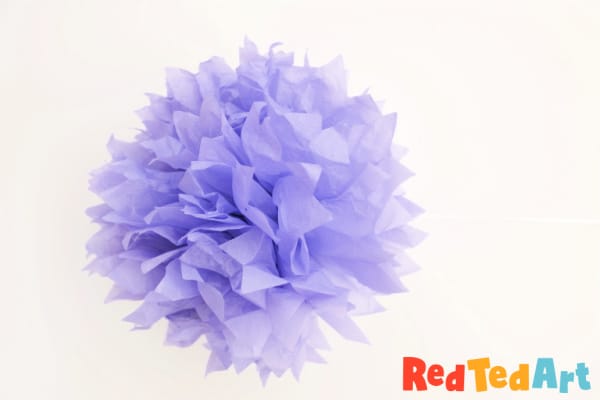
Tie a long piece of yarn around the centre piece piece and hang!
Now you have finished your first giant pom pom. Wasn’t this fun!?
As mentioned, these paper pom poms are great for decorating large spaces. They are perfect for wedding decor, baby showers, prom parties and more! We even turned out paper pom pom into a giant Halloween Spider! But you could also decorate as a Jack O’Lantern (using orange paper) or maybe a witch (using green paper). You imagination is the limit!
Why not check out these other Yarn Pom Pom crafts, for inspiration of what to turn your giant pom poms into:
