
Paper Plate Pig Mask Template
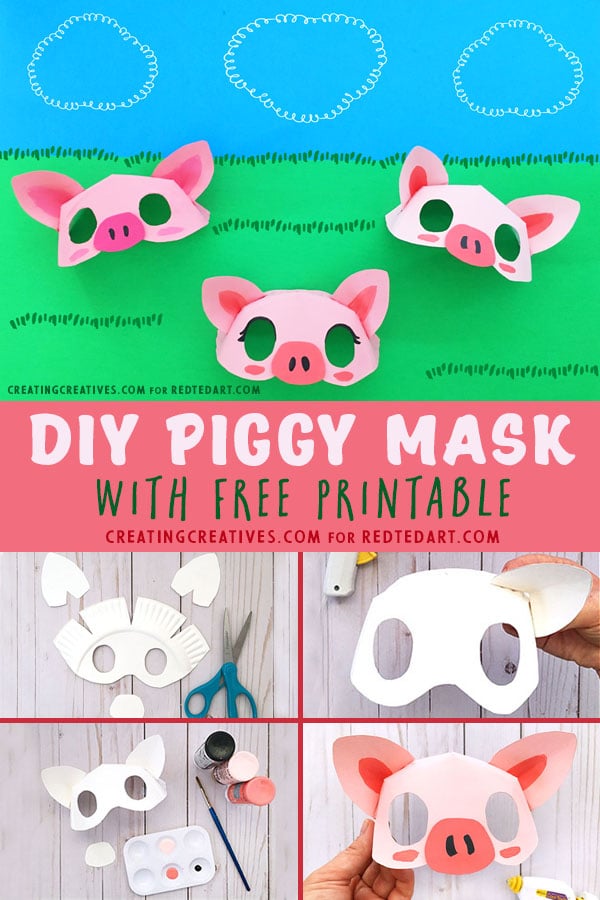
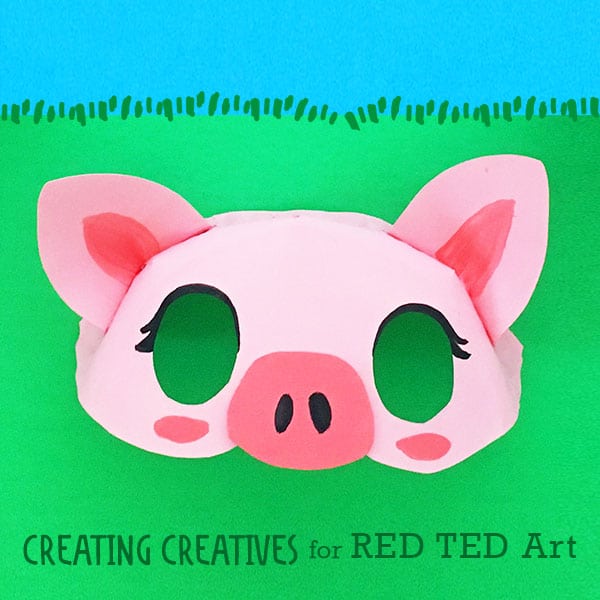
Oink Oink! It is DIY Pig Mask time!!!! If you love the 3 Little Pigs or are exploring Farm Yard Animals.. you will adore this great Paper Plate Pig Mask Template to make with your preschoolers (or older kids too!!). We love Pig Crafts for Kids and have another fantastic guest post from Creating Creatives for you today! Creating Creatives has a Paper Plate Mask for ANY occasion (do check them out – great Halloween Mask ideas for sure) and shares today, her Pig Mask Template with you!
These adorable Paper Plate Pigs join our fabulous collection of Paper Plate Crafts for Kids! Hope over and take a look!
More posts from our wonderful Contributor Creating Creatives!
Hey there Tedsters! We hope you like these cute piggy masks. One of our absolute favorite fairytales is The Three Little Pigs, so when Maggy asked for a Piggy Mask I was all kinds of down! I hope you enjoy them and be sure to tag me @creatingcreatives on Instagram if you make one, I’d love to see how it turns out!
Supplies needed to make a Paper Plate Pig Mask

- Pig Mask Template (free! Enter $0 at check out)
- Paper Plate
- Pencil
- Scissors
- Craft or X-Acto Knife
- Paint & Paintbrushes
- Glue Gun
- Hole Punch & elastic, string, or even pipe cleaners
Enter $0 at check out to get this free piggy mask template:

How to make a paper plate pig mask (with template)
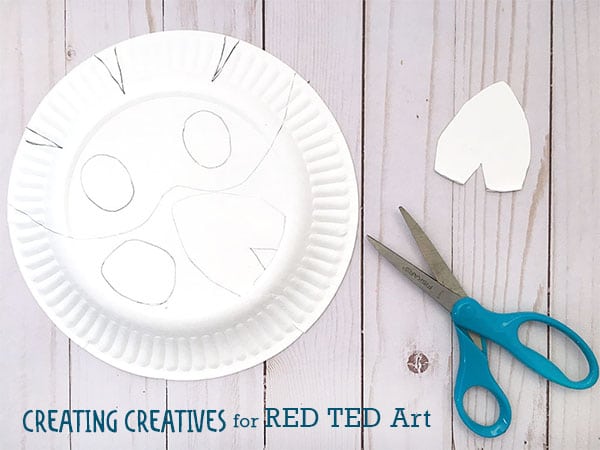
Cut out your pig mask shapes
Once you’ve printed and cut out the pig mask templates, trace them onto the back of a paper plate. Line up the face part of the mask with the edge of your paper plate to trace, and trace the ears and nose on the flat part.

Using a cutting mat cut out the eyes of the mask with a utility knife.
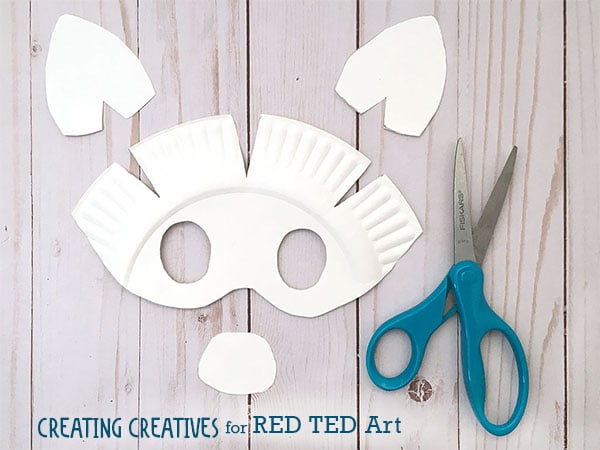
Your pieces should look like this.
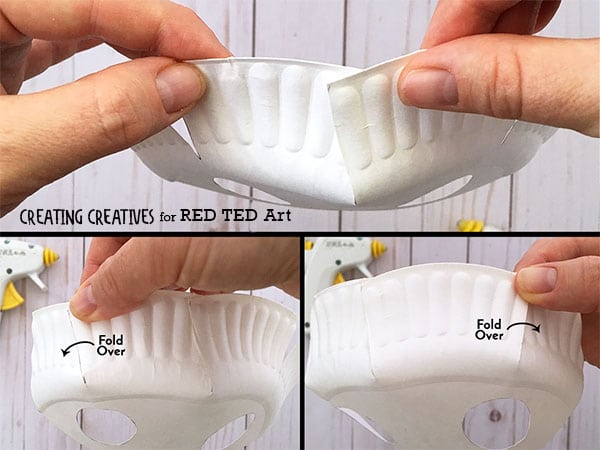
Shape the paper plate into a mask
Now to assemble your mask. Start with the center slit. Slightly overlap the right side over the left and hot glue together. For the left slit, fold the right side over the left and hot glue together. For the right side slit, take the left side and fold it over the right side and hot glue together.
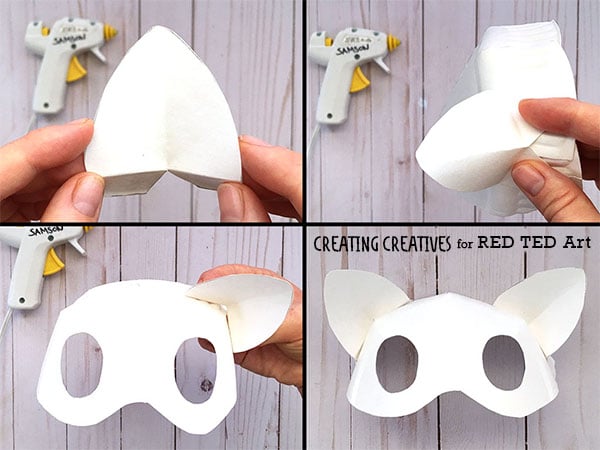
Attach the pig’s ears to the mask
Now to add the ears. Fold the ears back (use the template to see where to fold), then fold slightly together so they’re somewhat curved. Hot glue each ear onto the mask.
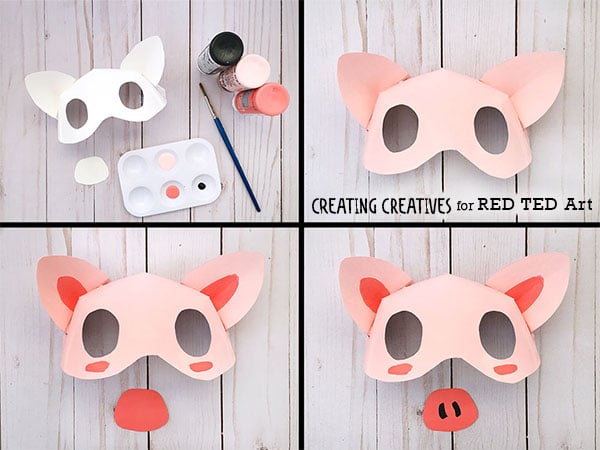
Paint your pig mask
It’s painting time! Paint the base of your mask 1 shade of pink, then the inside of the ears, cheeks and nose a different shade of pink. Finally paint 2 nostrils on the nose. You can also add eyelashes, or beauty marks, maybe even a ring around the eye. Whatever you want to do to add a little personality.
Attach the piggy nose
Hot glue the nose to your mask.

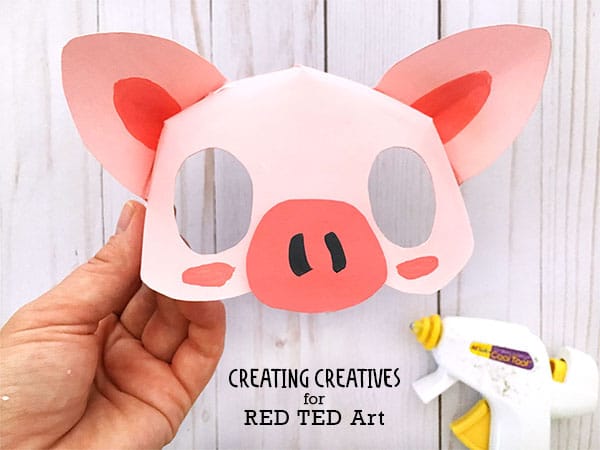
Attach the straps to your mask
Finally, punch a hole on either side of the mask and thread through some elastic, string, or even pipe cleaner. You’re done! Wear with pride and don’t let any big bad wolves into your house!
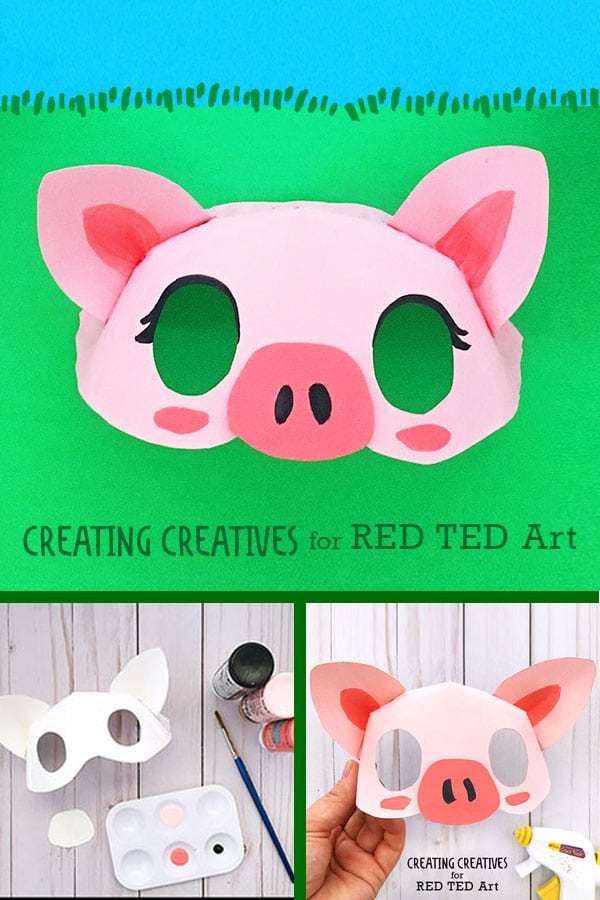
Aren’t these DIY Pig Masks simply adorable? Perfect for any Farm Yard Play Activities, fun with 3 little pigs or even for Chinese New Year and the Year of the pig!
There was never any doubt that Creating Creative was the QUEEN of Paper Plate Masks… sadly her website is currently in active, but if things change in the future, I will let you know!
More wonderful Paper Plate Crafts for Kids:
More DIY Pig Crafts for Kids (COMING SOON) Here:
