Perler Bead Picture Frame Heart for Valentines
Oh my, I am excited about today’s post by Creating Creatives! We haven’t shared a Perler Bead Craft idea in a while. And yet both my kids (10yrs and 12yrs) still adore them and were “Perler Beading” (or in our case Hama Beading) all Christmas! Today we have a super cute Perler Bead Picture Frame DIY. This is a fun way to make a fabluous DIY picture frame as a gift (for Mother’s Day or Valentine’s Day?) or just because. I think these Perler Bead Picture Frames, would also be great with a metal strip on the back – as fridge photo frames! So cute and colorful!

Today is a gorgeous Perler Bead Picture Frame Heart for Valentines. A perfect Kids Valentine’s Day Craft and gift idea – would also be fantastic for Mother’s Day!
More guest posts by Creating Creatives on Red Ted Art here.
How to make Perler Bead Picture Frames
Hello Tedsters! I’m so happy to be back for another 31 Days of Love (Red Ted Art’s LOVE-ly guest post series). This time we’re coming at you with a way to frame a memory, with one of our favorite crafting materials, Perler or Hama Beads!
We hope you enjoy these picture frames and if you decide to give it a go we’d love to see how they turn out so feel free to tag us on Instagram @creatingcreatives. Enjoy!
Hama Bead Picture Frames – Supplies
- Free Picture Frame Template here ($0 at check out, do not leave a tips – best place for tips is Buy Me a Coffee)
- A Perler / Hama pegboard (we used a square one)
- Perler / Hama Beads
- Parchment Paper
- An iron
- A picture (can be a photograph or a piece of artwork)
Grab this free heart perler bead picture frame by entering $0 at check out, do not leave a tips – best place for tips is Buy Me a Coffee!

How to make Perler Bead Picture Frames for Valentine’s Day or Mother’s Day
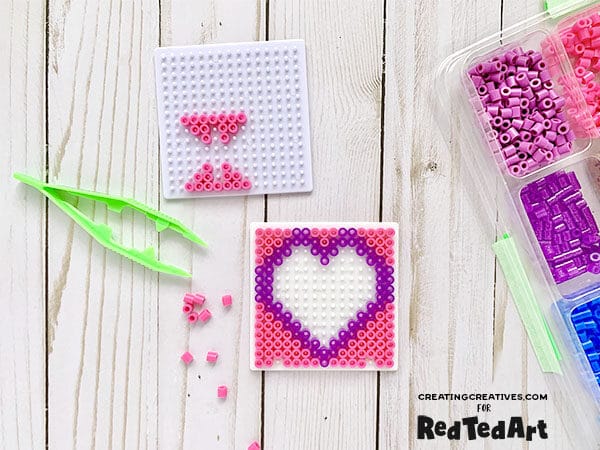
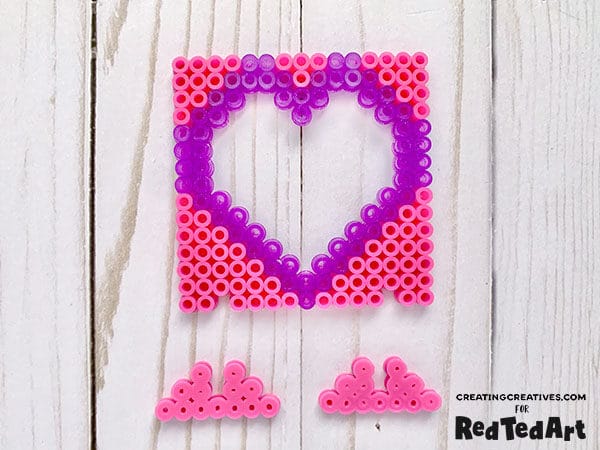
- Use the included FREE Perler Bead Picture Frame Template to create the design on your board with Perler beads. The heart pattern will be the picture frame and the other pattern is for the feet that your picture frame will sit in.
- An adult should help for the next 2 steps. Heat up your iron.
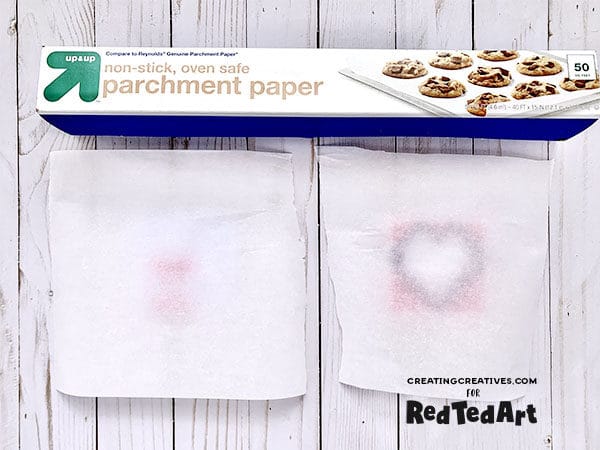
- While your iron is warming up rip a piece of parchment paper to cover your entire board.
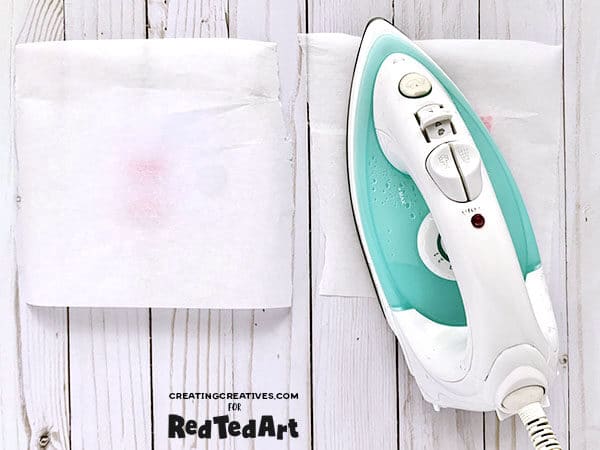
- Iron your
beaded pattern. Move your iron in a slow circular motion on top of the
parchment paper until all the beads have melted to touch each other. Do be
careful not to do it too much and melt your board.
- Allow your
beads to cool for a few minutes then take the parchment paper off. Some people
like to iron the other side of the pattern too. I only did this for the feet to
make them a bit sturdier. If your beads are curling up you may want to let it
rest under some heavy books for a couple minutes while it’s warm to flatten it.
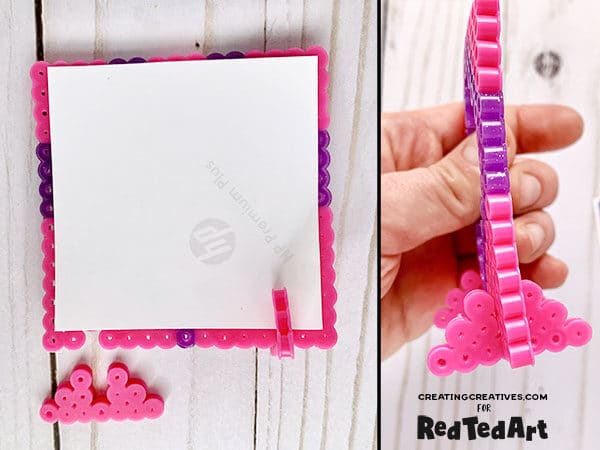
- Print or
color your picture. The actual picture frame is for a 2.5” x 2.5” picture, but
you’ll want to make sure your paper is a little bigger so it fits in the frame.
Put your picture behind the frame, hold it in place, and slot the legs on over
the picture.

- You’re done! Give to someone you love or display in your home!

Aren’t they the sweetest?

More wonderful Kids’ Valentine’s Day Crafts

See more of our Perler Bead Craft Ideas: