
Easy Kawaii Pumpkin Crochet Pattern
Sooo! Learning to crochet? Or love crocheting already and LOVE free crochet patterns? My daughter (12) is rapidly becoming the crochet QUEEN in our house and with that, has been putting together some cute and easy crochet patterns for us. Today’s pattern.. a super cute and easy crochet pumpkin!

I think these mini pumpkins are adorable throughout the Autumn months. Whether you are crocheting for Halloween (we popped one of ours into our DIY Ghost Pass the Parcel) or Thanksgiving (these would make lovely little decorations or gifts).. I think you simply HAVE To give this pumpkin crochet pattern a go.
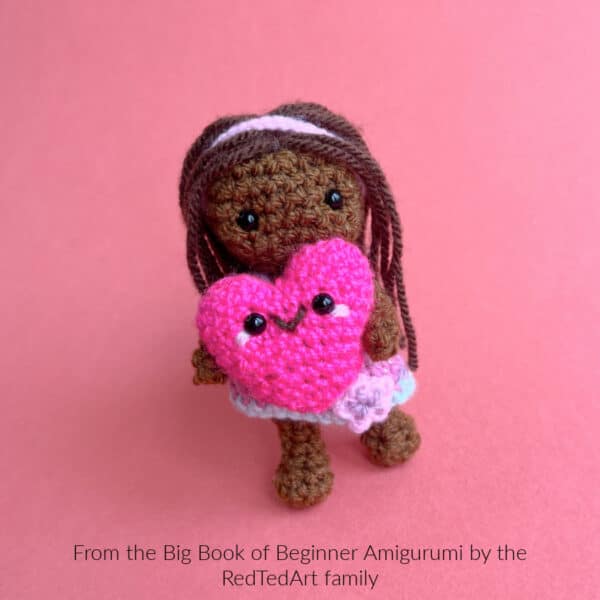
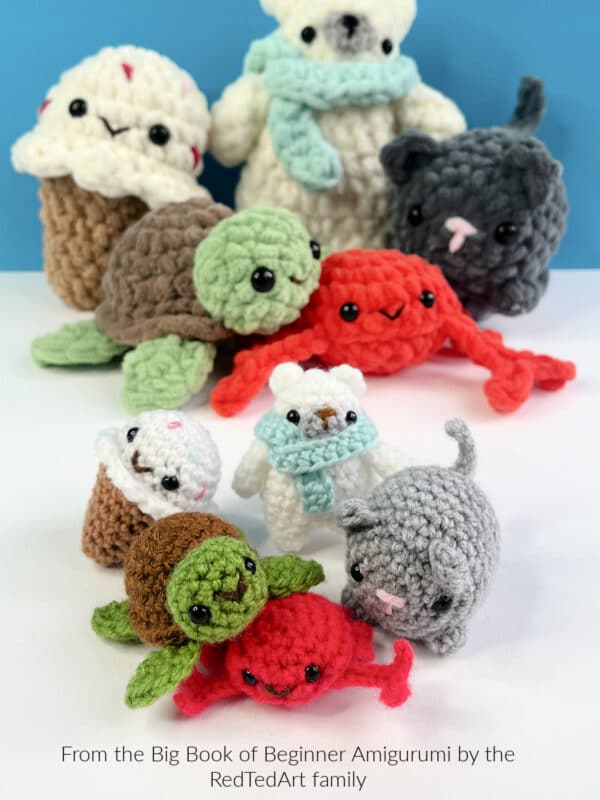
The Big Book of Beginner Amigurumi
Well, in case you have heard yet.. we do have a brand new crochet book out for you to check out – The Big Book of Beginner Amigurumi! It 60 super cute and relatively quick makes to make.. that you can scale up and down to make mini amigurumis (cute desk buddies, purse charms or keychains) or scale up to make lovely little plushies for Market Stalls or friends and family… one book. Endless possibilities… (read more about it here – or hop on over and just order it today!!!)

We love this little pumpkin so much, that OF COURSE (a version of this) had to go into our BRAND NEW crochet book.. not just because it is a cute and easy pumpkin crochet pattern.. but because it feels a bit like a “crochet classic” that most budding crocheters love to make. I think it is particularly cute as a keychain, but also looks so fun as an pumpkin plushie!
SO, if you love crochet, if you love Red Ted Art and if you want to support us, please do pop over and grab yourself a copy of our lovely amigurumi crochet book – out June 2026 in the US, and about 4-5 weeks later in the rest of the world. I hope you LOVE this book as much as we do. THANK YOU * THANK YOU * THANK YOU for all your support. Pre-orders are the bees knees and can make ALL the difference on launch day.

Now, with that out of the way… let’s learn how to crochet an amigrumi pumpkin project!
So want to learn how to make this easy kawaii pumpkin crochet? Read on!
Supplies needed for a mini crochet pumpkin

- Orange yarn
- Green yarn
- Optional: safety eyes or mini split pins, black yarn for mouth
- A little stuffing
- Needle
- Crochet hook (to correspond to your yarn)
NOTE: this pumpkin crochet pattern can be used with any wool/ yarn and different yarn thickness will result a differently sized pumpkin! If you are using chunky yarn – be mindful, that you will need a longer needle at the end to shape the pumpkin into pumpkin segments. In this instant “small” pumpkins using regular yarn or crochet cotton is best!
How to crochet a pumpkin
Easy Pumpkin Crochet Pattern
Crochet key for this free pattern:
Sc – single crochet
Mc – magic circle
Ch – chain
Inc – increase A
pprox Making time : 25 – 45 mins
Make the yarn pumpkin base
6sc in mc [6] 2.
Inc in every stitch [12]
(Sc, inc)* 6 times [18]
4 – 7. 18 sc (4 rounds) [18]
(Sc, decrease)* 6 times [12]
You can add the safety eyes at this point & then stuff the shape. You have to guess a little where these go! As the final pumpkin shape only emerges later! You can always sew on eyes instead or glue on some felt eyes!
(Decrease)* 6 times [6]
Leave long tail around 20 cm.

Ta-da you have yourself a little crochet ball!
Shaping the crochet pumpkin
Now it is time to shape the pumpkin! (The fabric pumpkin video on “auto play” shows you the same technique for shaping the pumpkin!)

Using the yarn, wrap it around the pumpkin, insert through the top and tighten.

Repeat 4 times:

So you now have four sections, giving the pumpkin a pumpkin – like shape.
See photos for better understanding.
Make the pumpkin stalk
Ch 5
Skip first stitch, 4 sc

Fasten off and sew stalk to the top of the pumpkin. Sew on a mouth.
You can see more of my daughter’s work on Craft Alotl instagram.
Check out my daughter’s adorable Penguin Crochet Ornament:

As well as ALL our free Crochet Patterns here:
