How to Make a Paper Heart Garland
We love Paper Crafts all year round, but especially for Valentine’s Crafting. Today we share this gorgeous “How to make a paper heart garland” tutorial!
This is a guest post by The Craft Train as part of the 31 Days of Love series!
This month has been simply amazing. With so many wonderful and different Valentine’s Day posts! We have had gorgeous Valentine’s Day Cards, Valentine’s Gifts and Valentine’s Day Treats. So many ideas to keep you all very busy!
How to make a paper heart garland
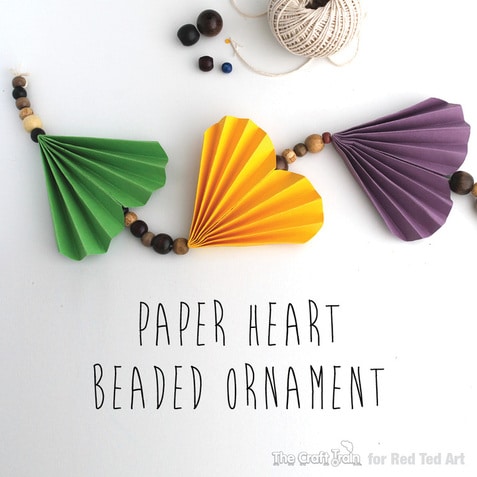
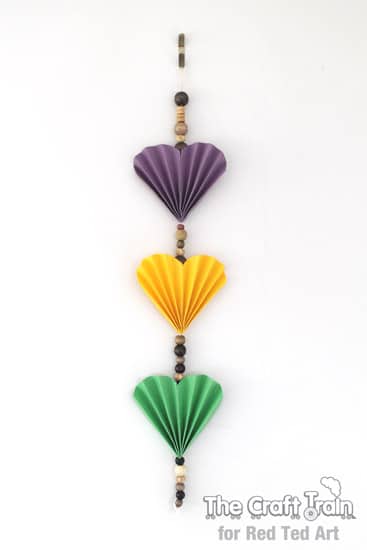
Here is a simple Paper Heart Beaded Garland or Ornament I made for Valentines day. You can make it in any coloured or patterned paper you like but personally I think it looks pretty good in rainbow. Small pre-school aged kids (like my own) will probably find folding the paper fan a bit too fiddly and will need help from mum with that part, but they can easily do the threading if you use beads with large holes and older kids should be able make this by themselves.
Paper Heart Garland – Materials
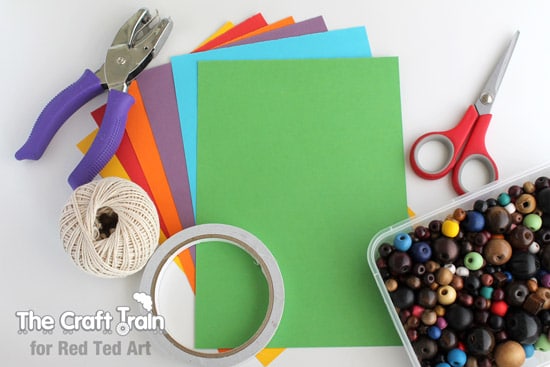
- Coloured construction paper A5 size (If you have standard A4 size just cut it in half)
- Scissors
- Double sided tape
- Beads with a wide hole for easy threading
- String
- A hole punch
How to make a paper heart garland – step by step
Begin by making your folded paper hearts
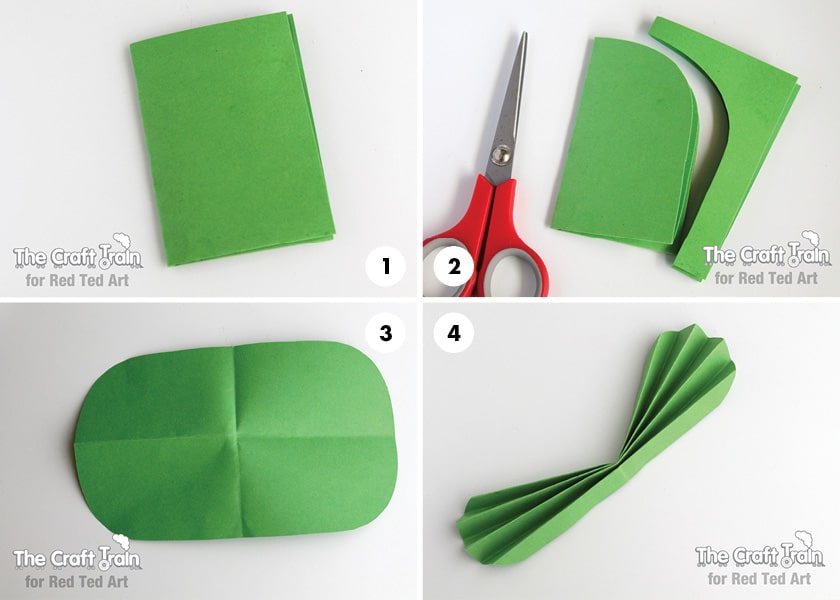
1. Fold an A5 sized piece of paper into quarters
2. Cut a rounded corner shape like you can see in the picture
3. Unfold
4. Fold in a concertina fan style length ways
How to connect the paper heart to your garland string
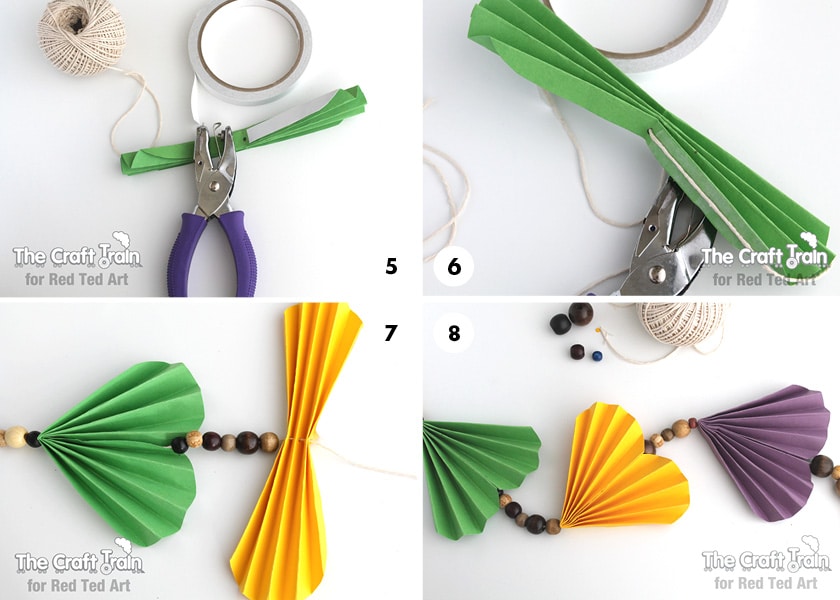
5. Punch a hole in the centre right in the middle of the fold and stick a piece of double sided tape on one half of the inside of the ‘fan’
6. To attach the heart to the string, thread it through the hole and stick the paper together with the string in the centre.
7. Thread wooden beads on the string. It’s best to thread one bead on and tie the string around it, then string a section of beads followed by a paper heart for as long as you want the ornament to be. It helps to wrap a piece of tape around the end of the string to stop it from fraying (like a shoelace end).
8. Once you’re done secure the top bead with a knot and tie a little loop so you can hang it up.
Ta-da!
Thank you to Red Ted Art for hosting this guest post. For more fun ideas like this visit my kids craft blog, The Craft Train. You can also find us on facebook, Pinterest and Instagram.
More lovely Paper Crafts, as well as Valentines Decorations here: