
Valentine’s Lightbulb Corner Bookmark Design
You can’t have a “series” without a Corner Bookmark Design, now can you? And as the 31 Days of Love series hurtles towards it’s end, not only do have a fantastic Valentine’s Day Bookmark for you.. but a STEAM Valentine’s Day Activity too! Over to the lovely Anne from Left Brain Craft Brain!

Hi! I’m so excited to be here hanging out with Maggy, the queen of corner bookmarks! I knew that when she invited me to join Red Ted Art’s 31 Days of Love, that I had to add a STEAM-y (science, technology, engineering, art, and mat) spin to one of these cool paper crafts. Because that’s what we do over on Left Brain Craft Brain. So I made a corner bookmark electric! You will love this easy to make Valentine’s Lightbulb Corner Bookmark. It uses something called paper circuits and if you can use a roll of tape, you can totally make this lightbulb shine.

What is a Paper Circuit?
A paper circuit uses something called conductive tape to replace wires that are normally in an electric circuit. In this bookmark, I’m using copper tape, a coin cell battery, and an LED that’s built into a sticker. This makes it super easy to create the circuit.
One safety note for this project… Please keep coin cell batteries away from small children. They are extremely hazardous if swallowed.
Light Up Lightbulb Corner Bookmark Supplies Needed

This card requires a few specialty items, but once you add light to your paper crafting, you totally love it!
- Card template (You can download it here by signing up for the Left Brain Craft Brain newsletter.)
- White cardstock
- White copy weight paper or red paper
- Printer
- Scissors
- Copper tape
- CR-2032 coin cell battery
- Sticker LEDs
- Clear Tape
- Glue stick or double-sided tape

How to Make a Light Up Lightbulb Corner Bookmark for Valentine’s Day
- First download the printable template and cut out along the outside of the lightbulb parts and the red square. If you don’t have a printer on hand, you can always use red paper to make the bookmark.
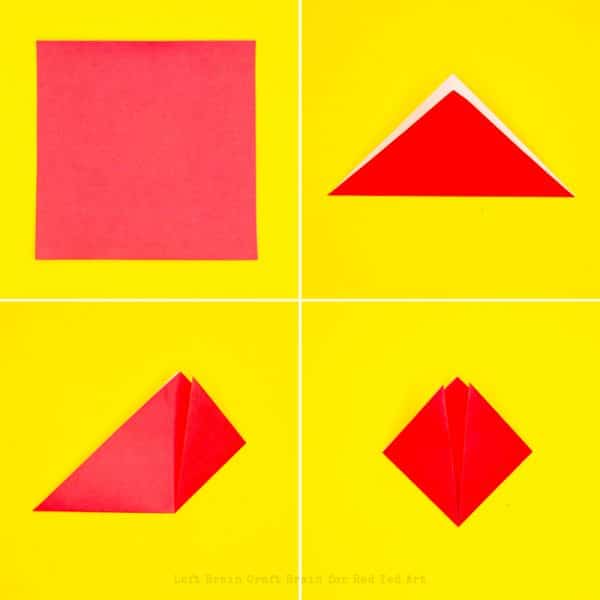
- Next you’re going to make a traditional origami corner bookmark for the base. You can grab the instructions for an Origami Bookmark on Red Ted Art’s super easy tutorial. Or follow the following step by step photo instructions!

How to Build the Lightbulb Circuit
Now it’s time to build your circuit. Grab the lightbulb that has the circuit lines on it, the copper tape, and the sticker LED.

- Place your sticker LED on top of the red heart with the small side facing the same direction as the point of the heart. Notice the + and – signs on the sticker, these are the postive and negative terminals of the LED.
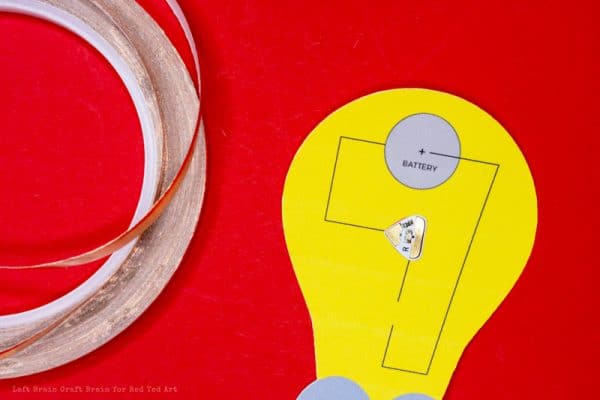
- Tape along the circuit line between the LED sticker and the grey battery circle with copper tape. Make sure there are no breaks in the tape.

- Place battery on top of grey circle, negative terminal side down. Copper tape from the positive side of the LED sticker to the top of the battery, leaving a gap where there is a gap in the circuit line on the card. Secure battery to the lightbulb card with clear tape.
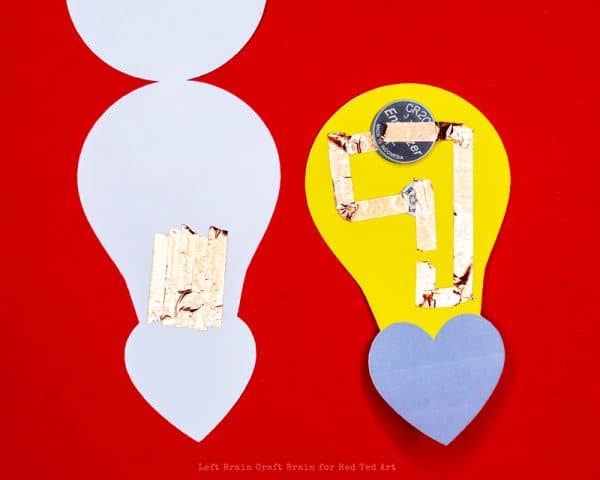
- Next, grab the double bulb part of the card and flip over. On the back of the side with the “You Light Up My Life” saying, place strips of copper tape as shown in the image below.
How to Assemble the Light Up Lightbulb Corner Bookmark
- Grab the double lightbulb piece and attach the circuit lightbulb to the inside of the bulb without the writing with a glue stick or double-sided tape.
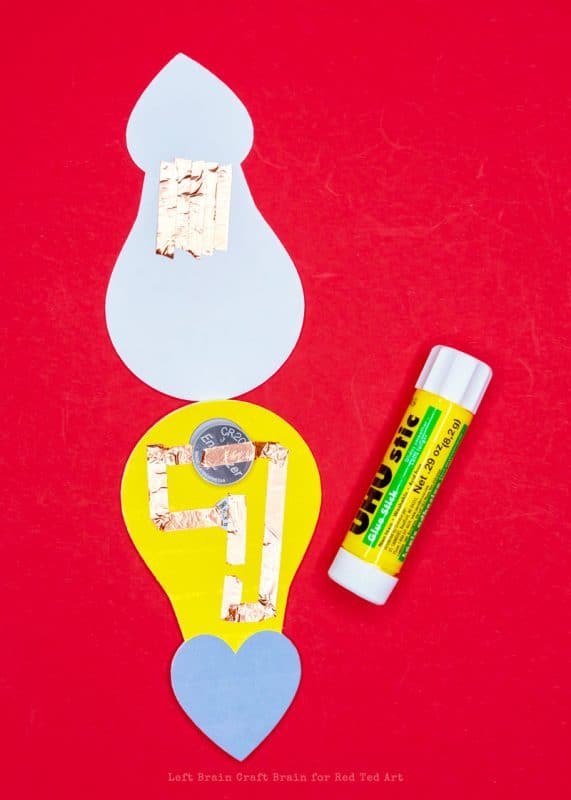
- Fold over the top lightbulb over the bottom two light bulbs and place some glue or tape in the grey heart area of the paper. Do not glue over the copper tape as this can weaken the circuit.
- Glue or tape completed light bulb to bookmark as shown below. And then light it up by pressing on the “You light up my life!” saying!


Troubleshooting Paper Circuits
Paper circuits can be a bit finicky, but that’s the fun of engineering projects! You learn the most from trial and error. Here are a few things to try when the lights just won’t shine:
- Try flipping the battery over.
- Is the battery still good? Test it on a bulb you know is good.
- Is the bulb still good? Test it on a battery you know is good.
- Is the copper tape a continuous piece for each connection? If not, make sure that there’s enough overlap between each piece. 1” of overlap is typically sufficient.
- Do you have enough current? If you’re building a circuit with more than one bulb, you may need another battery.
- Is the battery securely attached to the circuit? Tape with clear tape if necessary.
More Paper Circuits!
I whipped up another light-up corner bookmark that’s out of this world. You can grab the Light-Up Rocket tutorial HERE on Left Brain Craft Brain.
If you love paper crafting and want to add a new challenge to your cards, this ebook will introduce you to the world of paper circuits.
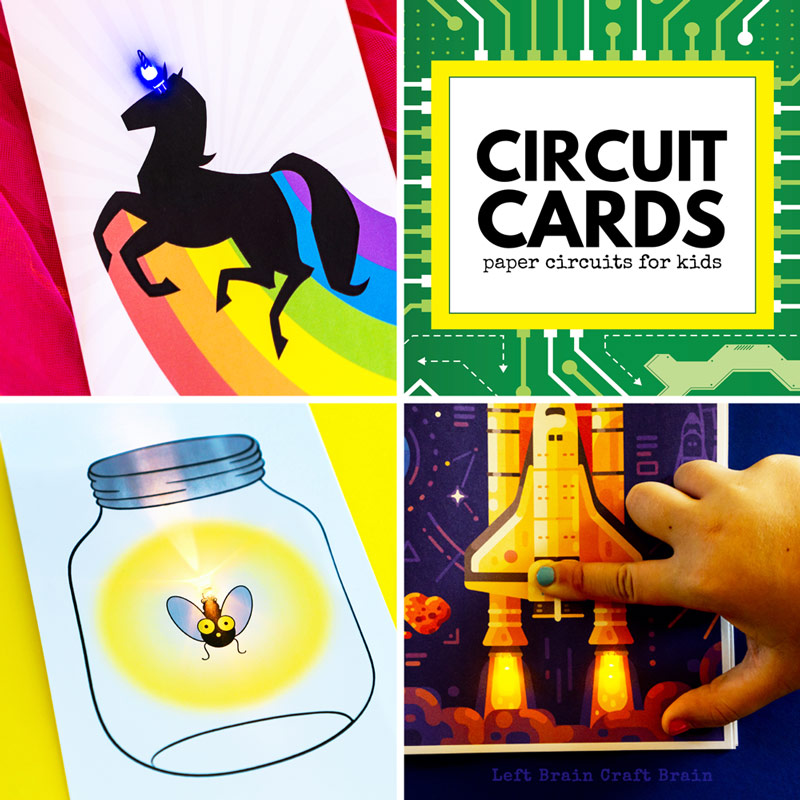
The Circuit Cards Paper Circuits for Kids Ebook contains 10+ printable and buildable paper circuits cards for holidays, special occasions, and year-round fun. Each card contains a printable template and circuit diagram, plus easy to follow instructions for paper circuits success.
Kids will love making a glowing unicorn horn, light-up cupcake cards for their friends’ birthdays, or Star Wars themed cards, too. After working through some of the basics of how to build a circuit with a handy circuit lesson plan, they’ll love crafting their own ideas, too.

