
How to… make a Fabric Mâché Bowl!
We all know (and, erm, love?) paper mâché – all that lovely gooey newspaper creating weird and wonderful new things! Using fabric to make a bowl instead of newspaper! What an ingenious way of using up old bits of fabric! Learn how to make Fabric Mache Bowls today! A great way to recycle fabric.

So, I quickly gave it a go and made a little bowl out of some old jeans (scroll down). I am happy with the result, but it doesn’t have quite the same oooh factor as when you use “softer” fabric. So I had another go.
Remember, my no sew bunting? Out came, literally, the scraps from that project. They were only really enough for one layer of the bowl. So what do I do? Use some “new fabric” and cut it up? Kind of defeats the purpose! I then remembered that in my scrap bag, I have an old pillow case. So I decided to make the inside of my bowl white and the outside “colourful”. I decided that look a bit plain, compared to the outside, so decorated the inside too. So.
Materials need to make a fabric mache bowl

- Strips of fabric,
- PVA glue/ white glue/ mod podge (the better the quality of glue, the better the results),
- scissors,
- clingflim and
- a bowl,
- an old plate to work on
How to make a Fabric Mache Bowl
Time needed: 20 minutes
This fabric mache bowl is quick and easy to make. But you do need to allow for drying times!
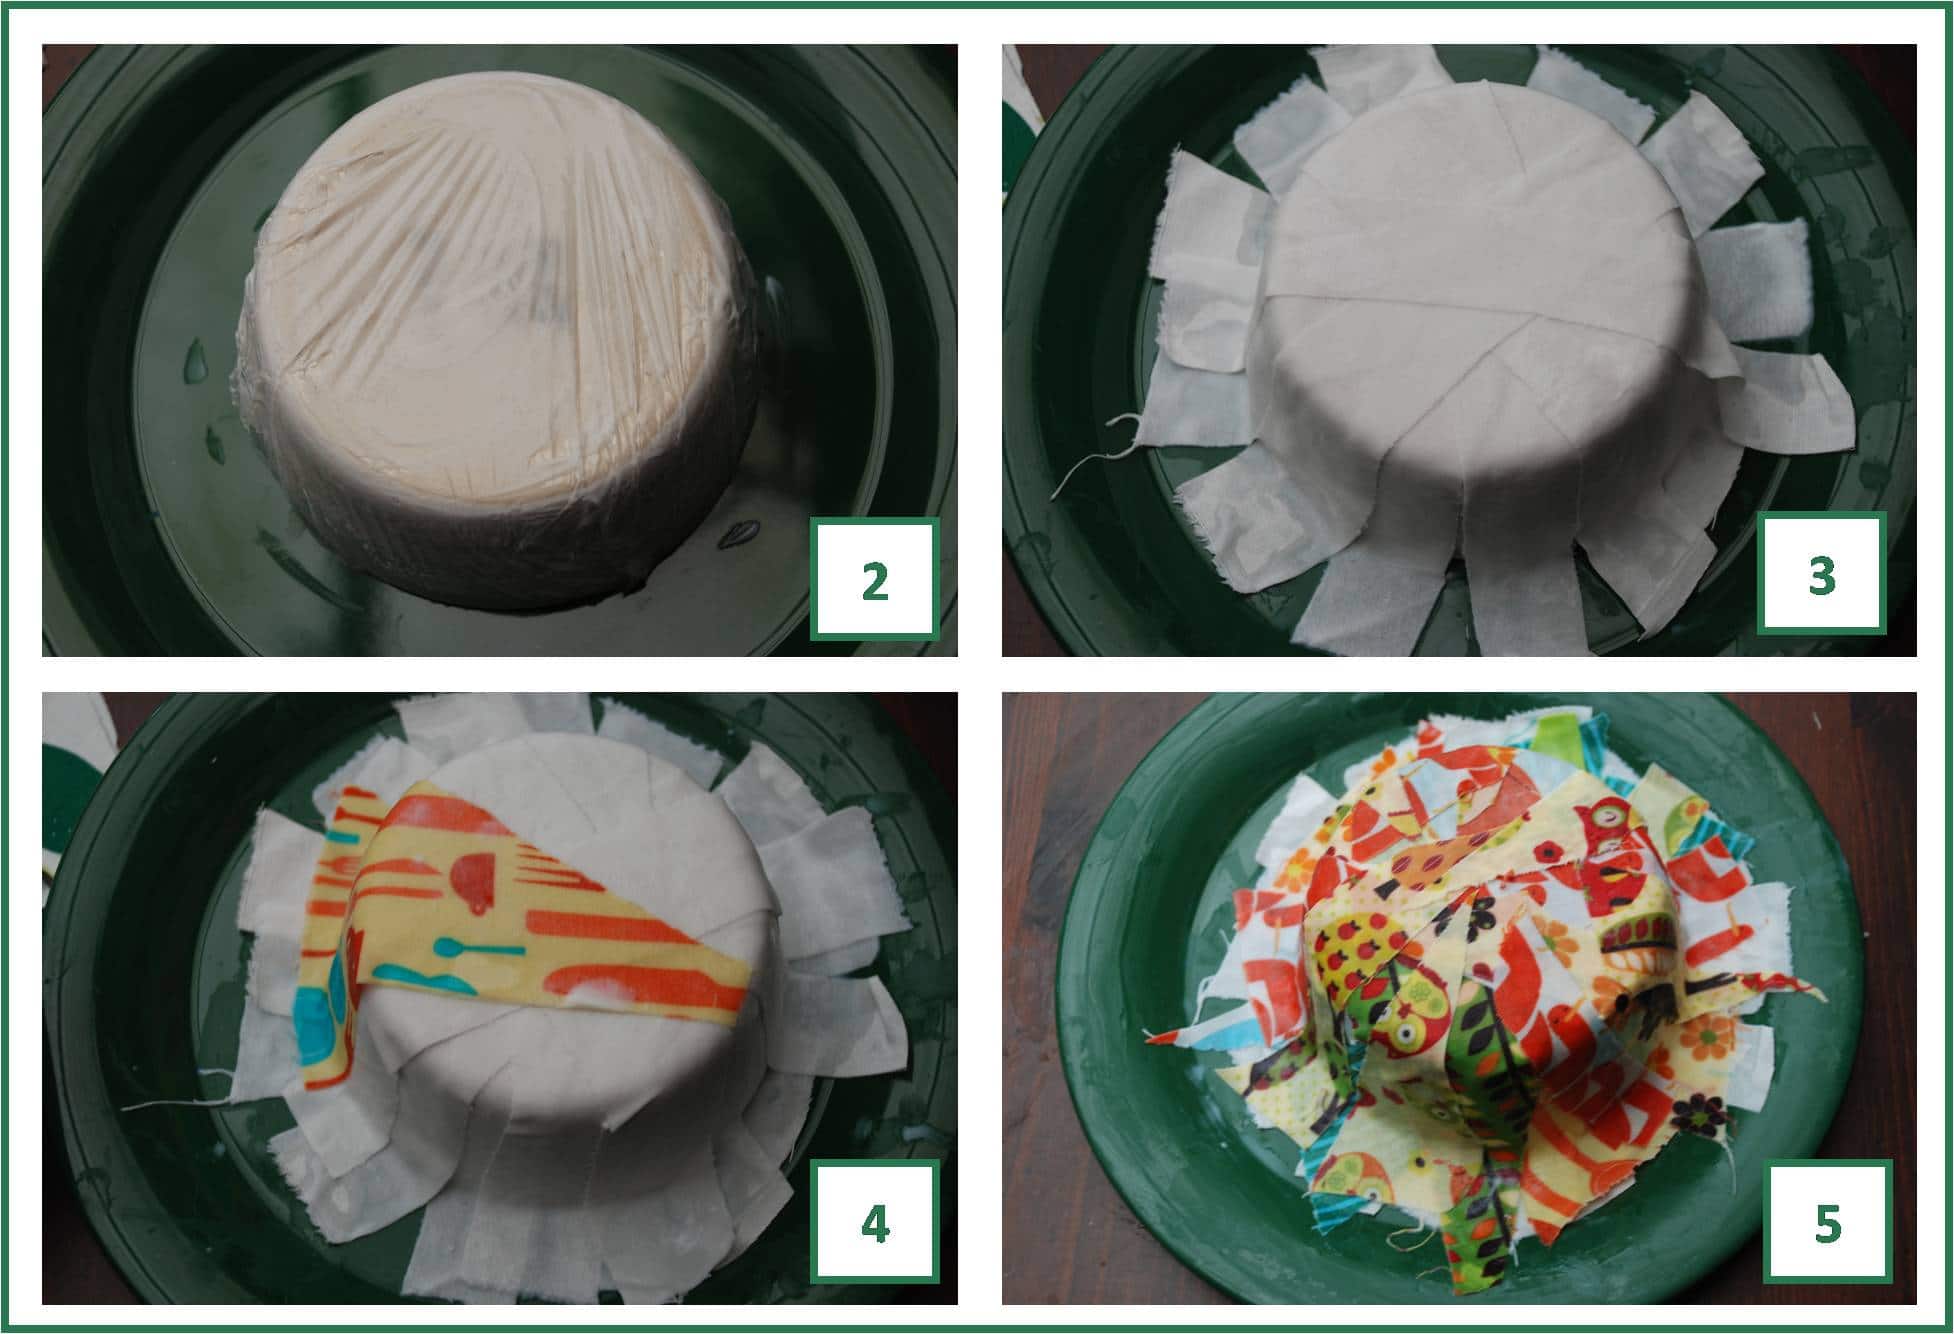
- Prepare you bowl
Cover bowl in clingfilm (else you work will stick to it). Cover clingfilm with watered down glue (not too watered down).
- Start layering your fabric
Layer with “soggy” fabric – as I chose white fabric, it doesn’t matter which way up you do it. However if you have patterned fabric, make sure the patter is face down. Make sure you cover the whole bowl at least once.
- Reverse the fabric sides
Add outside layer. This time make sure the pattern looks up. A total of 3 layers (of facing down and up fabric) should be enough!
- Let dry
Let your fabric bowl dry fully. It may take a day or two! If it is sunny outside it will dry quickly!
(the numbers below are out of scync!)
- Trim the edges of your fabric bowl
Ease out off bowl (the cling film should help, ease the clingfilm off the bowl and then remove it from the fabric bowl) and trim edges if you wish (they can look quite pretty if you leave it “rough”).
- Add details to your fabric bowl if you wish
As my “white” was very “white” I decided to decorate the inside and cut out some patterns from my fabric remains. On the denim bowl, I decided to add a ribbon, I had to use clothe pegs to help keep it in place (keep re-adjusting clothe pegs, so that they don’t stick to the final bowl!!!).
- Glue in the details
Use some more PVC glue to glue the shapes in – cover both sides of the shapes to get a nice smooth and flat finished. Let dry and finished!


I am pretty certain that you can make ANYTHING out of fabric the way you can with paper mâché. Let your imagination be the limit!

With the denim one, I am sure, I used a little more glue and the finish is a little more “rough and ready”. But still a great way to recycle and old pair of jeans!!
More fun with Fabric Scraps here:
