How to make a Pirate Ship from cardboard – easy craft!
Welcome back to this week’s How To – where I made a Cardboard DIY Pirate Ship / Pirate Boat for the children! We do adore a little Pirate Craft here or there (a great addition to our special Crafts for Boys collection)!!! Red Ted was given a fabulous pirate ship with fabulous pirates for his . He wouldn’t let Pip Squeak play (as kids sometimes do, especially with new toy).
Let’s make a pirate boat!
So I bought her some pirates (thinking the pirates were the problem). He then said “Mummy, can you make Pip Squeak a pirate ship too?”. This was about 4 weeks ago.. and *finally* I found the time during the Easter holidays to Get Crafty for the kids. And this is our DIY Pirate Ship How To! Hope you like it!
I love this Pirate Ship sent to us by Facebook Reader Andrea C ! Thank you for sharing your photo with us!
Use our easy peasy guide to how to make paper mache from flour – inexpensive, environmentally friendly and quick!
Move those Legos aside.. time to get crafty!
DIY Pirate Ship How To – Supplies needed in this tutorial:
- Cardboard (I used a mid sized delivery box),
- masking tape,
- newspaper & paper mache paste (here is an easy homemade paper mache recipe),
- scissors,
- paint,
- glue,
- 2 sticks (for masts),
- odds of fabric (I used some old suit fabric from The Englishman and white felt),
- varnish
Some of the materials are optional – e.g. you could use acrylic paints in which case you wouldn’t need varnish.. similarly you don’t HAVE to add a layer of paper mache, but I think it adds stability! See what you can find at home and amend our DIY Pirate Ship How to, to suite what you have at home!

For those who have asked.. we have these fantastic Pirate Toys – that my kids still enjoy playing with over 6 years later. They are a bit pricey, but I would say a fantastic COLLECTORS item.. and ahem, we have quite few now. They are called “arty toy” and are made by djeco!
How to make a Pirate Ship from Cardboard – step by step tutorial
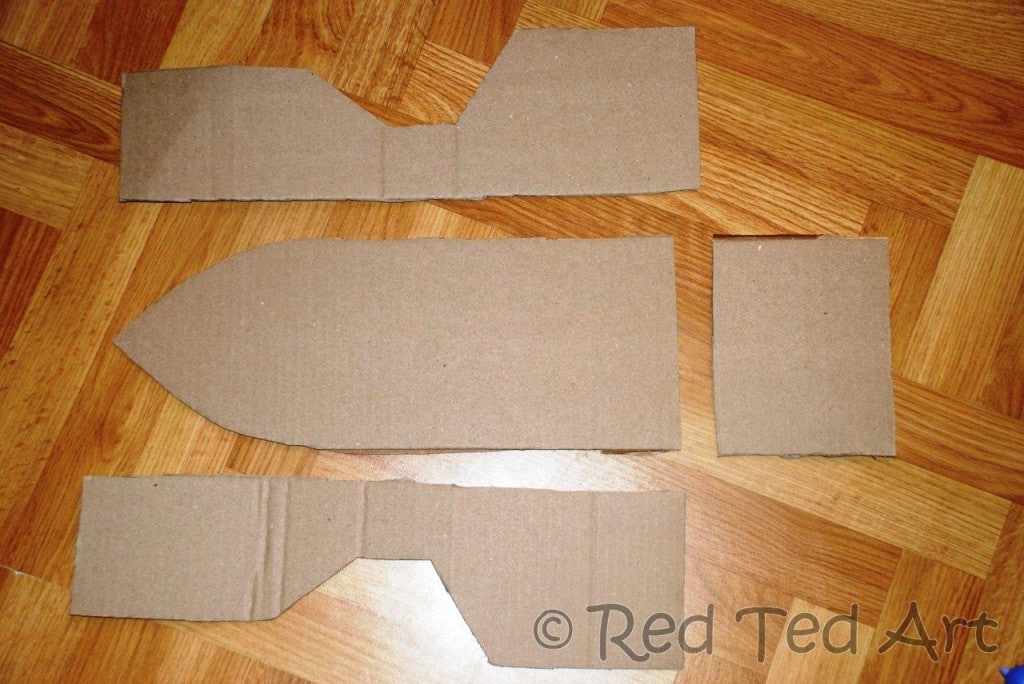

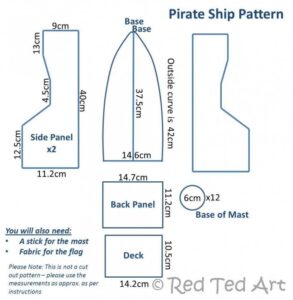
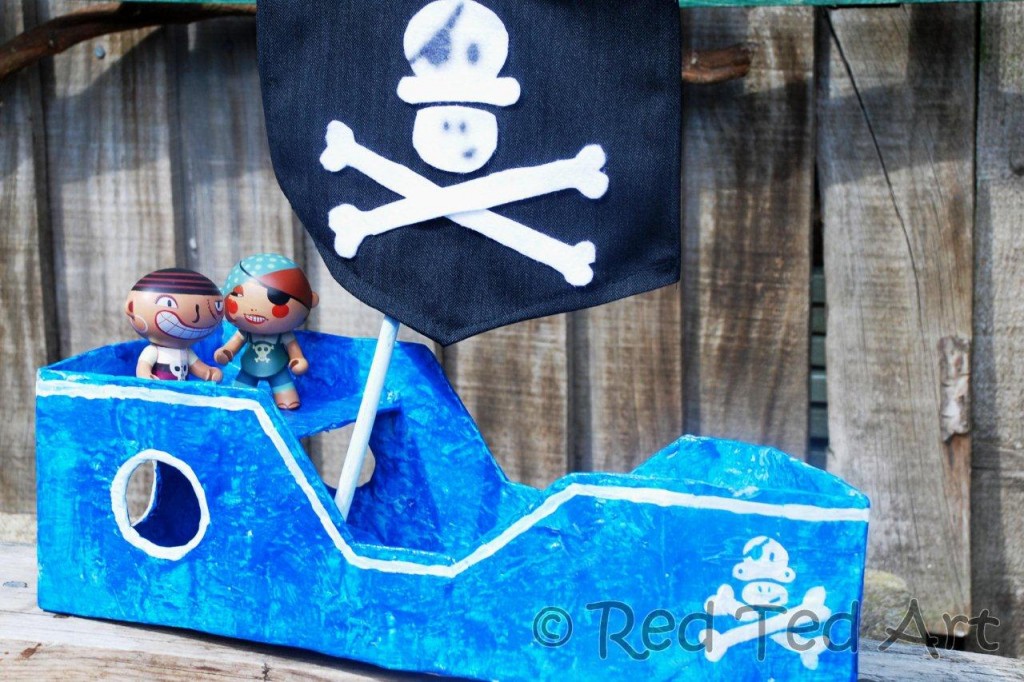
1) Cut out your basic pirate ship shape. We had 5 parts: the bottom, the two sides, the back and a deck. I have included the dimension in a rough sketch for you. Really – they are just approximations. Best to cut your two side panels and the back, tape it all together and then to cut your base and desk to fit your boat. I kept trimming off a little for a good fit! I based our ship on Red Ted’s Toy.
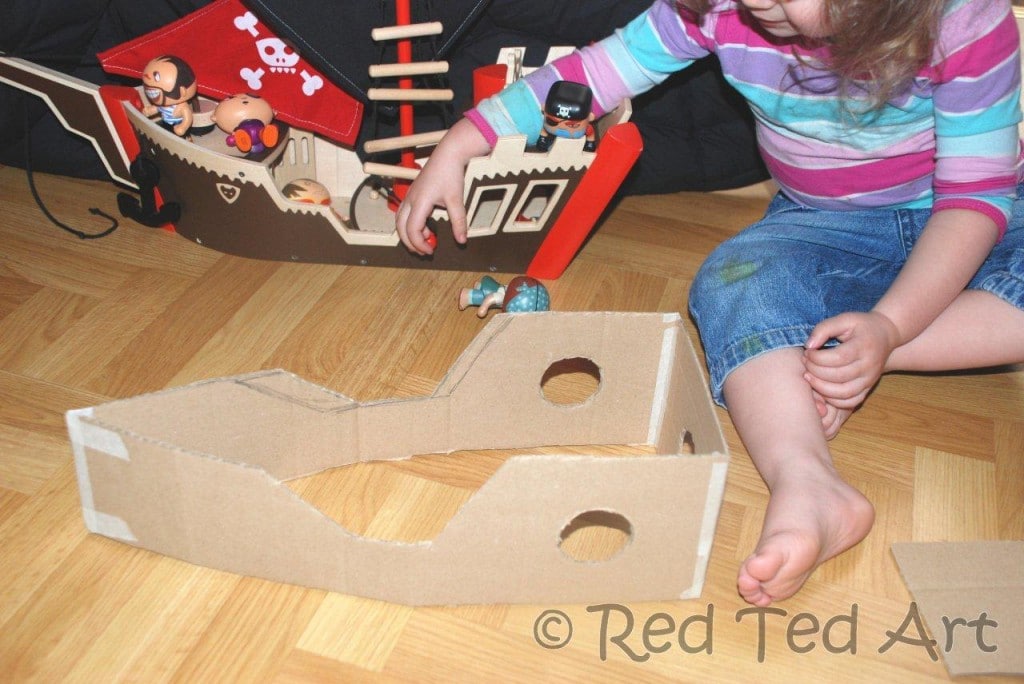
2) Cut port holes into your sides and back of your DIY Pirate Ship. I used some nail scissors (that I have especially for crafting) – as they have a nice round curve. Tape your sides and back together.
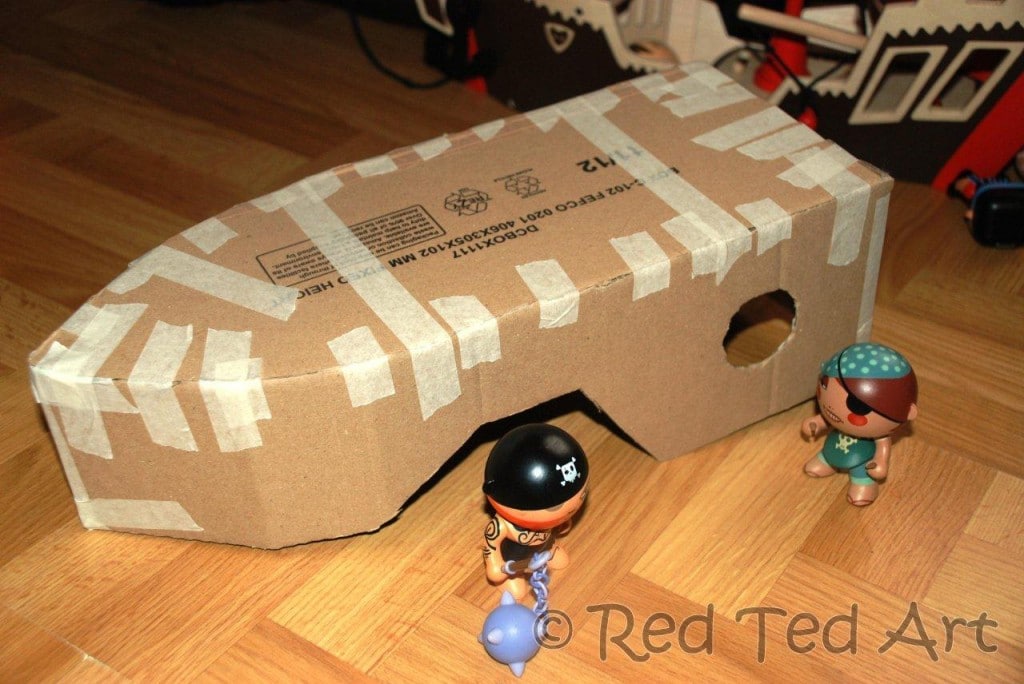
3) Having trimmed your bottom and deck, tape these in too. The deck is quite fragile and is the part that probably benefits the most from the paper mache.
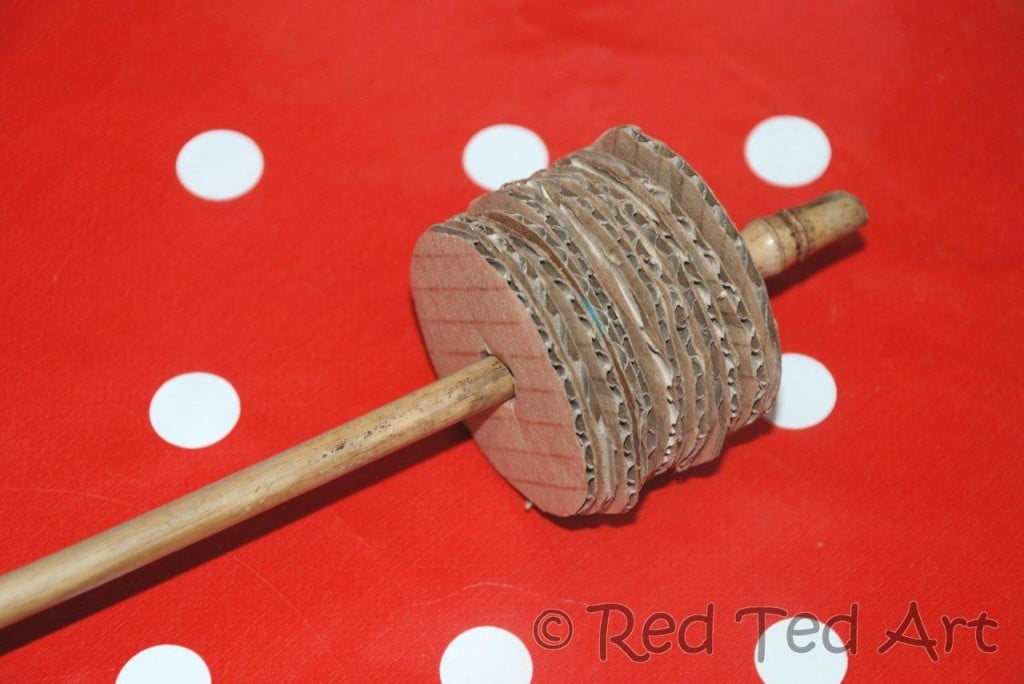

4) Cut out 12 cardboard discs – poke a hole through them. Make sure the stick fits snuggly. Then glue all the discs together with strong (!) glue and finally glue in place on the boat. Add masking tape to secure it (picture doesn’t show the tape, sorry!).
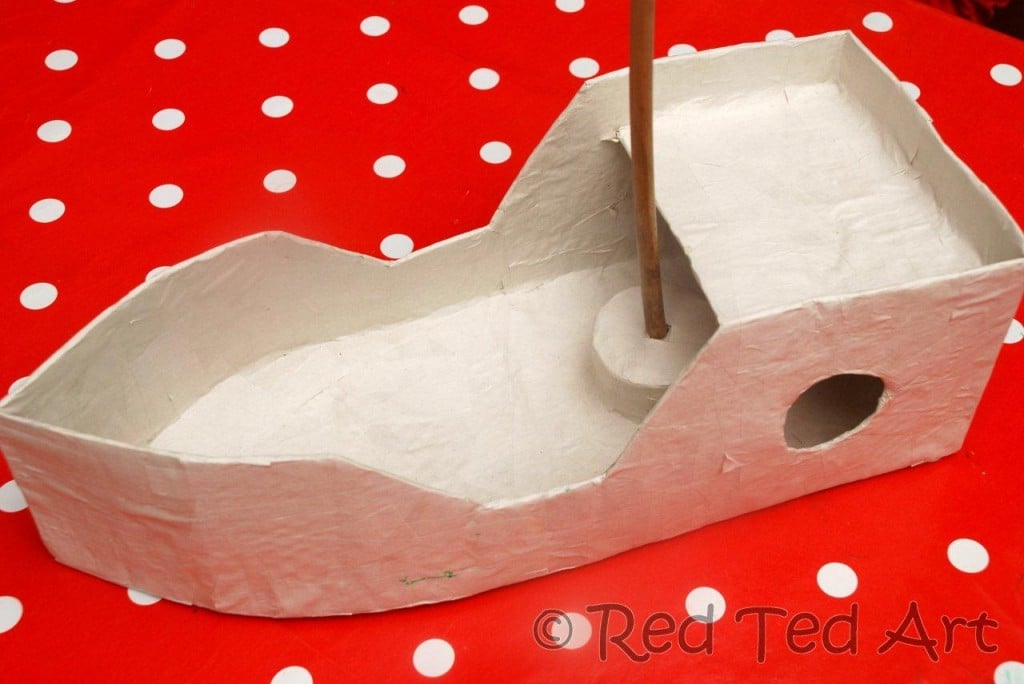
5) Now to paper mache! We happened to have lots of white “packing paper” lying around, so I decided to use that. Of course ordinary newspaper is fine too. Check our easy and low cost paper mache recipe. Cut your paper in lots of small-ish strips. Start adding layers of mache – especially over the “joints”. Secure all the masking tape – try to give extra hold to the deck. Yes it is fiddly, but if you can get a few layers of paper “under the deck” propping it up, then that will give it extra strength.
I like to layer my paper in different directions – you know how when you tear newspaper it one direction it tears really is easily, but not in the other? Well, I believe that if you criss cross your paper layers when paper maching, you get a stronger final construction. I do this particularly in areas of “stress and weakness” – e.g. I layered extra round the circular discs.

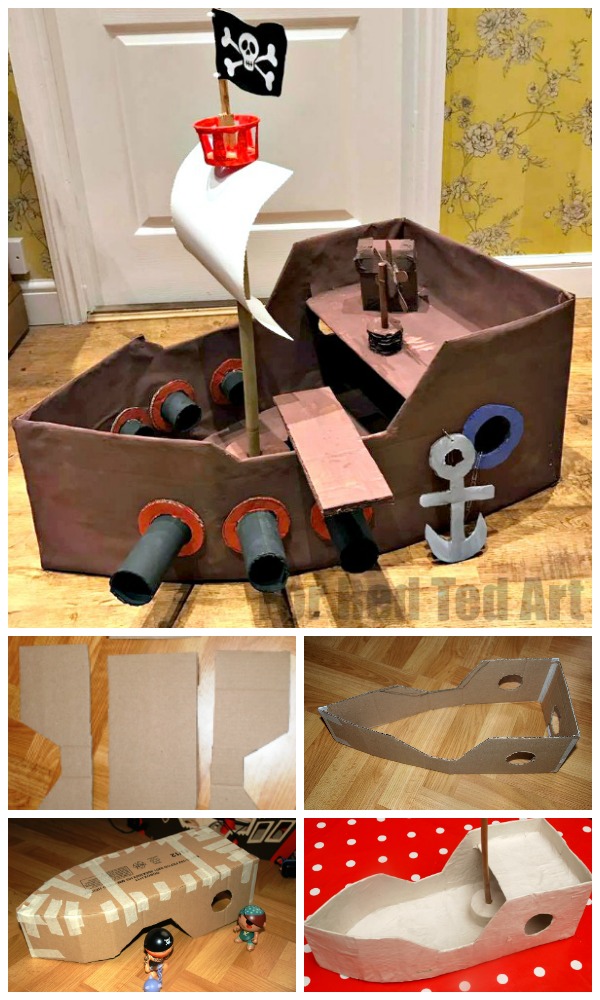
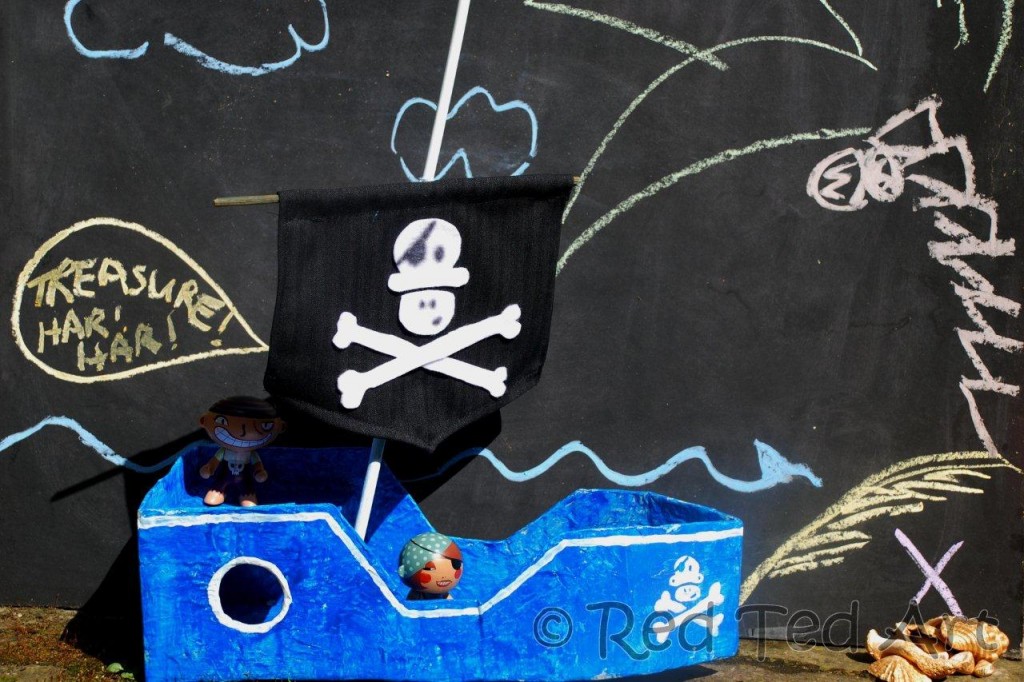
6) Let dry. Then paint. The children chose blue!


7) Let dry again and add detail – I painted on some skull and cross bones and anchors. I first drew some on paper, cut them out and traced them on with pencil.
8) Let dry and varnish (I used Mod Podge, but any varnish will do)

9) Make a sail: I used a rectangular ish piece of black suit fabric. Sewed the edges. Across the top, I left the seam “wider” so I could insert a stick. Near the middle I snipped the fabric, threaded through some string and with that tied the sail to the mast! For the skull and cross bone I stuck on some white felt.
Done. Enjoy! I am sure that with time, I will add a ladder and crows nest. But for now, we are done! Hope you have making your own pirate ship!! Remember, that the paper mache is “optional”… all about the longevity of your craft! We want to keep ours for a long long time!
Play. Play. Play.
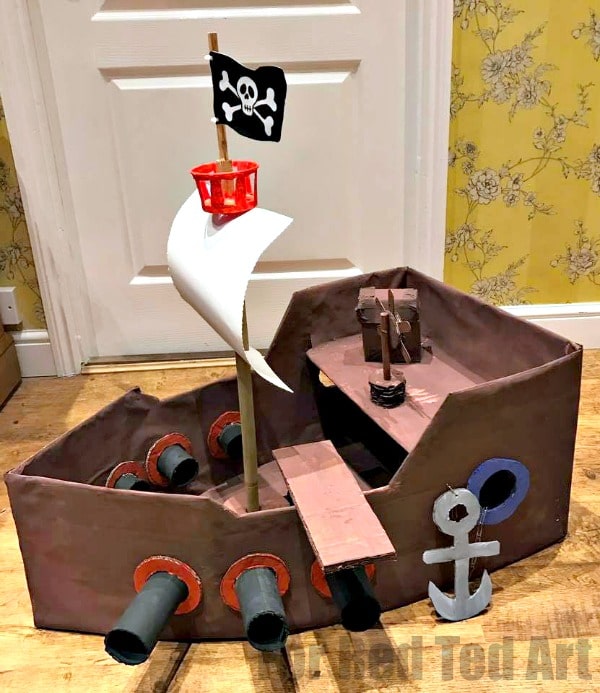

Here is alovely “mini version” from PinkOddy, who made a pirate ship for the kids’ LEGO people.. so cute and fun!


A lovely facebook reader, Maria, shared these amazing photos of their cardboard pirate ship AND toilet paper roll pirates. Aren’t they fabulous? The pirates are made using old ping pong balls and toilet rolls. Too cute!
More great PIRATE CRAFTS here!
Pirate Ship
Equipment
- Cardboard
- Masking Tape
- Newspaper & paper mache paste (here is an easy homemade paper mache recipe) OPTIONAL!
- Scissors
- Paint
- Glue
- 2 sticks for the masts
- Fabric for the flag
Instructions
- Cut out your basic pirate ship shape. We had 5 parts: the bottom, the two sides, the back and a deck. I have included the dimension in a rough sketch for you. Really – they are just approximations. Best to cut your two side panels and the back, tape it all together and then to cut your base and desk to fit your boat. I kept trimming off a little for a good fit!

- Cut port holes into your sides and back of your DIY Pirate Ship. I used some nail scissors (that I have especially for crafting) – as they have a nice round curve. Tape your sides and back together.
- Having trimmed your bottom and deck, tape these in too. The deck is quite fragile and is the part that probably benefits the most from the paper mache.
- Cut out 12 cardboard discs – poke a hole through them. Make sure the stick fits snuggly. Then glue all the discs together with strong (!) glue and finally glue in place on the boat. Add masking tape to secure it (picture doesn’t show the tape, sorry!).
- Check our easy and low cost paper mache recipe. Cut your paper in lots of small-ish strips. Start adding layers of mache – especially over the “joints”. Secure all the masking tape – try to give extra hold to the deck. Yes it is fiddly, but if you can get a few layers of paper “under the deck” propping it up, then that will give it extra strength.
- Let dry again and add detail – I painted on some skull and cross bones and anchors. I first drew some on paper, cut them out and traced them on with pencil.
- Make a sail: I used a rectangular ish piece of black suit fabric. Sewed the edges. Across the top, I left the seam “wider” so I could insert a stick. Near the middle I snipped the fabric, threaded through some string and with that tied the sail to the mast! For the skull and cross bone I stuck on some white felt.