
How to make a Knight’s Shield from a Cardboard Box
So… with Christmas over.. and our house sprinkled with new toys and empty boxes it is definitely time to think frugal crafts – how can we upcycle our cardboard boxes? What can we make from all the big cardboard boxes in our house? One thing I have wanted to make for ages for Red Ted is a Knight’s Shield and Sword made from old cardboard boxes. And now is my chance.
(Before I go on.. we have LOTS more Cardboard Box Crafts for you, as well as some Cereal Box Crafts that you may like! Do check them out too!). Time for some Crafts for Boys!
We made this for fun… but of course by customizing the design and details of the knight shield, you could incorporate this into a lesson plan about medieval knights and the crusades. We used the coat of arms of a popular children’s show in the UK, but again, you can have all sorts of details to add your shield, be it some cool lightning or other relevant emblems. Do some research about medieval tournaments in medieval times and see what the warriors would wear and what decor they would use on their armour. A fun way to explore the middle ages!
Or combine it with some story time about princesses and dragons. Add some magical features to give your shield “greater protection” when fighting magical creatures!
Moveover Legos.. time to get crafty and make a super fun craft project! Great crafts a super fun to play with.
Knight’s Shield Craft – supplies needed:
As with all our craft ideas, we like to keep supplies basic and as simple as needed. Crafting should fun and inexpensive!
- One large box – you want one side of the box to be big enough for the knight’s shield
- Acrylic paint
- PVA glue or a hot glue gun
- Papier mache (1 cup flour, 2 cups water, stir and microwave until thick) and newspaper (OPTIONAL!!!) – you can read more about our papier mache paste here.
How to make a Knight’s Shield Craft for kids of all ages:
This is definitely a fun project to work on together. For a little boy or girl, you may have to make it FOR him .. for older kids it is a great together project!
We did wing it a little.. as this was a spur of the moment craft! But hopefully the following is helpful to you too and you will have as much fun with this as we did! Let’s have a blast and get crafty!
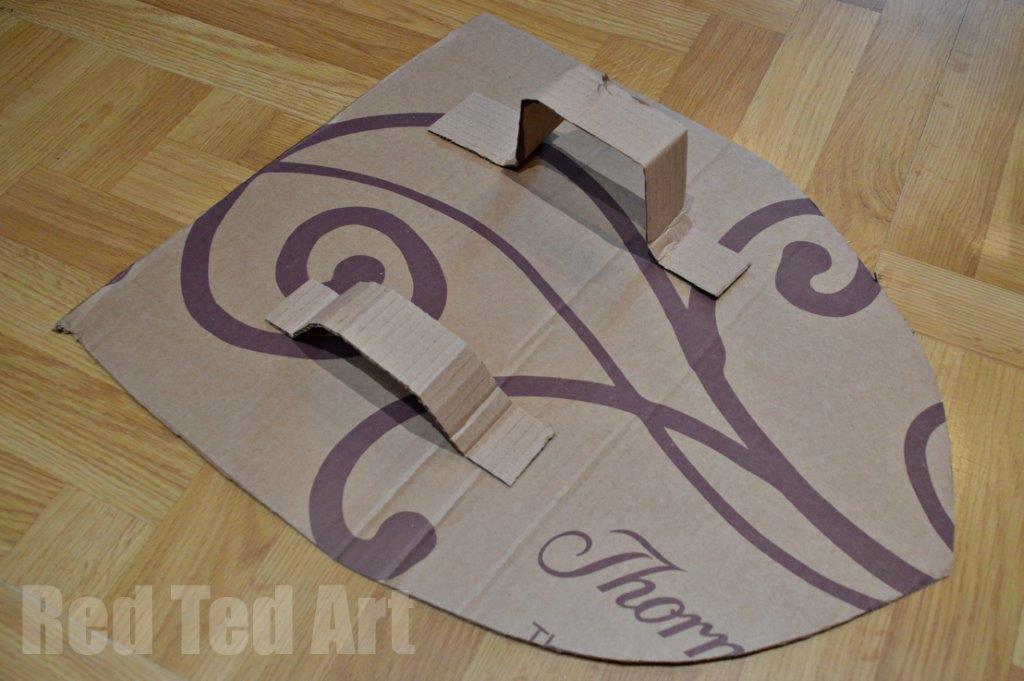
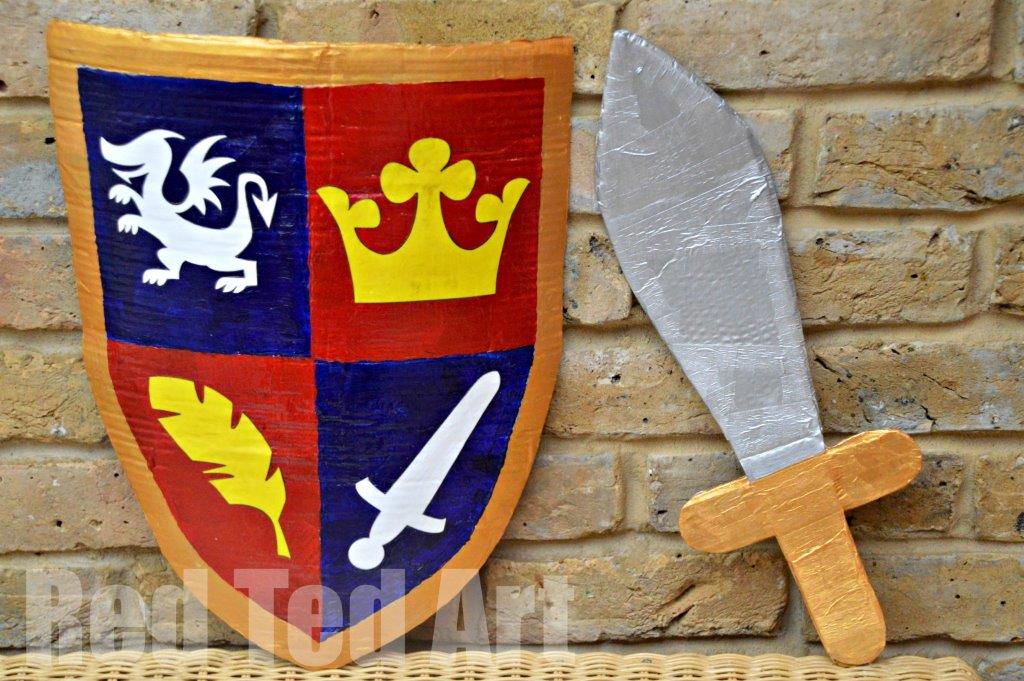
1) Draw a shield into the largest side panel of your cardboard. On our shield, the lines of our cardboard ran ACROSS the shield. From left to right. I was hoping that this would give the shield more stability. Cardboard has a habit of bending at these lines.
If you decide NOT to papier mache your shield, I recommend that you have TWO pieces of card per shield – one with lines going from top to bottom and one with the lines going from left to right. This means that you are limited by the dimension of your box a little more, than if you only need the card going in one direction. If you do not use two pieces of card glued together, your shield will start bending after very little play and be annoying. So. Either use the 2 pieces with opposing lines, glued together or papier mache (as from step 3).
2) I then cut out two handles for the back of the shield. I was trying to be clever and made one “handle” bigger – for the arm to go through and the second handle smaller for the hand to hold onto. Well it worked fine.. except, I made it for Red Ted’s right arm…. when he is right handed and should really be holding the sword in that hand. Doh. Your call.
The handles are made from long rectangular strips of card, folded and glued down. I used a hot glue gun as it is quicker, but PVA should work fine too.
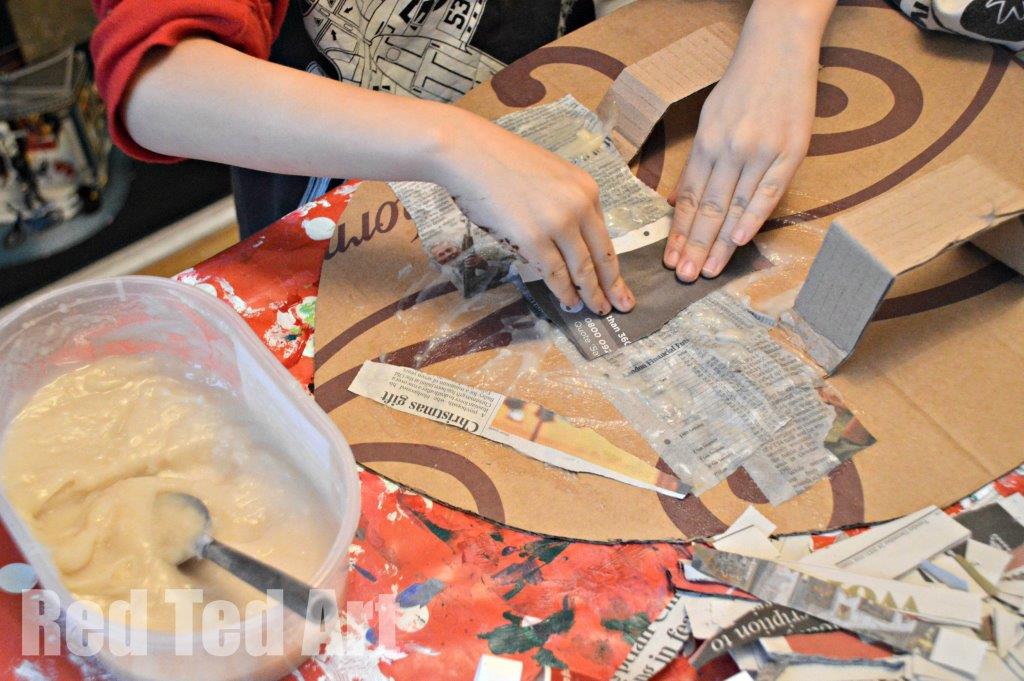
3) Papier mache your shield. We papier mached the inside first – so that I could secure the handles. I made sure the centre of the shield had at leas 3-4 layers, so that it was nice and stuff and less likely to bend during play.
4) Curvature of your shield. I confess, by sheer luck and fluke, our shield started bending, thanks to the wet strips of newspaper…… but it was bending the wrong way. Argh. So, whilst it was drying, I first weight the shield down a little to flatten it and then I gently curved it the right way – i.e. so the handles curved in a little.
5) Once dry I papier mached the front of the shield (to give it a smoother surface). I had little papier mache paste left and was too lazy to make more, so only applied one layer or so of news paper and also to the edges, so I had a smooth surface to paint later. Again, I gently curved the shield whilst it was drying into the direction I wanted it to take! Surprisingly, the finished shield came out with a perfect curved shape!

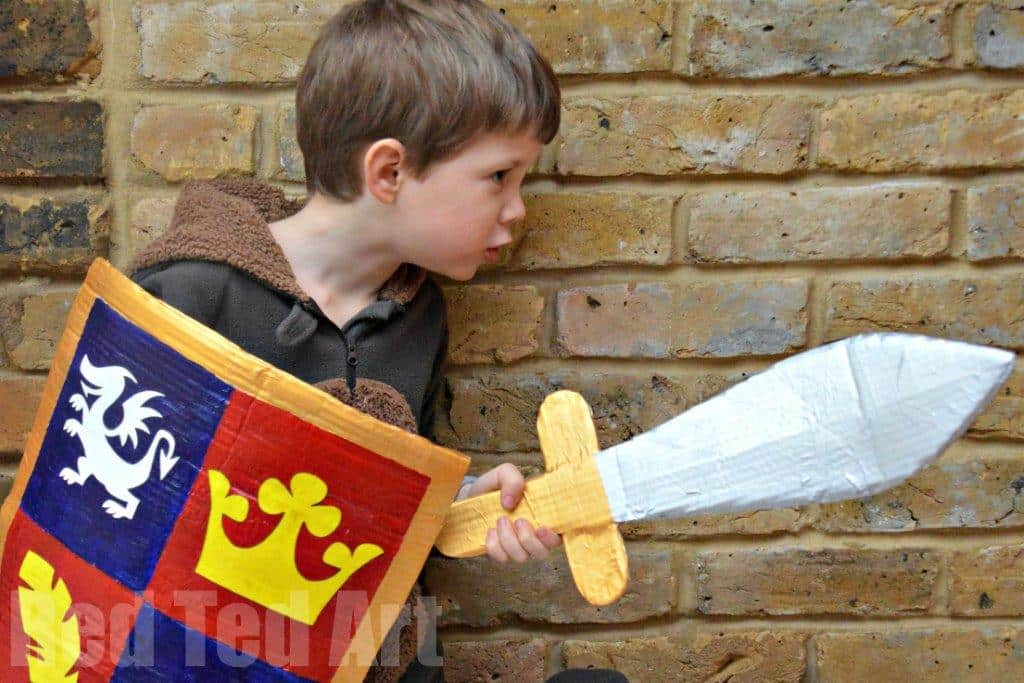
6) Once fully dry, I painted the front of the shield: Gold, Blue and Red – in the end we decided to go for a Mike the Knight shield (a popular UK Children’s TV programe), though I was also very tempted by a St George’s cross. To make sure I painted it all evenly, I used a ruler to marked out the lines for the gold and the 4 “rectangles”.
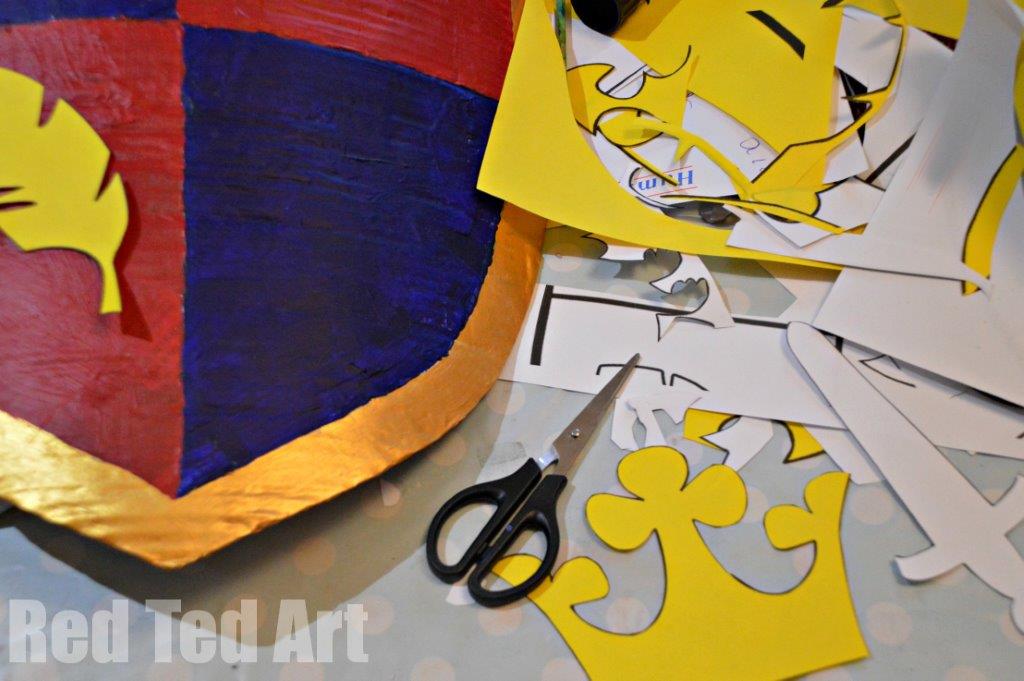
7) Once painted and fully dry, I downloaded this Mike The Knight shield template. Fiddled with it in Power point (i.e. made it bigger) and printed it off in yellow and white. The cut it out neatly and glued it on with decoupage glue and adding a layer of decoupage glue to seal it. Note – you have to apply the paper gradually, to stop it wrinkling or bubbling. Don’t rush this!
Done. We are SO pleased with the result.
Making a Cardboard Sword
Whilst waiting for the shield to dry, I also made a quick sword. With the sword it is even MORE important to add two layers of cardboard with the lines running both across and up and down. As it will bend. Again. You can papier mache the sword or you can use masking tape to give it a nice neat edge after gluing the parts together. Then paint!

Happy Knight Play!!
Do check out the rest of our Crafts for Boys!