
Alice in Wonderland Crafts – Card Soldiers
My lovely brother and sister in law recently had an “Alice in Wonderland” themed wedding… and they put me in charge of some kids’ activities/ crafts for the “morning after the night before”.
So, I had a little ponder and thought it would be good to have a range of different alice in wonderland crafts and activities they could do – undirected and directed. I also didn’t want to offer “too many wedding crafts”, as a) kids don’t always fancy it and b) it can be overwhelming and c) it may all end up in one big messy pile. The final activity (the soldier cards) where made a LOT easier by using my new Cricut Explore.
As I was able to upload my own pattern and cut enough for 10 kids to craft. This is probably my most favourite feature of the Cricut Explore and makes it terrible useful and versatile for me. Perfect for kids party crafts (it would have been so handy for our Superhero Mask party craft and Paper Hobby Horse party craft). So I decided on the following for activity ideas, loosely themed around Alice in Wonderland:
(our main Alice in Wonderland party craft! More below)


1) Free Drawing – I found some lovely “framed” paper, that instantly turns every drawing into a “framed work of art”
2) Alice in Wonderland Colouring Pages (my kids can colour for hours) – I printed some from Coloring Book.

3) Simple Alice in Wonderland Puppets (cut, tape, finish). I found a cute printable that was easy for young kids to cut on their own on Wild Olive.

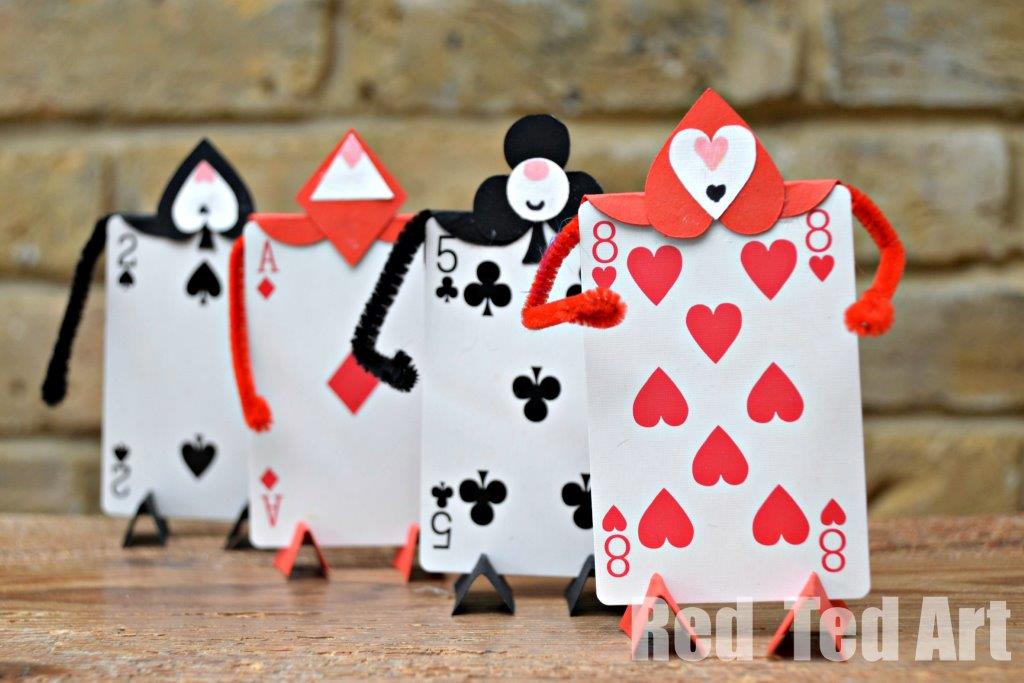
4) Finally – the “proper craft” – some Alice in Wonderland Soldier Card People (that was a mouth full). I made the Alice in Wonderland Card People based on those by Disney Family – they had made some for Valentine’s Day, so had a set of heart shaped ones. I wanted to do all four suits (though the hearts are probably the nicest), so decided to make my own pattern again.
Make your own Alice in Wonderland Soldiers:
Materials:
* old deck of cards (with some missing already!)
* red and black cardstock
* white paper
* pipecleaners (for arms – optional)
* pens for details
* scissors & glue stick
Having a Cricut Explore is convenient, but not essential. You can hand cut the bits you need, but of course it will take a little longer!
Soldier Craft Steps
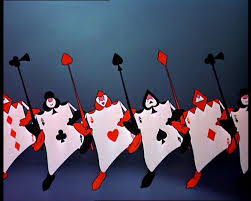
1) As Disney only had the heart card template, I started to make my own for all the cards. I took a look at the Marching Soldiers cartoon to see what “shapes I would need”. Clearly the four suits some hearts, circles, triangles and some rectangles (for the feet). I check the Cricut Design room for exciting shapes. No luck.
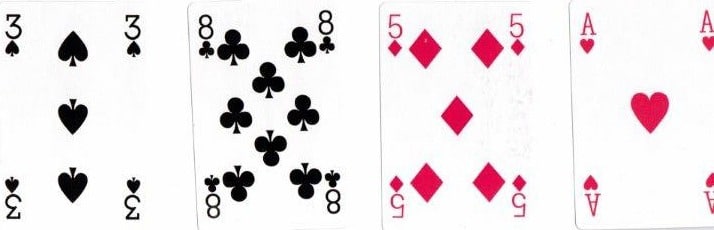
2) Not a problem. I scanned in a set of cards instead! Then I went to the Cricut Explore Design room, uploaded it and each time cropped out one the four suits and saved it four times. Job done. IUse the heart shape to create an additional “cape” (a large heart) and select basic triangles and circles as basic shapes. So per soldier you need:
* 1 head (heart, diamond, spade or club)
* 1 face (depending on shape a circle, heart or triangle)
* 1 large heart for the cape
* 2 rectangles for feet
Here are the Cricut Design Room steps to help you along the way:

Go to the design room and start a new project. Select upload on the left hand side. You should get this image. Go for “Basic Upload” (ignore the images at the bottom, those are my saved projects!)

Once you have uploaded your image, select “Basic Image” (as you are going for a simple one colour shape)

Now the fun begins. You can either crop first or select the eraser and get rid of all the bits you don’t need. Cropping does a fine job, but the eraser is FUN. Besure to get ALL the bits though.

I then use the “magic delete” tool to get rid of the tiny bit of white around my shape.

You can double check you have done it all right, by clicking on the eye on the top right hand corner. That gives you a view of the cut that will be made.

Finally save your project, but do give it a name and some tags, so you can easily find it again!! Now you are ready to move on to STEP 3.
COLOUR ARRANGE YOUR SHAPES:

Insert all the shapes you need and get the size right. Then select different colours, so you can later cut from one sheet of light card.

Select the next shapes.. I did red, black and white.


Load the colour paper you need (here we have our last white sheet) and hit cut!
Then go to the Circut cut icon and select cut. It will give you a choice of number of cuts. I set it to 8. Then select the amount you want to make and the machine will sort the layout for you. Feed in the right colour card as appropriate.

4) Cut out all your pieces and assemble!! I made it “hands off” for people to do by themselves (it was the morning after the night before after all, and I didn’t want to get “stuck” at the craft table). Here is The Uncle having a go with Red Ted. Lovely. Done.

Don’t they look fun!!
You may also like our super popular paper teacups – perfect for any Alice in Wonderland tea parties!
