Egg Decorating Ideas – Napkin Decoupage Eggs
Decoupage is the “lastest” thing here at Red Ted Art – we are trying out all sorts of different things to decoupage, including this Easter Egg Decorating idea: Napkin Decoupage Eggs.
We have used thing flower catalogues to decoupage and it work fine (nice and colourful). The great thing about napkins, is that they are super thin, therefore give you a neater finish and come in all sorts of lovely decorations.
Napkin Decoupage Materials needed:
- Napkins with pretty patterns
- blown out eggs
- PVA glue (modge podge is great)
- Scissors
- Paint brush
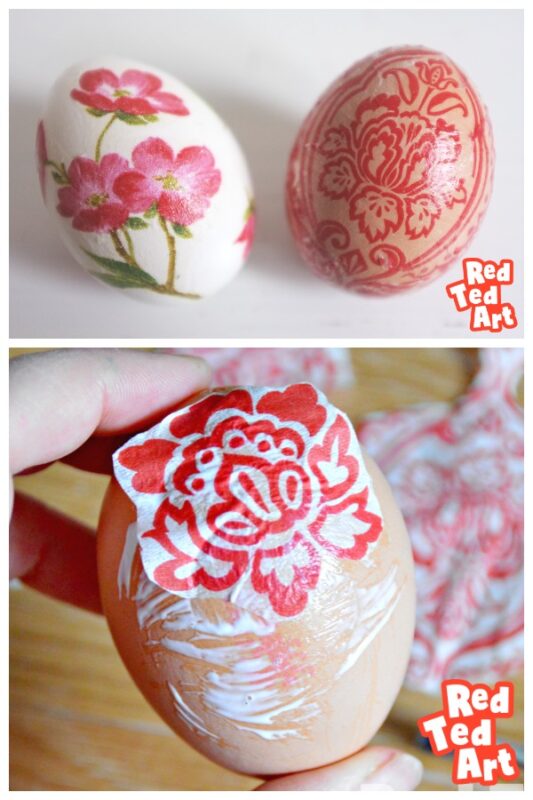
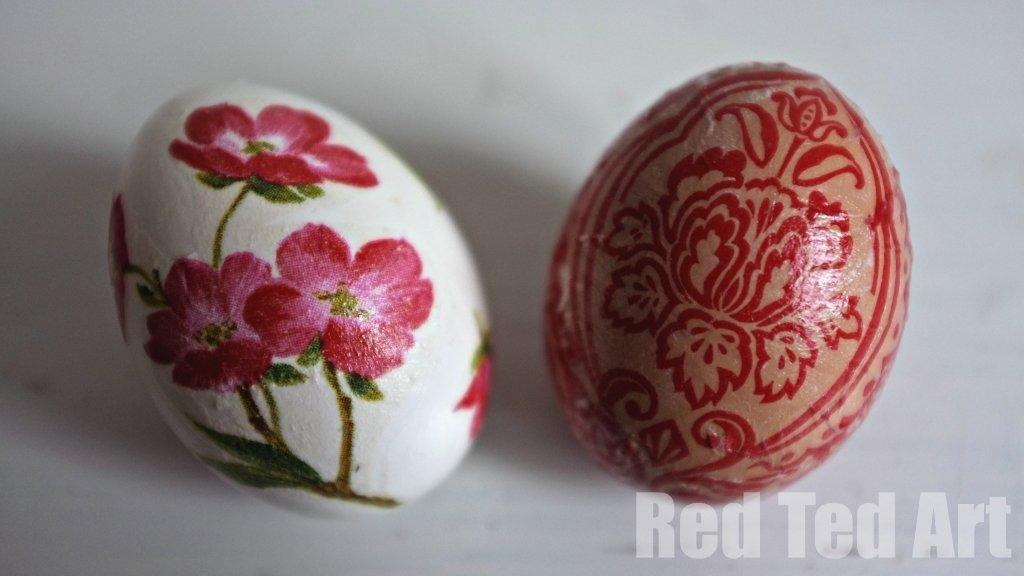
We were at a friend’s house for lunch and they had these pretty red napkins. I seized the opportunity and asked to take one home. One napkin is enough for at least 2 eggs and possibly a third (depending on which part of the pattern you are focusing on). How thrifty is that? Later we were at my in law’s house and she had the pretty blossom napkin AND a white egg for me. Whoop whoop.
How to Napkin Decoupage Easter Eggs – step by step!

1) Follow my egg blowing instructions to “blow” you egg shell out clean. Make sure your egg shells are fully dry before you start!

2) Cut out your patterns as neatly as possible – I focused on two large pieces for either side of the egg and then some flowers and leaves as “fillers”. It is good to cut a little more than you will need, as once you start sticking, you don’t want to put things down to cut out more pieces. My napkin came in 3 layers – try and remove the 2 unnecessary layers under your pattern.
To avoid wrinkles: cut smallish designs, you can also nip the design in strategic places to help it “fold” and then when you add the decoupage glue, that will help smooth it out. The key really is that you are using one layer of a 3 ply napkin, which is very thin.

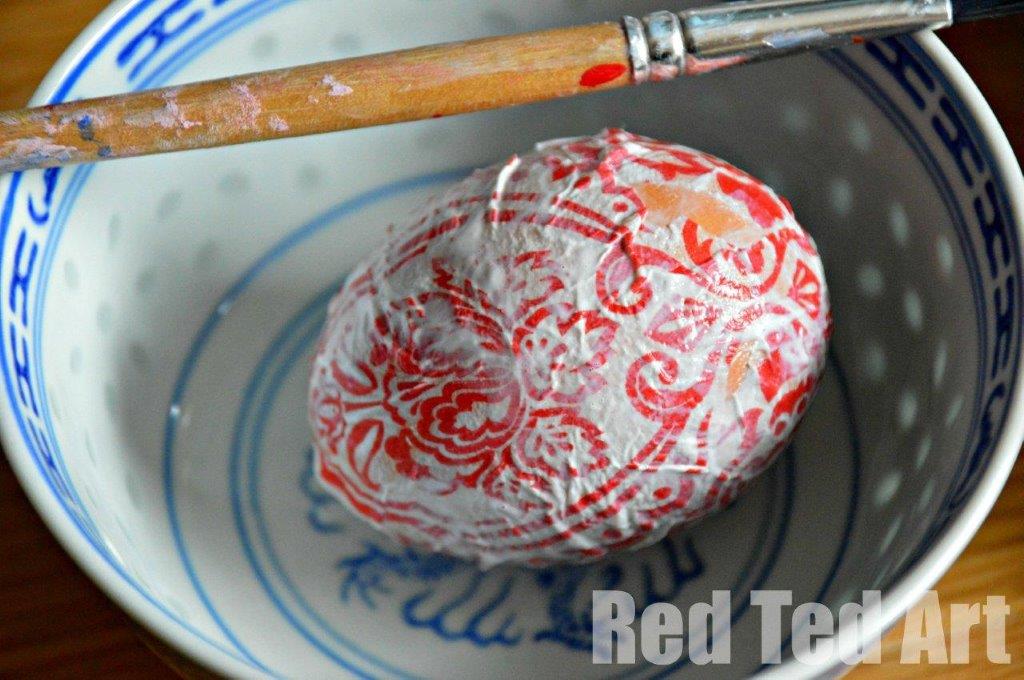
3) Dab the egg with decoupage glue.
4) Add your pattern. And apply more glue over the top. Be very gentle – pat the glue if necessary. As the napkin can tear.
5) I had to put the egg down and let dry a little before I continued, as my fingers were sticking to the napkin and damaging it. So if need be, do this in “two sittings per egg”. I have shared the above photo so you can see that it all looks a bit messy at this stage.
6) Fill in any gaps. Let dry fully. I didn’t expect for the white part of the napkin would dry “clear”, but I think it is quite a nice side effect. Our egg was brown, so the final egg is brown with the red pattern. You could always colour your egg with food dyes first.
7) Re-open the hole from the egg blowing and insert a thread and hang.
PRETTY!
The best thing about this technique, is that the egg decorating ideas are endless – napkins do come in so many different designs and colours. Butterflies would look wonderful. My kids would adore bunnies and I think flowers would be pretty too. Just check what napkins you have at home or what your local shop currently has available.
Want more ideas? 10 Egg Decorating Ideas: