
How to make a 3d Pop Up Lion Card
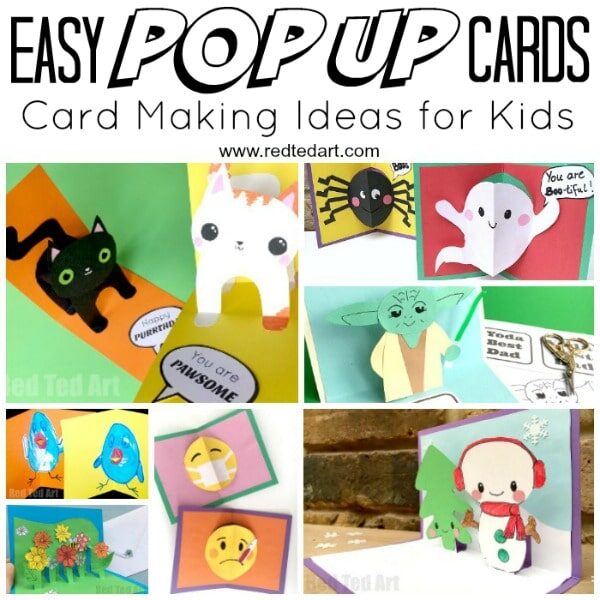
We love 3d Pop Up Card Projects for kids! Some pop up cards are quite complicated.. but WE love to make super easy pop up cards that still look great!
Today, we share a simple technique and teach you how to make a 3d Pop Up Lion Card. It is not disimilar to our Panda Pop Up Card from a few years back.

3d Lion Card – Materials:
I actually made this card as a large A5 – normally I make them A6, but can you make this in “big” or “small” whatever you wish!
- A4 piece of card folded in half
- Paper in Orange, dark yellow and light yellow
- Black pen
- Glue stick
- Scissors
You can watch the video tutorial on auto play or follow the step by step directions below! And learn how to make your own 3d Pop Up Lion Card today!
How to make a 3d Pop Up Lion Card
So as with all our crafts, I try to “deconstruct” what we are making into simple shapes and patterns, so you should be able to have a go at making your own designs! The key thing with this Lion Pop Up, is the to get the lion head size correct – so that it isn’t too big and pop up outside of the card too.. but follow the steps below and you will be fine!
Begin with your paper lion’s head

You need to fold your CARD in half first – because the folded card, will give you an indicator of the lion’s head.
The Mane: Once you have folded your card to make it A5 (or whatever size you are working with). Draw a an OVAL shape on to the mane paper (orange) that neatly fits inside the A5 card – it is good to have 2cm on either side spare. If you find drawing ovals hard, you can use a plate to trace and then flatten off two edges. Cut out the mane.
The Head: Now you have the main, trace this onto yellow paper and cut another oval about 1-2 cm smaller, out of yellow paper.
The Ears: the ears are like two tear drops with the point bits flattened. But you can also cut two ovals in yellow. Then two smaller ovals to go inside the ears in the light yellow.
The Mouth Piece: Finally, you will need an oval for the mouth. Experiment with the size to find a shape you like.
Assembling the Paper Lion’s Head

Draw a nose onto the mouth piece, a mouth and some dimples. Let the pen dry. Then glue it onto the yellow head oval.
Draw on some eyes and stick on some rosy cheeks if you wish.
Glue the ear parts together and stick them to the back of the head.
Now glue the head onto the orange mane.
Add black stripes to the main.
Your head is finished.
Making your 3d Paper Lion’s Body

Cut out a body shape in yellow – it is a bit like half an oval. I made mine quite narrow.
Cut out four small ovals in the light yellow for feet.
Cut out a tail in yellow and a tear drop puffy tail in orange.

Draw claws onto your feet – remember 2 sets of claws curve in one direction, and 2 in the other.
Stick the claws to your body – to on the front and two behind.
Assembling your 3d Pop Up Lion Card

Fold the body in half – so that the main features are on the inside.
Add glue to the back and secure in place.
Glue the tail in place too, but make sure it positions well with the head and doesn’t overlap.
Fold the lion’s head in half – with the features on the outside (so reverse fold to the body).
Fold 2 cm of the edges of the lion back down – on both sides..
Check that the lion’s head fits in place.

Add glue to the 2cm folds on either side and carefully glue the lion’s head in place.
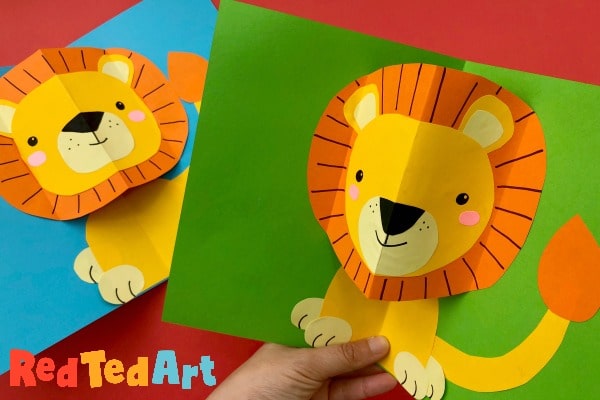
FINISHED!
Why not make a newspaper origami envelope for your card and pop it in the post!

Why not check out the rest of our how to make a 3d Pop Up Lion Card. There are so many great techniques and designs to explore and have fun with.
3d Pop Up Lion Card
Equipment
- Card stock
- Coloured Paper in desired colours
- Pen
- Scissors
- Glue stick
Instructions
- Fold your card stock in half – this will help inform the size of the lion's head
- Cut out your lion's features – the mane should be a little smaller than the card folded in half. The features in clude:* Mane* Head* Snout* Ears* Body* Paws* Tail
- Glue the lion's head features together and add eyes, nose, mouth and mane details in pen.
- Glue the body features together.
- Fold the body in half and glue in line with the centre spine of the card.
- Fold the lion's head in half (with the features on the outside). Then make two additional folds.
- Add glue to the folds and secure the lion's head in place.