
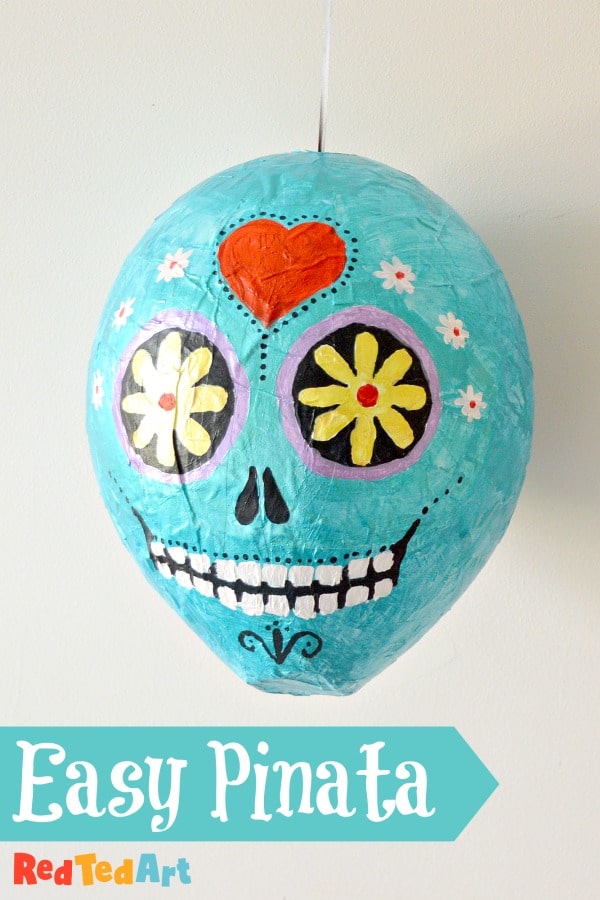
How to make a Sugar Skull Pinata for Parties
Having a Halloween Party this year? If so, be sure to make a DIY Halloween Party Pinata too!! DIY Pinatas are super fun and thrifty to make.. and if you use the classic Papier Mache & Balloon technique, the resulting shape is perfect for a Skull Pinata or Sugar Skull pinata – depending on the final theme and look of your party! We love Handmade Halloween Crafts for Kids!

This post first appeared as a guest post on Party Delights!
Welcome to more fun crafts for Halloween – today we are doing something a little different and sharing our Day of the Dead party ideas with you. We love this slightly different take on the usual Halloween celebrations going on.
The Day of the Dead is a celebration originating in Mexico on 31st October, 1st November and 2 November. It is a time to pray for and remember friends and family who have died. The Day of Dead is becoming more and more popular in other parts of the world and makes for a great party theme.
NOTE: Please make your Halloween Party piñata at least one week in advance as it requires several “drying” stages. So don’t try and start one the night before your party!
Day of the Dead Pinata – Materials Needed:

* Old newspaper
* A balloon
* Masking tape
* Paints in various colours
* Pencil
* String hanging & chopstick for hanging
* Halloween treats for filling
For the DIY Paper Mache Paste:
As you know we have a full post with all the DIY Paper Mache Paste details.. but.. in summary you will need –
* 1 cup flour
* 2 cups water
* Disposable container (e.g. old ice cream box)
A microwave is handy but not essential
Day of the Dead Pinata – Part 1 – Making your papier mache
Make your paper mache paste – this is a natural eco friendly recipe

1) Begin by making your papier mache paste – this is super easy to do. Mix your flour and water in a disposable container and pop into the microwave. Medium heat if it’s new or high if it’s an older model… give it a good stir every 20-30 seconds until it starts thickening. If you don’t have a microwave, you can do this in a pot on the cooker too!
Start paper maching your balloon with newspaper layers

2) In the mean time cut your newspaper into strips (you can tear it too). Make sure you have different sizes and lengths. Big pieces to start off with and then some smaller pieces for finishing off your pinata towards the end.
3) Apply some paste and add your paper. Add paste over the top. You can use a brush to do this, but it is quicker and easier if you just get stuck in and use your hands. Keep smoothing your paper and paste down.
4) Create 2-3 layers. As this is a pinata and you WANT to break it afterwards, it is a good idea NOT to make your piñata too solid. At the top of the balloon I had a good 4-5 layers, as this has to stay in tact and hold the piñata up as it gets bashed. Parts of the sides only have 2 layers or newspaper, so they are soft spots for the kids to hit later on. If in doubt, make it thicker because as you remove the balloon you don’t want to break your structure.
NOTE: You can at this point papier mache a hook into the top of your balloon for easier hanging later on. If you do this, make sure you have lots of layers (5-6) to make sure it is secured in tightly.

5) Get a small boy to hold it whilst it dries.

6) Only joking. Hang it up somewhere to dry – preferably not touching anything in the first 3-4 hours whilst it is quite wet. Once it has dried a little you can hang it off a chair indoors. Let it dry for 2-3 days.
NOTE: Making sure your papier mache has FULLY DRIED is VERY important. If you pop the balloon too soon, it can ruin your structure.
7) Once fully dry, gently pop your balloon and remove.
Day of the Dead Pinata – Part 2 – Decorating

Seal the Pinata – fill with treats first, if you are not cutting an opening later
1) If you have added a HOOK to your pinata in the step above, now is the time to FILL your pinata. If you haven’t and are using the old ‘pencil/chop stick’ and string method, you can wait until later… Use some masking tape to cover the bottom of your hole. You need to use masking tape and not other tape, as you can paint over it!
Paint the Paper Mache Pinata a Base Color

2) We decided to paint the pinata white first, as I wanted all the colours to stand out. We used acrylic paints, but poster paints should work too. Prop your balloon up in a bowl and paint it white. Once dry, turn and paint the remaining side.
Sketch out your Sugar Skull Details – in essence these are two large circles for the eyes

3) Once fully dry, use a pencil to ROUGHLY sketch where you want what. I marked out two round eyes, a heart, the nose and a loose shape of the mouth.
Turn the paper mache balloon into a Sugar Skull
4) Start painting!!!!!! We started with the eyes, heart and nose details and then filled in the whole balloon in our shiny blue. Then we went over the top and added some details in black and opaque white. Remember when painting – stick to simple shapes, don’t over complicate it. Don’t worry about “mistakes” – you can always paint over them in white and start again and go for lots of colour. Day of the Dead is all about marigold flowers (orange and yellow), hearts and patterns.

Day of the Dead Pinata – Filling & Hanging

1) Now you have finished painting it is time to fill your piñata with Halloween Treats and hang it up.

2) We cut a small hole in the top of the piñata – big enough to fill with sweets. Then we tied the curling ribbon around the pencil and popped the pencil inside the piñata – the pencil then forms a horizontal and stays in place. If the curling ribbon isn’t strong enough use some string.

Woohoo, your piñata is READY FOR PLAYING.
Enjoy!!!
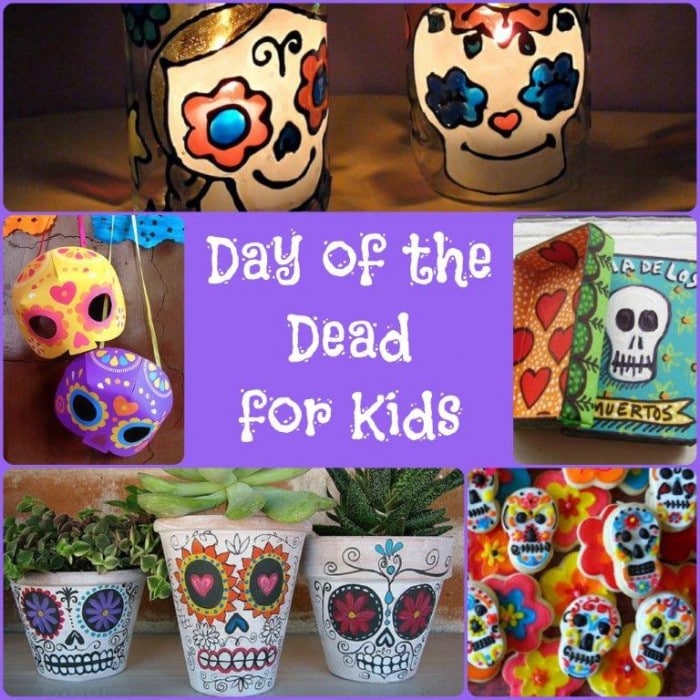
More great Sugar Skull DIY Ideas here:
Check out the rest of our fabulously easy and fun Halloween Crafts for Kids!
