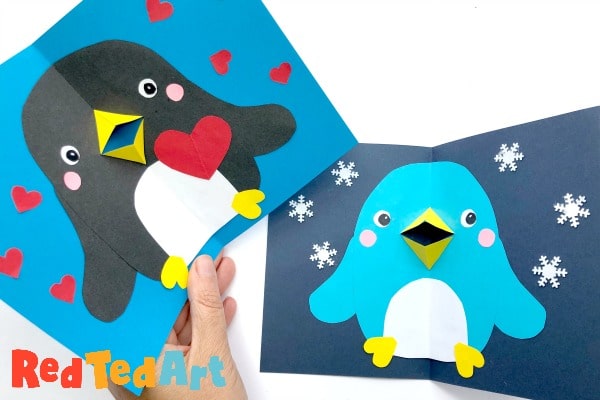
Easy Pop Up Penguin Card for Christmas or Valentine’s
We do love a bit of a “all seasons” card, right? Why make somehting once, when you can make it again? Today’s easy Pop Up Cards for Kids is another such project! Learn how to make this fabulously cute and easy Pop Up Penguin Card and the decorate it for either Christmas or Valentine’s Day. Let it snow for Christmas (maybe even add our 3d Owl’s Santa Hat) and rain hearts for Valentine’s Day Card Making!
Make an paper penguin craft with us today!

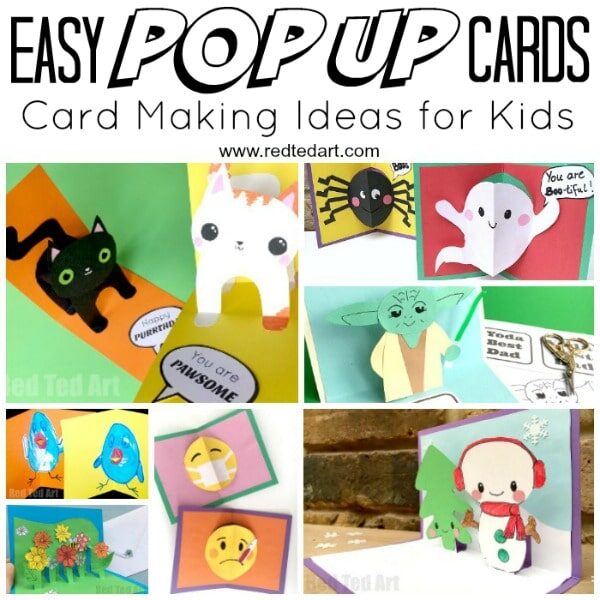
Aren’t they simply delightful? They really do make me smile! So cute! As with the Monster Pop Up Cards and Owl Pop Up Cards, I have some printable templates coming soon.. but similarly… I teach how to make a pop up penguin card from scratch, here today…
To make your a 3d Penguin Card you will need:

- Cardstock,
- paper in penguin colour,
- white, yellow, red and pink paper scraps,
- scissors,
- pen,
- glue stick and
- optional embellishments (e.g. snowflake confetti)
This is a 4 page printable – 2 page worksheet, printable template, as well as a set of speech bubbles and is available in my teachers pay teachers store. It is however possible to make this craft without this printable by following the instructions below!

How to make a Penguin Card for Christmas or Valentine’s:
As mentioned these Penguin cards can be made for penguin lovers all year around. Whether you are making them for Christmas, as Thank You cards in January or for Valentine’s… these 3d Penguins will sure put a smile on anyone’s face!
I have a video tutorial that you can follow or check out the step by step photo instructions!
Step by Step Photo Tutorial for a Pop Up Penguin Card
Cutting the basic punguin and beak

Use your card stock as a guide for how tall your paper penguin should be. Fold the penguin paper in half (the height of the card). Then sketch your penguin. The penguin will be like an upside down filled in U shape. You can later round off the corners of your penguin if you wish.
Cut out your penguin. Check that it fits nicely into your cardstock. If you wish you can make the penguin a little smaller and leave space for a Santa Hat as per our 3d Owl.
Fold the penguin in half.
Make a 1-2 cm cut about 1/3 down from the head.
Fold down the flaps (see images). Youl will see that the flaps align nicely with each other to make a straight line – like part of a square or rectangle.
Fold the flaps in the other direction and then forward again – to make a super neat crease. This will help when making the beak poke out later.
Now fold the owl again – so the pencil drawings are on the outside. And push the “beak parts” inside. You now have your basic pop up beak owl.
Making your pop up beak yellow and adding wings

This is probably the fiddliest bit of your pop up penguin! But don’t worry, you can do it!
Fold you yellow beak paper in half. And “Insert” it into the fold of the beak.
Draw a line to mark how big it needs to be. Cut.
Open up the triangle you just cut and check against the pop up beak to see if it fits. Trim a little if need be.
Repeat for the bottom half of the beak.
Glue your triangles in place.
You have now completed the “hardest” part of your handmade owl card! Time to have fun with decorating!
Now use your penguin as a guide and sketch out a wing. Cut two the same size and flip one to mirror it.
Your Paper Penguin’s Features

Cut out the remaining features, you will need:
- 2 white eyes (with eyeballs drawn on in black
- pink cheeks (optional)
- 2 feet (like upside down hearts
- A white tummy (another upside down U).
- If making the Valentine’s Penguin you will need a large hard and lots of smaller ones too.
Final Pop Up Penguin Assembly!

Glue on all your penguin’s features.
Check the positioning of the penguin in the card.
Fold the penguin in half so all features are on the inside.
Add glue to one side of the owl and postioning in the card – making sure the fold aligns with the centre of the card.
Add glue to the other side of the paper penguin. Close the card carefully and open up again. The pop up beak should now work!
FINALLY, add any finishing details, such as snowflake confetti at Christmas and or paper hearts for Valentine’s Days!


See ALL our Handmade Pop Up Cards in one place (or check out our special collection of Christmas Pop Up Cards here):
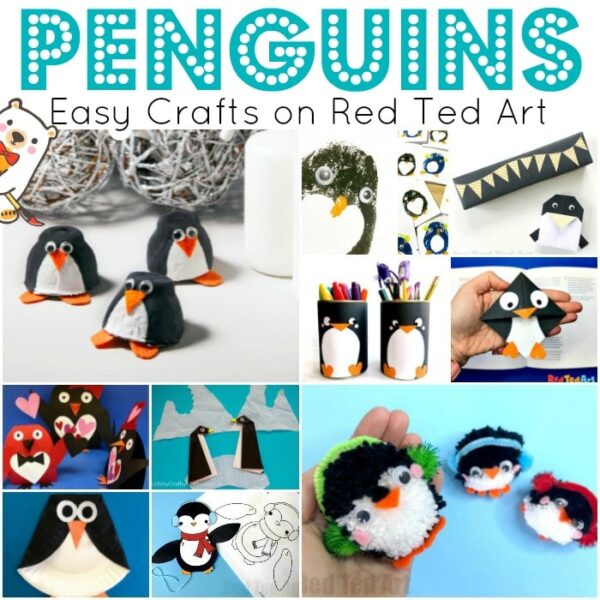
Check out more of our Fun Penguin Crafts for Kids: