
Easy Sea Glass Turtle Craft Idea
We adore sea glass. It is soooo pretty and searching for sea glass is such a staple beach activity for the kids and I when on holiday. We have brought so much sea glass back over the years.. and it is a great way to collect beach finds, without harming the environment. As sea glass is human rubbish afterall! So what sea glass ideas and sea glass crafts can you make with kids? Is it possible to make sea glass jewellery with kids? Read on and check out our Sea Glass Turtle Craft made from salt dough. Make our best salt dough recipe and make these adorable summer turtles.
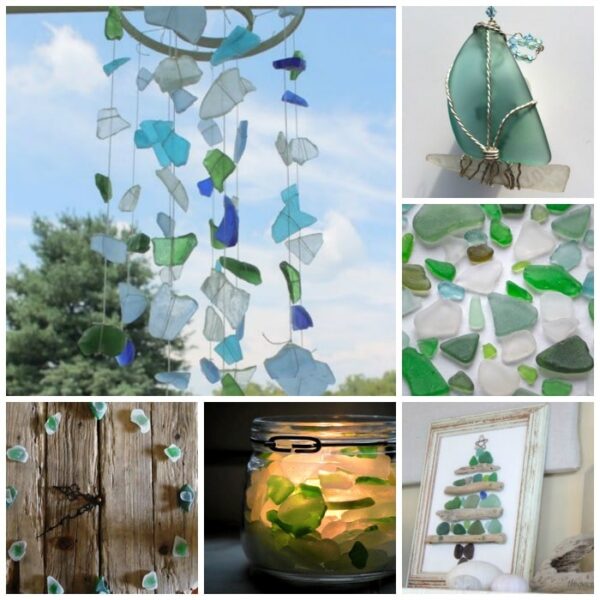
Making sea glass jewellery is usually something only for adults! As sea glass is small and therefore a little “fiddly”… and it can be hard for small hands to turn them into a sea glass art project that you can wear. We have most our sea glass layered by colour and kept in jars. It is very pretty and a lovely way to admire our treasure found in the sand! You can even pop a little candle in the jar, and nestle it amongst the sea glass. Very pretty and popular sea glass candles!
But what can you make with sea galss.. and if full on necklaces and bracelets are beyond the capability of small hands… how about:
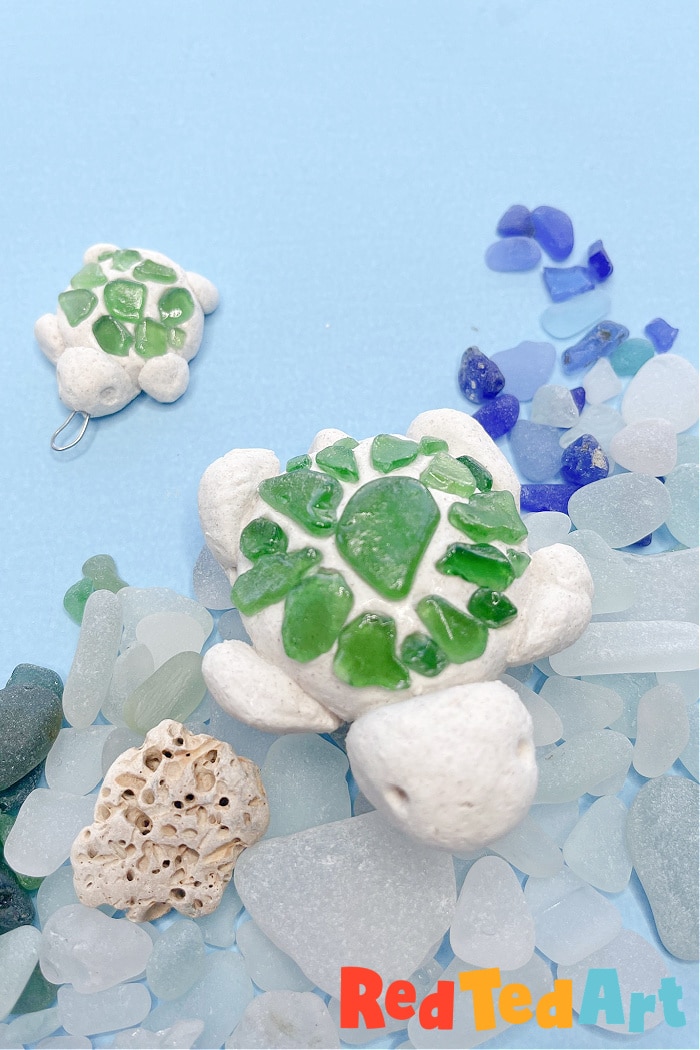
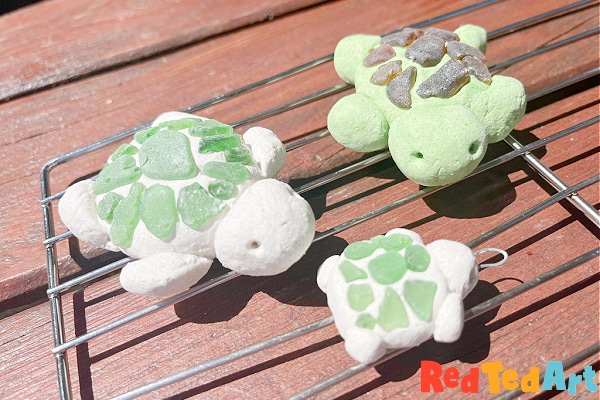
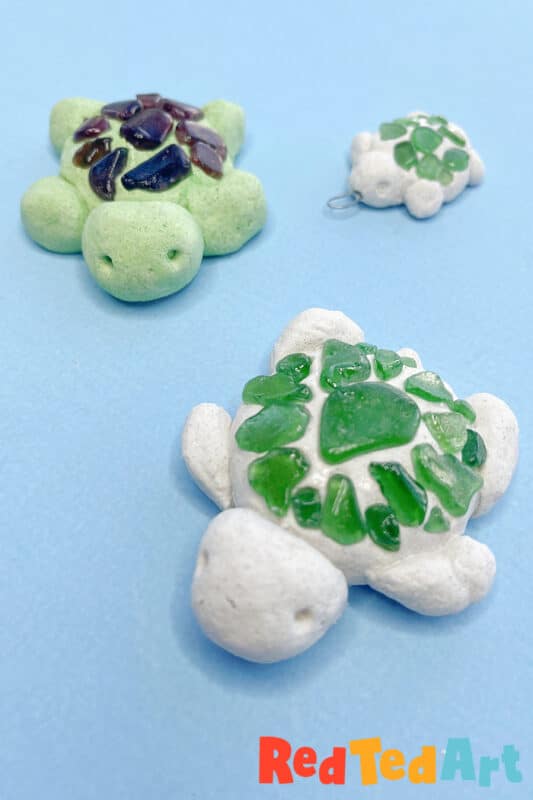
Our lovely little Sea Glass Turtles.. well… sea glass AND Salt Dough Turtles.. that is 3 of my favourite things one sentence! Sea glass (so pretty), salt dough (so fun!) and of course turtles (so cute!). These sea glass turtles are great for kids of all ages. I am sure you can your preschooler, kindergartner or toddler making these.. as well as older kids. My 12yrs old LOVES them.
What isn’t to love about today’s kids’ craft! Right?
Eco Warrior Summer Craft
As sea glass collecting is technically litter picking and homemade salt dough recipes are environmentally friendly (salt & water), this makes for a great Eco Warrior craft, that can be turned into different things.
The best thing about these salt dough turtles is that you can really vary the craft which ever way you want:
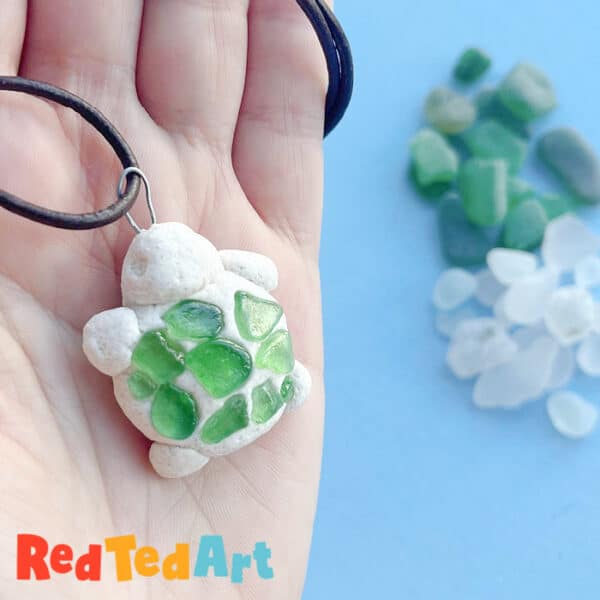
- make small sea glass turtles and turn them into wearble sea glass jewellery
- make medium sized sea glass turtles and add magnets for the fridge
- make large sea glass turtles and use them as paper weights
- replace the sea glass with other nature finds – e.g. pebbles and make other salt dough turtles
Woohoo. I do love a bit of versatile sea glass art that kids can actually get involved in!!!
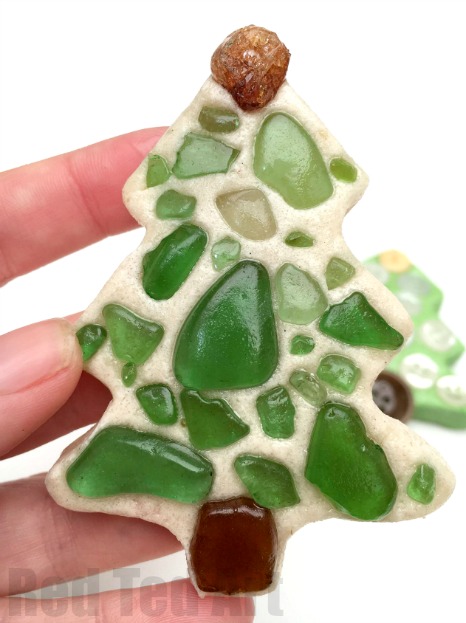

Don’t forget previous creative projects of ours. We also have our sea glass Christmas Tree Craft (such easy sea-glass ornaments), as well as our sea glass art mermaid wall art project. My kids LOVED both of these! The Sea Glass Christmas Tree is oe of our much cherished DIY Christmas Ornaments. The mermaid was a wonderful collage sea glass art project that my daughter adored making and loved showing of her masterpiece at the end too. And a great way to show off this pretty colorful glass!
Anyway. I digress.. onto our sea glass turtle craft.
Easy Salt Dough Recipe + Sea Glass Supplies:
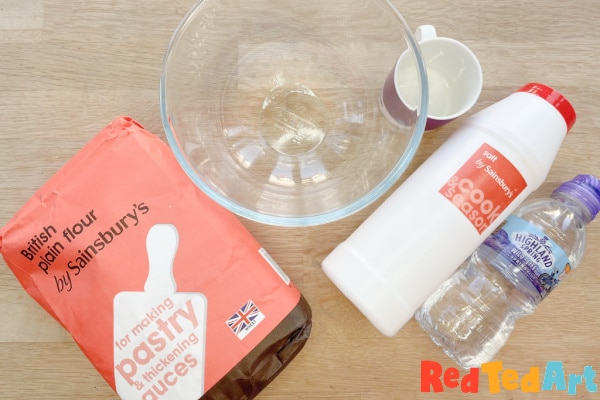
You will need to make a batch of our favourite and best Salt Dough Recipe. The ingredients really are very simple and inexpensive!
- 1 cup of flour (plain flour/ all purpose flour NO self-rising flour, this will cause puffing)
- 1/2 cup of salt (I buy table salt in bulk for salt dough crafting)
- 1/2 cup of warm water
- green food coloring (optional for colored salt dough)

Plus…
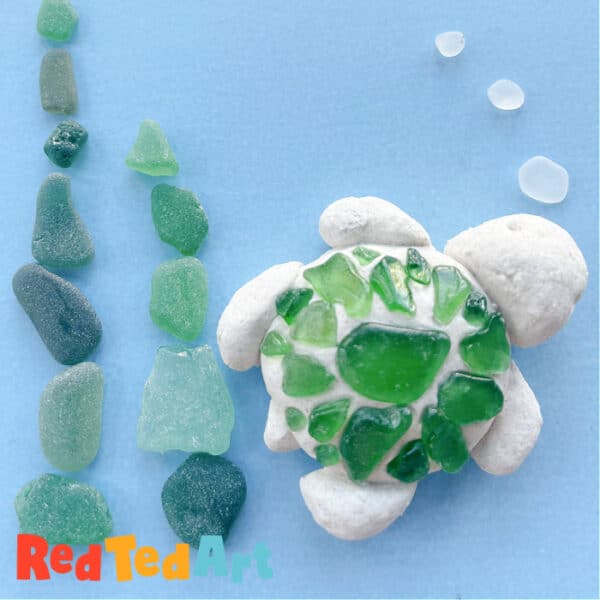
- sea glass (we preferred using green sea glass, but brown sea glass works too)
- some varnish/ sealer and/ or glue (you may need to secure the sea glass once the salt dough project has fully dried)
- a little wire if making sea glass jewelry (or even work as a salt dough ornament attached to some ribbon)
- baking sheet for drying
- a large bowl/ mixing bowl
Whichever version you make, these little turtles make great salt dough keepsakes, reminding you of your holiday together! Wouldn’t they also make lovely little gifts at Christmas time?
Don’t have sea glass?
You can easily substitue the sea glass with other nature finds – such as pebbles, sticks, mini pine cones ore seashells.
Sea Glass Turtle – Video Tutorials
We have a step by step instructions tutorial, or of course the ever popular video tutorial too! Do check out the video on auto play for full craft!!
How to make sea glass turtle jewellery, fridge magnets or paper weights!
Time for some instructions! As mentioned, these salt dough turtles are suitable for kids of all ages. From toddlers and preschoolers to older kids!
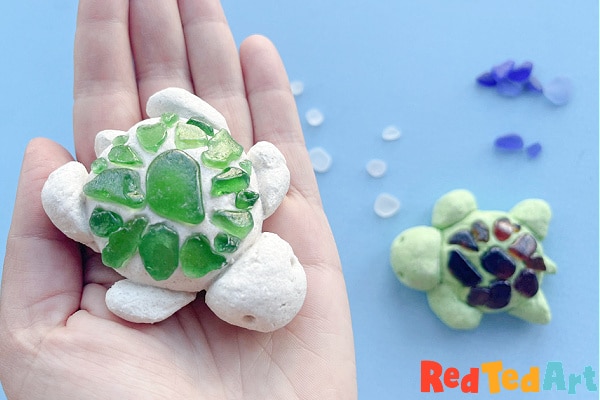
Can you tell from the title of this section, that we couldn’t quite decide what to turn our salt dough turtles into? Ha.. so many choices! How about all three (though for the paper weight you need a lot more sea glass.. and we used a fair amount up for our Sea Glass Art Mermaid). I do love the dinkiness of our little salt dough pendant.. but also the flexibility the larger salt dough turtle allows for “small hands” to get involved.
So maybe the answer lies in: how old is your child. But kids of ALL ages can make these turtles!
There are two ways you can make these turtles.
- Make the whole salt dough turtle first, then add the sea glass
- Start with the turtle shell – salt dough plus sea glass and then add the rest of the turtle features.
I tried both and liked both ways. I can’t say which I prefer!!!
To make a salt dough turtle:
Making a salt dough turtle is very easy.
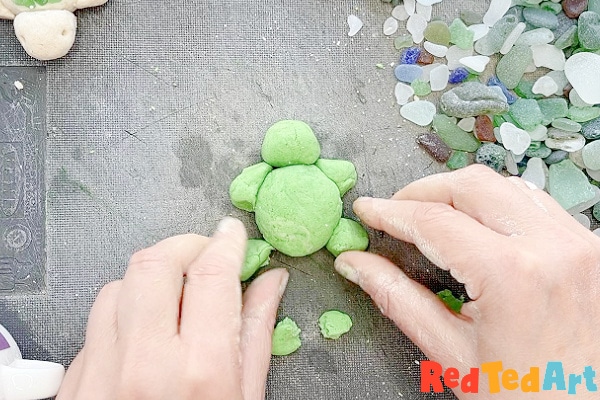
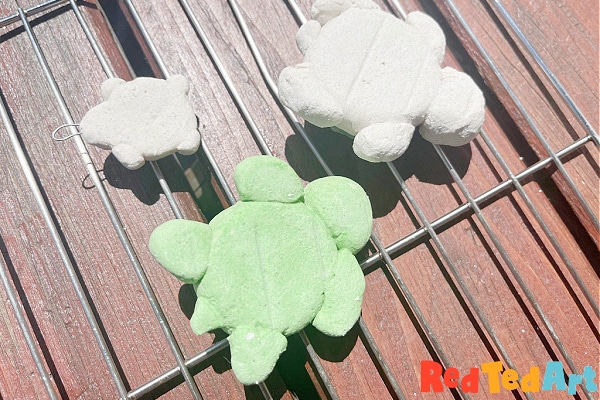
Begin by making a larger salt dough ball – make sure it is free of cracks. Add a little water if you need to smooth it. Flatten the salt dough ball a little. Maybe even make it slightly oval.
Make a smaller ball from your salt dough for the head. Attached to the larger, a little flattend ball. Smooth down with some water to secure.
Make 4 small balls for the fins. If you wish you can shape them a little. For younger children “balls” are fine. Again, attached them to your turtle’s salt dough body and smooth down/ secure with a little water.
Finally add a little salt dough tail.
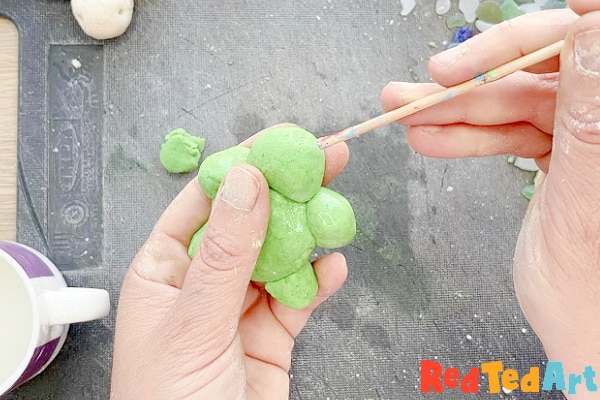
Smooth all over. Poke two eyes into your turtle’s head with the back of a pint brush, a pencil nib or a toothpick.
Adding the sea glass to your salt dough turtle:
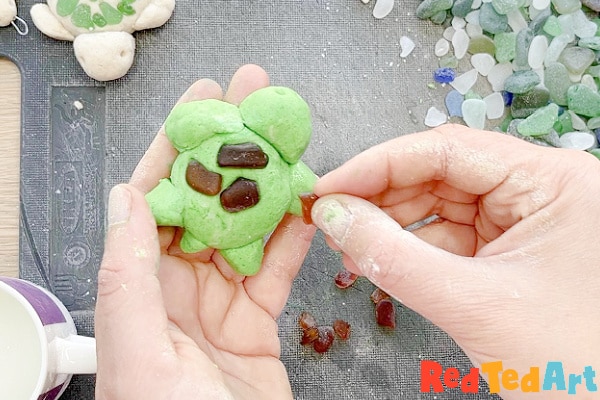
Gather the different shapes of colorful seaglass. Take the largest piece of sea glass and place it in the centre of the salt dough turtle shell. Press in place gently (so as to not miss shapen the turtle).
Now add the smaller sea glass pieces around the centre in a circle. Gently pressing the sea glass in place as you go.
Add another layer or smaller pieces of sea glass into any gaps.

Some sea glass may fall off again. Don’t worry. Gently put it back in place… you can glue it place later.
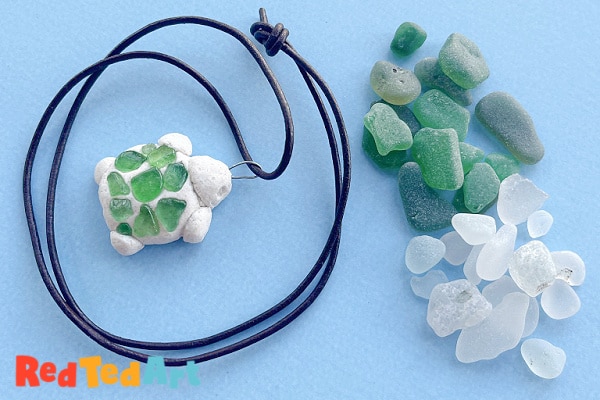
If making a sea glass jewellery turtle or salt dough ornaments
The wire hanging turtle makes a great pendant or salt dough ornament.
Cut a little craft wire.
Twist one.
Insert into the turtle’s head – where the mouth would be.
Don’t forget that we some lovely Salt Dough Shell Pendants similar to this too!
Oven bake the salt dough or let it air dry
As it is a nice sunny day here at Red Ted Art HQ, we let our salt dough air dry fully (it only took an afternoon on our hot sunny day).
If you can’t let the salt dough air dry – bake in the oven at low temperature (100-120C or 200-250F) for 2-3 hours. If in doubt, keep the oven temperature low to avoid any puffing of the dough.
Do turn your salt dough creations a few times to let it dry on both sides!
Seal your salt dough turtle/ varnish the sea glass
Once your turtles are fully dry.. seal the salt dough with a craft varnish, mod podge or even just a layer of good white glue/ PVA glue. This will also help secure the sea glass in place and make it all lovely and shiny! If the odd glass falls off (it will!) just glue it back in place!
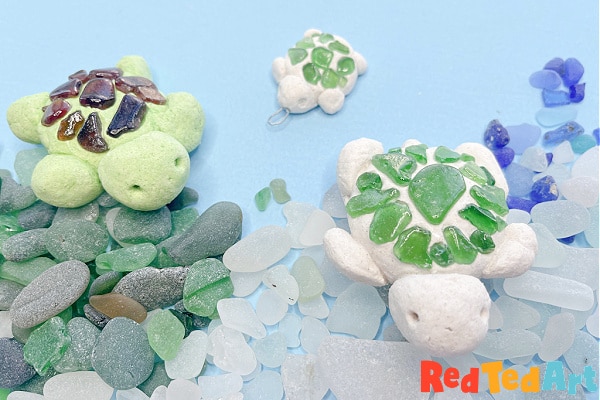
Your sea glass turtle craft is FINISHED!! Woohoo. How I love the combination of sea glass ideas and salt dough crafts! And of course.. who doesn’t love a cute turtle craft!

I hope you agree that this makes a nice and easy sea glass jewelry idea for kids to make. And should feature as part of any sea glass craft ideas collection!
Further Sea Glass Ideas
Check out the rest of our sea glass crafts and ideas, in this collection – you will find lots of gorgeous sea glass jewellery inspiration too!
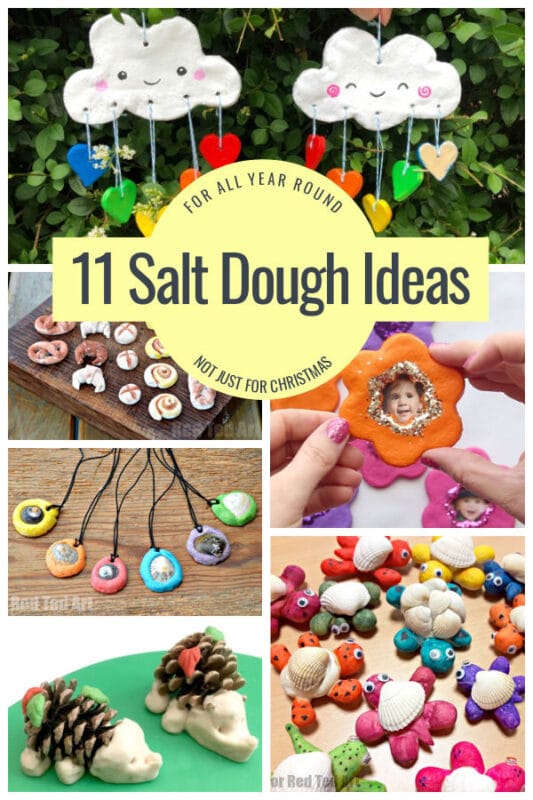
More Salt Dough Crafts for Summer:
I spy both more salt dough jewelry ideas, as well as more salt dough turtles! Well.. why not. But I also love the salt dough rain cloud decorations and as well as the DIY toy salt dough bakery! SOOOOO fun.
If you make any of our salt dough crafts or sea glass crafts, please do share your photos with me on instagram and maybe I can feature them on my account or on facebook / pinterest too!! Woohoo!
Additional images, as I loved making and photographing these so much!!!!!


Hope you enjoyed this little summer craft!! SO FUN!