Easy Tiger Pop Up Cards
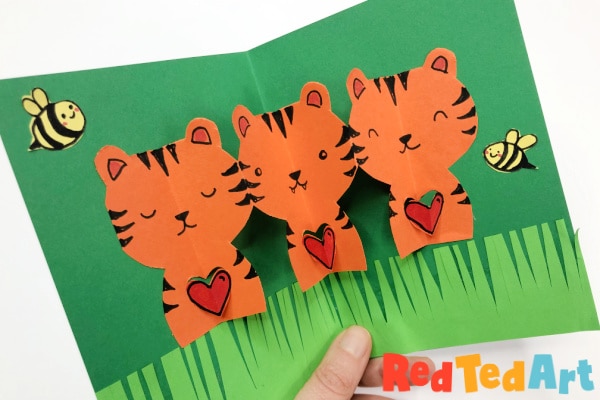
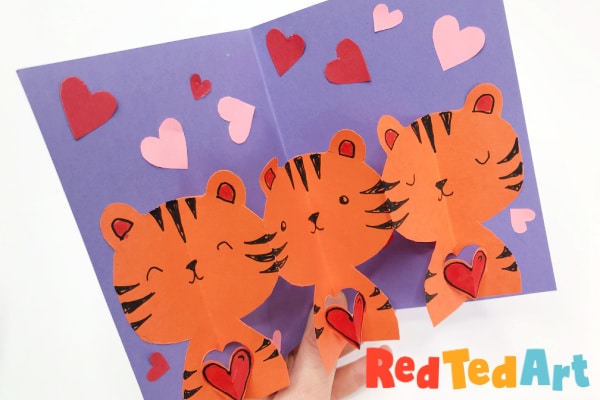
We our love for easy Pop Up Cards continues, with some super duper cute and easy Tiger Pop Up Cards for Valentine’s Day AND beyond! As we show you how to customise your cards, you can make these cute pop up Tigers all year round and to suit any occassion. I think they would make lovely Birthday Cards too, especially for anyone born in the Year of the Tiger!
This 3d Tiger Card is based on the humble paper chain. Making paper chains is a wonderful childhood “staple” that everyone should give a go. It is simply delightful to see your “half figures” turn into a chain of people or in this case tigers!
As with all paper chains, you “simply” have to be careful of which side your folds are, to ensure you end with connecting people or characters! Be sure to pay close attention.
Once you have mastered the principle of making a paper chain, it is so so easy to turn it into wonderful 3d Pop Up Cards. We have a range of 3d Pop Up Cards for you to browse here.
To make your Tiger Pop Up Card you will need:
- Card stock (we used A5 folded in half)
- Orange paper (though you can use plain paper adn colour it in)
- Scrap paper in desired colours for decorating (e.g. reds and pinks for Valentine’s, greens and yellows for birthdays or summer cards)
- Red and black pens
- Scissors
- Glue stick
How to make a Pop Up Tiger Card
As mentioned the basis of this card is a paper chain! Once you have learn to make a paper chain, this process is super quick and easy. Your child may (!) want to practice with scrap paper first. That way, they can also create a little template to make their own perfect Tiger!
Follow video tutorial on auto play or the step by step instructions below!
Folding your paper for a paper chain
Our orange paper is as wide as the greeting card when open. So in our case that is around 21cm.
Create a concertina of aprroximately 3cm folds. It doesn’t have to be super accurate. But you DO need to have a set of 6 folds in total, to make 3 tigers.
It is likely you will have a small strip left over, just trim that off.
Now take your folded paper and sketch half a tiger. Remember – the outside of the tiger should be on the side that “opens” and the “central line” of the tiger must be on the fold. Also the outside of the tiger MUST reach the edges. So if you look at my drawing it isn’t perfectly round (you can round the corners off later).
You can also add a heart shape to your tiger, like we have.
Cut your paper chain shapes
Cut out the tiger and open – did it work? Yes! Hooray.
Fold it again and cut the heart – remember not to cut the WHOLE of the heart, the sides need to remain uncut.
Onfold. Now pinch the hearts to fold into the opposite direction of the tiger body, so they pop out again.
Adding features to your tiger with pens
Time to decorate!
Add your tigers features with a black pen:
- Stripes
- Eyes
- Nose
- Mouth
- Ears
- Outside of the heart
As well as a little colour to the inside of the ear and heart in RED.
Assembling the pop up chain card
Fold your tigers back up again.
Add glue to one half of your tigers – note: do NOT add glue to the heart.
Check the position of your tigers and glue to down. The position will change a little depending on how big you made your tigers. When the card is open, you want the chain to lie flat.
Fold up your tigers again and add glue to the other half side of tiger.
Close the card and glue in place.
Open.
Your may need to “recrease” the hearts to pop, but your basic tiger pop up card is finished!
Now add any additional decorations such as hearts for Valentine’s Day Card making or grass and bees if using it for a summer Birthday Card.
You can use any cut offs to draw another tiger face.
Glue it to the corner of the front of the card – making the edges overlap.
Flip the card open and trim off the edges. Now you have the perfect tiger added to the front of the card too!
More wonderful Valentine’s Day Cards here:
More fantastic Pop Up Card Projects here:


