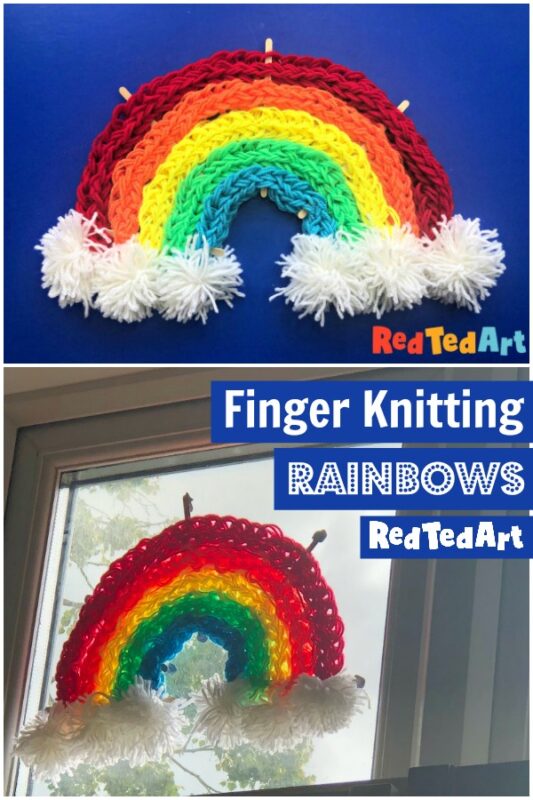
How to Finger Knit a Rainbow
We love Yarn Crafts for Kids.. and as you know we ADORE Finger Knitting for Kids and have created many projects over the years! Today’s rainbow project was sent in by a reader and I asked for permission to recreate it! Well done Eliza, aged 9!
Today we will look at How to Finger Knit Rainbows! This one takes a little longer, as you have more strands to knit and then need to connect them.. but the results are totally worth it. You will also learn how to make pom poms with your fingers!
For Finger Knitting Rainbows, you will need:

- Yarn in the desired colours. Please note: these can look great in ANY colour combination, so work with what you have and make the most of it. I used red, orange, yellow, green and blue… Thicker wool is better for this project, but you can knit with two strands of wool at once.
- White for the clouds (but they could be grey, purple, pink or blue too)
- Your fingers
- Craft sticks to give it structure/ maybe even a little glue
- Blue tak for hanging in the window

How to Finger Knit a Rainbow
Personally, I think videos are GREAT for learning how to finger knit, so would watch the instructional video. But I have taken out the key steps for you again, so you can look at it in written and picture format.
How to Finger Knit with Step by Step Photos
Time needed: 45 minutes
- Preparing your finger knitting
For this Rainbow, thick yarn or two strans of yarn are best. We will use these images from our Beanie Hat Tutorial. As they are clear and concise!
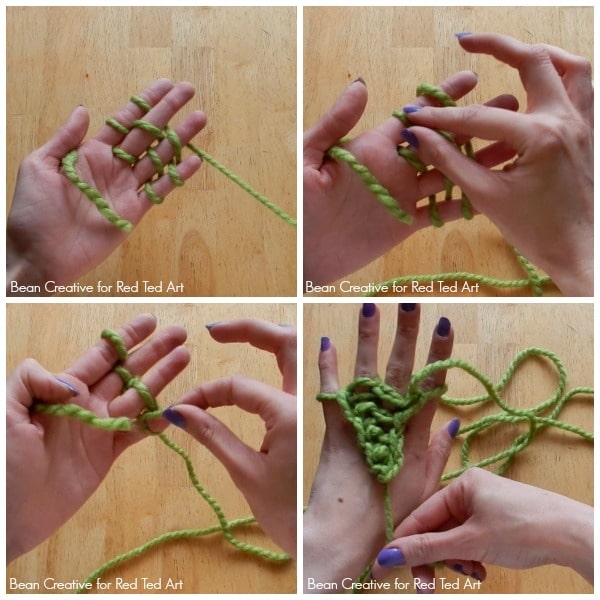
Hold the wool comfortably with your thumb.Wrap the wool behind your index finger and in front of your middle finger. Then behind your wedding finger and around your pinky. Then in front of your wedding finger, behind your middle finger and around your index finger.
You need to do it again. Wrap the wool in front of your middle finger. Behind your index finger. Then around your pinky. In front of your wedding finger, behind your middle finger and then around your index finger. So you have two loops on each finger. - Creating your finger knitting stitches
Now you need to pull the bottom loop up and over the top loop. On all fingers So you’re left with one loop on each finger. Then start again. Keep repeating these steps until you have a long enough piece. Long enough to wrap around your head. - Make Your Rainbow
Once you have the basics of Finger Knitting mastered, make your different coloured strands. These are the sizes I went for:
Red – 49cm
Orange – 46cm
Yellow – 40cm
Green – 36cm
Blue – 30cm
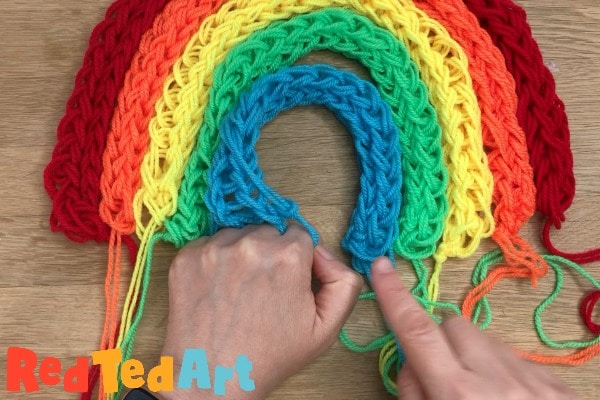
But you can also measure you knitting as you go along and see that each starnds fits “inside” the next as per the image.
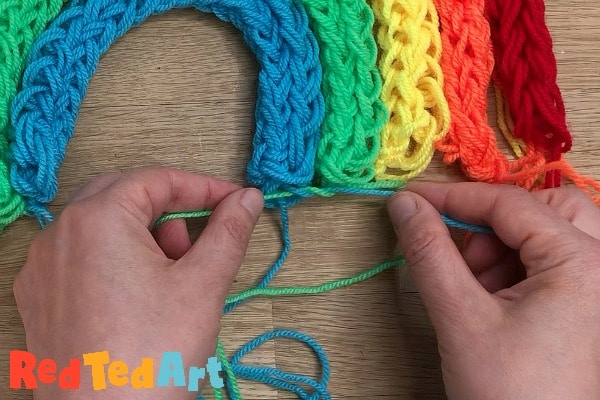
- Knotting the knitting together
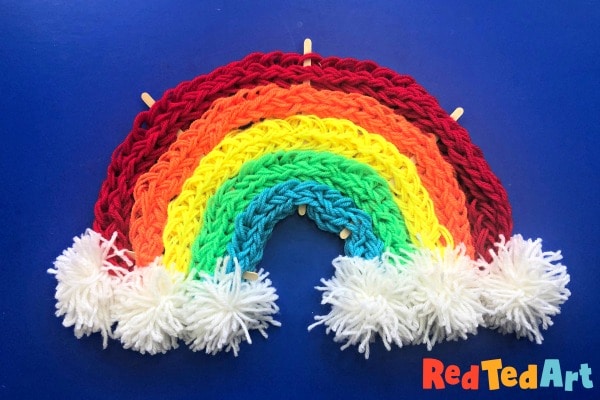
Layout your rainbow in the correct order and shape.
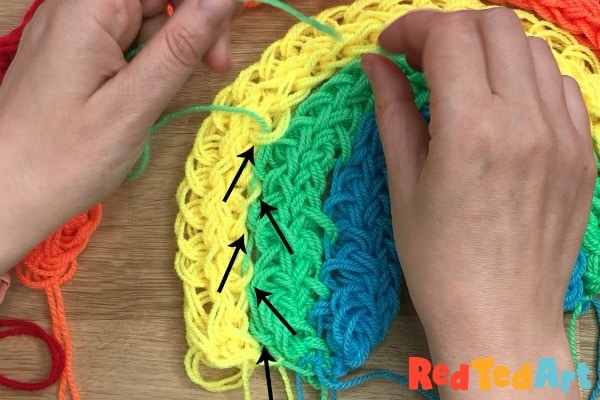
Tie the two strands next to each together with the tangling strands of wool. - You now need to connect your finger knitting strands
If you only used one strand of wool (instead of two per knitte colour), you may need to cut some extra threads, loop through the bottom of your knitting and tie with the next one.
Use remaining strands to “running stitch” your two strands together. The video shows you how. - Shaping your Finger Knit Rainbow
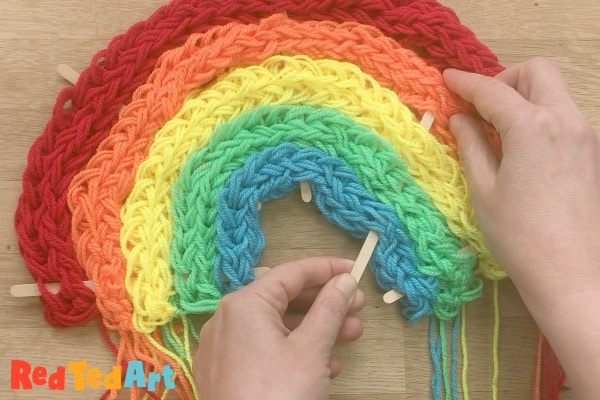
Though the basic shape is there, when you hang your rainbow at this point it will look a little loose.
I threaded throw 5 ice lolly sticks to help keep give it shape. If you wish, you can tab a little glue on these once in place, to help secure them in place.
Keep ends sticking out, as these are perfect for some blu tak when securing to a window or door. - Make some finger pom pom clouds.
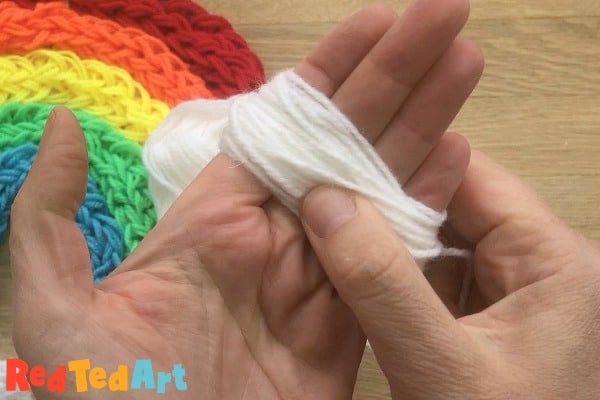
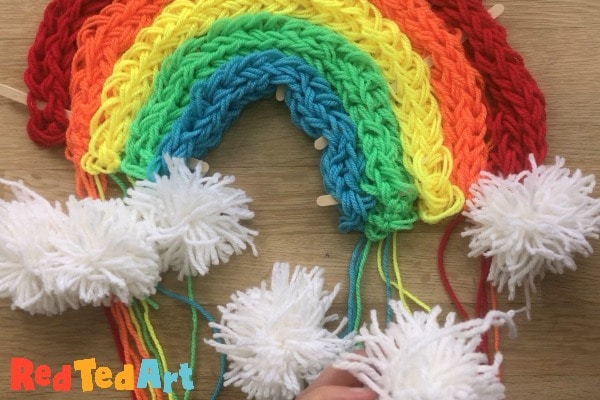
You will now need 6 cloud pom poms.
You can make these using your fingers too (we have more pom pom making techniques here).
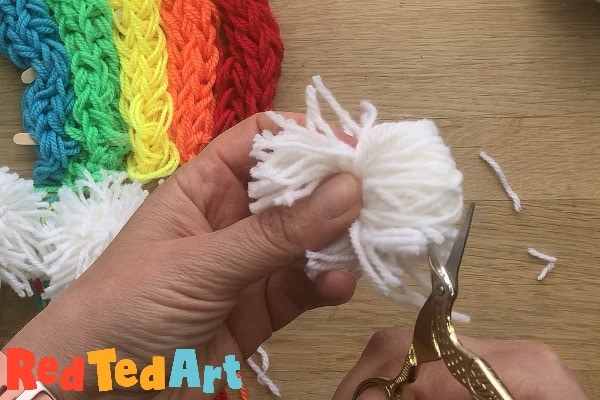
Wrap some wool around your four fingers. -
Carefully easy off. And secure with some additional wool.
-
Cut the ends open.
-
For the pom pom clouds, I don’t think you need to shape the pom pom. It looks a little “rough” but I think it works well for these finger knit rainbows.
- Secure the pom pom clouds to the finger knit rainbow
Use the pom pom string to tie to the rainbow.
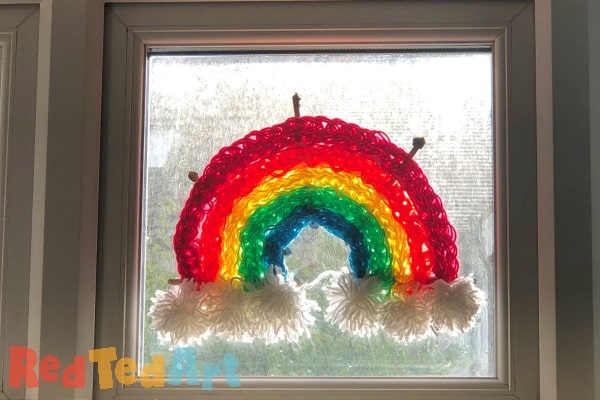
- Hang your finger knitted rainbows in your window
We did this by adding blue tak to the ice lolly sticks and securing to the window. Every so often we need to resecure them.
The rainbows look amazing when the sun shines through! -


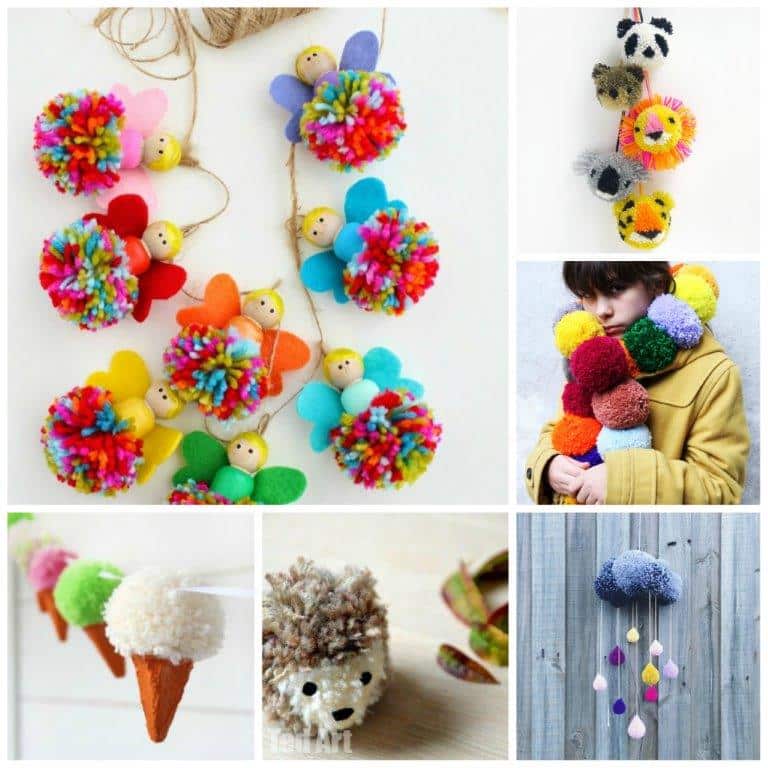
I hope you enjoyed this Finger Knitting Project!! We have more Finger Knitting ideas for you here:

And more Pom Pom Project Ideas here: