
How to Make Paper Clay – 8 Steps with Pictures
We love working with papier mache and upcycled newspapers. Paper Clay though technically a papier mache is a different Paper Mache Technique and super fun to work with. Paper clay is great for Pulpart Projects. Today, learn how to make paper clay with our 8 steps – pictures included!
How to make paper clay
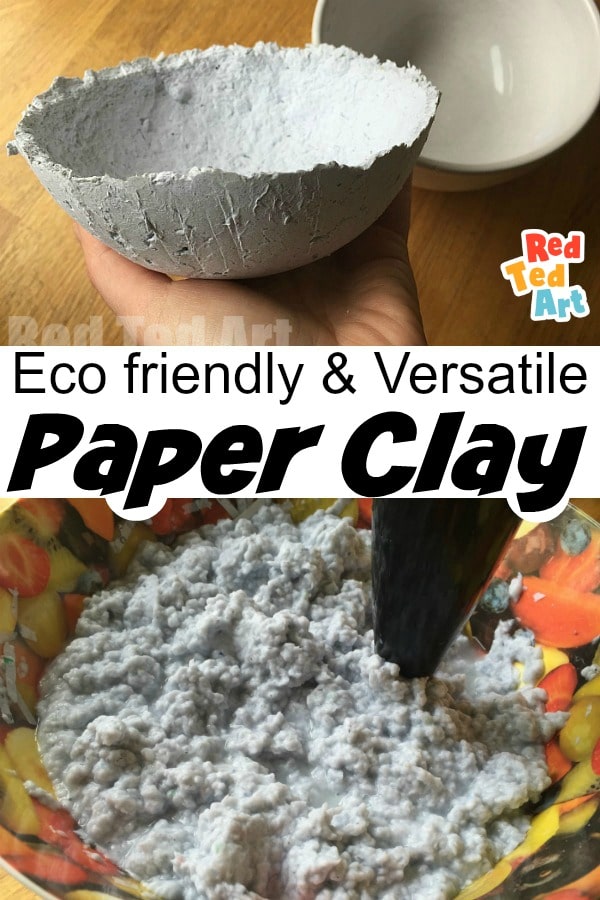
Homemade Paper Clay uses the same ingredients as a papier mache paste recipe, but you will need a blender as well! For a “whiter” clay finish, you can also use toilet paper and glue. But I prefer the shredded paper version as it is more eco friendly.
Did you know that shredded paper can NOT be recycled? Most paper recycling plants can’t “handle” shredded paper as it is too small or clogs up the machines. So these shredded paper uses are great for eco friendly person!
DIY Paper Clay video
You can either watch out paper clay video tutorial or follow the step by step photo directions! Paper clay, is basically paper mache clay – as you are combining paper with a strong good quality paper mache glue!
How to make paper clay: Step by Step Photo Directions
Step 1 DIY Paper Clay – Gather your suppliers
- shredded paper or newspaper cut into pieces
- large bowl
- hot water
- flour – 1 part flour to 4 parts pulp
- salt
- a hand blender or mixer
Step 2 Make Shredded Paper or cut up newspapers

Begin by shredding all your paper. Using stredded paper is a wonderful upcycling technique. Did you know that many recycling plant can NOT process shredded paper? It falls through the machinery gaps and clogs it up. So if you have paper to shredd.. this is a great way to use it up. We have more great shredded paper uses for you to explore as well!

Step 3 Fill a Bowl with Paper & Hot Water

Mix the water and shredded paper up throughly and make sure it is fully covered and able to saturate the shredded paper.
Step 4 Leave overnight (or for a few hours)
Your mixture won’t look much different the next day.. but the paper should now be softer and ready for hand blending!
Step 5 Blend with a hand blender or similar

A hand blender is great or you can use an electrix mixer as well. Please ask for permission first and also make sure it doesn’t overheat! Pulp up the paper with the blender until it is broken down completely.
Step 6 Squeeze out excess water
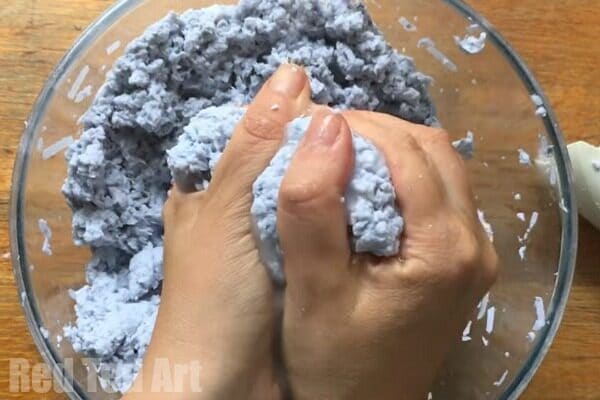
Step 7 Add some flour and salt to your paper pulp mixture

Step 8 Storing your paper clay – use an air tight container
This will store in an air tight container in the fridge for 2-3 weeks.
NOTE: because we use flour and not glue, their is a unique smell to this DIY paper clay. But it is an organic, natural smell.. once you have painted your work and once it is fully dry it will pass. You CAN use glue as mentioned… however, the natural aspect is SO much better!
DIY Paper Clay Video Tutorial
Watch our simple and oh so easy to follow How to make Paper Clay video tutorial. As mentioned previosuly we prefer our method of using shredded paper and flour (vs toilet paper and glue) as it is true upcycling and eco friendly (flour is better than glue for the environment!).
We have used this paper clay to make:
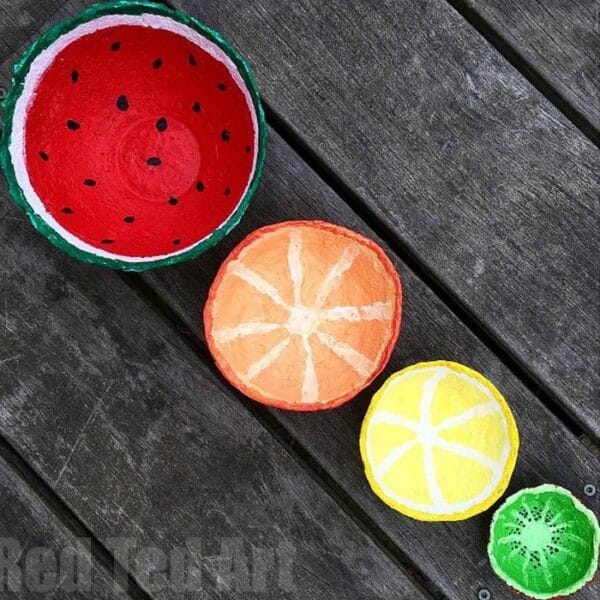
Fruity Summer Bowls – great for young kids as they only need to mould the pulp into a bowl!

Fun Paper Clay Pencil Toppers.
We have so many more fabulous Papier Mache Techniques for you to explore and be inspired by!

More ideas for Shredded Paper: