Red Ted Art - Make crafting with kids easy & fun

Cute & Easy Crafts for Kids

  • Home
  • START HERE
  • Preschool Crafts
  • Easy Crafts for Kids
  • Paper Crafts
  • Free Printables
  • About
  • Join Our Newsletter
  • Cookies, Privacy Policies & Disclosure

Kids Get Crafty – Christmas Baubles

December 15, 2010

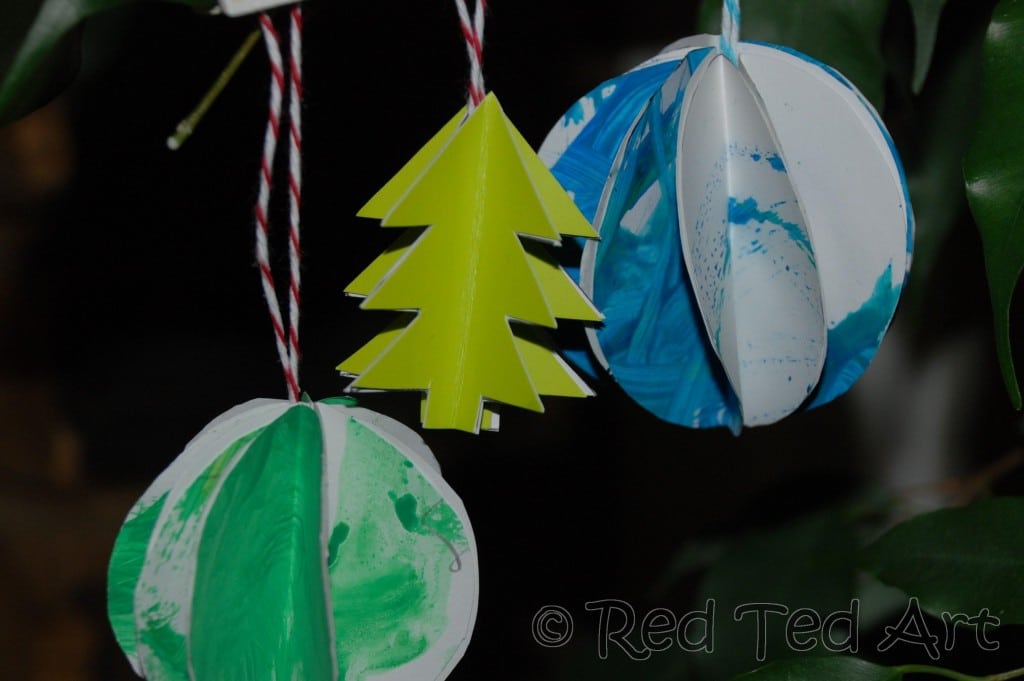
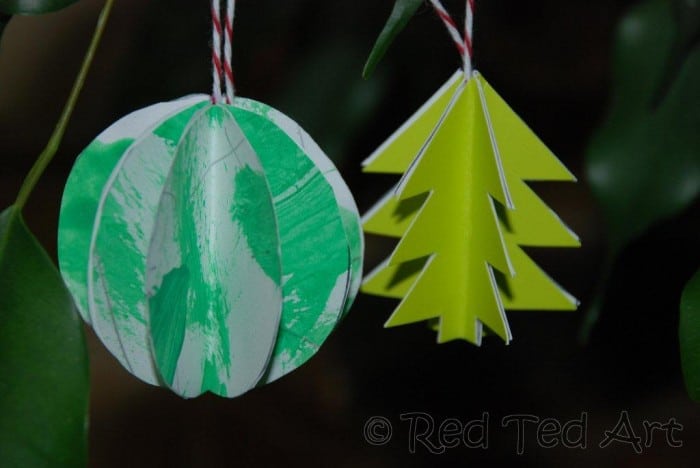
Red Ted and I got all Christmas crafty again this week – we love DIY Christmas Ornaments. Well, we are in the middle of advent and I find that Christmas is a really special time of year to craft together. I love our little craft today, as it is another great way to “use kid’s art” and make something with it. We made these paper Christmas baubles. Red Ted not only enjoyed painting, he also enjoyed the sticking. Of course I had to help him.. but read on for how we fared.

Check out our Photo Bauble Post, using the same technique!

paper bauble YT

UPDATE: {a few years later} and we have another go at them!

These ornaments feature in our new Christmas Ornament Book. 30 of our favourite ornaments brought together in one place. Sorted by age. Each craft is shared on one page – making the perfect worksheet print outs. Lovely to have them all in one place too!
christmas-ornaments-3d-images-1a

Only $7.99

Get yours today and keep it forever!

The Book

The Wise Men's Christmas (Bauble Books)The Wise Men’s Christmas (Bauble Books)

This a little book that will be going into Red Ted’s Christmas stocking – it is a story AND a bauble in one! I know, it is a little cheesy, but that is what stockings are for! This little book tells the story from the point of view of the 3 wise men. There are 3 others in the series (Joseph’s, Mary’s and the Shepard’s). It is not a well known fact that I am actually half Spanish and in Spain, traditionally, the gifts are brought on the 6th January by the 3 Wise Men (think about it, it makes sense!). For this reason, I thought it would be nice to have a little book that focusses on the 3 Wise Men. It’s very sweet.

How to Make Paper Baubles (Video)

How to Make Paper Baubles (step by step photos)

The craft, I believe is really easy and quite effective.

Materials: Paper, paint, ribbon, scissors, glue

christmas bauble craft

1) Do some painting or drawing. I findthe stiffer the paper the better these work

christmas bauble craft

2) Cut out 8-10 circle. You need to cut these as perfectly as possible for the finished effect to be at its best. We used a small cup to trace the circles

christmas bauble craft

3) Fold circles in half. Make a good crease.

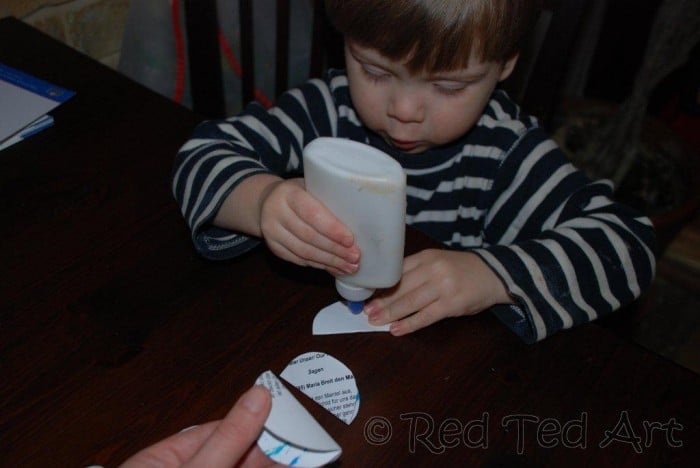
4) Stick the left side one to the right side of the other. I found that if I held them for Red Ted he could do all the sticking. When you get to the last one, add the ribbon. Then glue the first circle to the last

paper bauble how to

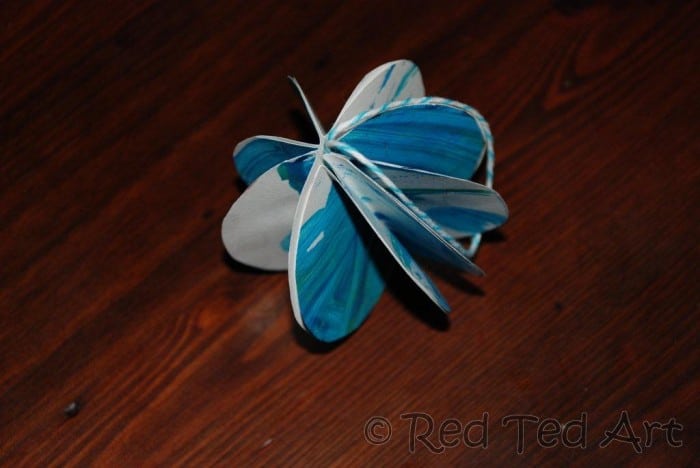
5) Even them all out a bit, if necessary add a tiny bit more glue and done!

christmas bauble craft

These make lovely gifts for family too. Add a little note in the corner saying which child made it, what year and what age…

The tree was made on the same principle – but with thicker card and only 5 sides.

Happy Paper Bauble Crafting!!

Here are some more fun Christmas Ornaments Crafts, as well as yet MORE Christmas Ornaments for Kids

This paper bauble technique.. can be adapted into all sorts of fabulous season “baubles” – do check out the following:

  • 3d Paper Heart Ornaments
  • 3D Paper Flamingo Decorations
  • 3D Paper Spider Decorations (just so cute!)
  • 3D Paper Chicks
  • 3D Paper Bunnies
  • Adorable 3D Paper Snowman Ornaments

«
»

Filed Under: Christmas, Kids Craft 59 Comments

Comments

  1. Beckickles says

    December 15, 2010 at 8:49 am

    Another great craft idea. Just where do you get them all from!

    I’ll try this with Kidder for our tree 🙂

    Becca xx

    Reply
  2. fabmums says

    December 15, 2010 at 8:59 am

    It looks like you had a lot of fun with this craft and cute result too!

    Reply
  3. maryanne says

    December 15, 2010 at 11:17 am

    Good thinking to paint first and THEN cut! I tried this with stars, but cut out the stars first. My kids would only color one side of the stars, and would NOT under any circumstances let me turn them into 3D ornaments!

    Reply
  4. Jill says

    December 15, 2010 at 11:30 am

    Thanks for the sweet comments on my blog Maggy! I’m so happy you stopped by because know I found another awesome link up and blog to follow. I can’t wait to see all the great crafty ideas.

    Jill

    Reply
  5. Melody says

    December 15, 2010 at 11:59 am

    I love that you have crafty boys. I have one of my own and these look like projects that would thrill him for hours. Thanks for sharing!

    Reply
  6. adele- monkeying around says

    December 15, 2010 at 12:22 pm

    I love the idea of these very different and there are so many colourful possiblities. Thank you for linking up
    Adele
    http://www.monkeyingaround1.blogspot.com
    x x x

    Reply
  7. KJ says

    December 15, 2010 at 12:23 pm

    Thanks for coming by my blog and the invite to link up!!

    Reply
  8. Susana says

    December 15, 2010 at 1:49 pm

    These ornaments turned out great! I like the idea of painting and then cutting!!

    Reply
  9. Polly @ Helping Little Hands says

    December 15, 2010 at 3:40 pm

    Thanks for the invite! I love your baubles, and we’ll be doing that candy cane mouse idea that’s linked up.

    Reply
    • Red Ted Art says

      December 15, 2010 at 3:48 pm

      Polly – yes, I love the candy mice too – they are just too cute!

      Reply
  10. Red Ted Art says

    December 15, 2010 at 3:47 pm

    Mary-Anne oh I like the idea of stars!

    Adele – yes, def great that you have so many “colour choices” with this craft!

    KJ – so pleased to see you!

    Meldoy – definitely nice to have crafty boys!!! So much fun!

    Thank you all for your lovely comments!

    Maggy

    Reply
  11. Anel says

    December 15, 2010 at 5:05 pm

    Maggy,
    thanks for inviting me to link up here and thank you for your comment. I will continue visiting your blog =)

    Reply
    • Red Ted Art says

      December 15, 2010 at 6:11 pm

      Anel – so great that you popped over! Look forward to reading more of your blog too!

      Reply
  12. Little Wonders' Days says

    December 15, 2010 at 6:16 pm

    Cute baubles! Looks like a fun time too.

    Reply
  13. JDaniel4's Mom says

    December 15, 2010 at 7:34 pm

    I love your ornaments. The 3-D effect is really fun! The book looks great. JDaniel got a few of these during the book swap and loves them.

    Reply
  14. Deb Chitwood @ Living Montessori Now says

    December 15, 2010 at 9:06 pm

    Thanks for hosting the link-up! I love the photos of Red Ted putting together his 3-D ornaments – what adorable expressions!

    Reply
  15. Ali at Green Baby says

    December 15, 2010 at 10:33 pm

    Maggy,
    so simple…and really easy to make! I love this… will get my boys on the case this weekend, they’ll love it!
    Another cracking idea from @redtedart eh?

    Ali
    x

    Reply
    • Red Ted Art says

      December 16, 2010 at 8:29 am

      Ali – I can’t take credit – crafts from my childhood revisited!!!

      Reply
  16. CraftyMummy says

    December 16, 2010 at 3:31 am

    Thanks for linking your craft to my link up! Very easy for kids!

    Maybe some of your readers would like to link up too!

    Reply
  17. Discovering Montessori says

    December 16, 2010 at 1:10 pm

    Nice! Thank you for the tutorial, I always wondered how these were made. Sounds like a very good book. Thank you for sharing.

    Reply
  18. Janelle says

    December 16, 2010 at 5:18 pm

    I have plans to make similar circle ornaments and use them to help my daughter remember the verses to a couple of carols.

    Reply
  19. SnoopyGirl says

    December 16, 2010 at 5:29 pm

    What a fun craft. I have done this one using recycled Christmas cards. Thanks for sharing!

    Reply
  20. Sara @ Mom Endeavors says

    December 16, 2010 at 8:30 pm

    Thanks so much for stopping by Mom Endeavors and inviting me to link up! 🙂

    Reply
  21. amy@flexible dreams says

    December 16, 2010 at 9:21 pm

    Thanks for the comment and direction over to your blog party. I’m excited to read through the links here!!

    Reply
  22. Kayte @ Bits & Bobbish says

    December 17, 2010 at 3:08 am

    This was such a great idea. I will have to try it.

    Reply
  23. Hootin' Anni says

    December 17, 2010 at 10:04 am

    I’m here from Show n Tell, and I must say I really enjoyed viewing all the kids’ crafts!!! Darling.

    My Show n Tell Link – A Jim Shore Find

    Do stop by and say ‘hi’ if you can find time. Have a great week ahead.

    Reply
    • Red Ted Art says

      December 17, 2010 at 10:25 am

      Fabulous and have hopped over your way too!

      Reply
  24. adele- monkeying around says

    December 17, 2010 at 10:56 am

    hi maggy for some reasonthe wrong pic came up on my last post I have added. I can not believe the amount of enteries you have had added this week well done! We are very quiet this week with only 3 :0(

    Adele x x x

    Reply
  25. Red Ted Art says

    December 17, 2010 at 11:01 am

    Let me know if you want to relink up and get me to delete the “wrong” one. And thank, yes, there are some lovely crafts this week – it must be the season to be crafty!!!!

    Reply
  26. Jennifer @ Life with the Lebedas says

    December 17, 2010 at 2:48 pm

    Love that it’s something fun for the kids to do! Thanks for sharing & linking up! He looks like he had a good time! Glue is always fun for kids.

    Thank You & Have a Blessed Christmas!

    Reply
  27. mermaid says

    December 18, 2010 at 1:23 pm

    Love them too. So simple and cute. I made couple using mu daughter`s photograph last year.

    Reply
  28. Jenny says

    December 18, 2010 at 1:54 pm

    I love finding uses for kids’ random paintings. These look fun, and I especially love that they would fit the “style” of our tree. I also really like the idea of the books told by different viewpoints.

    Reply
  29. Red Ted Art says

    December 18, 2010 at 2:02 pm

    Mermaid – oh photos is a great way of making these. Lovely idea!
    Jenny – tanks for stopping by! And if you do get to make some, do send us a pic!!! Love seeing everyones craftiness!

    Reply
  30. Red Ted Art says

    December 18, 2010 at 2:02 pm

    Mermaid – oh photos is a great way of making these. Lovely idea!
    Jenny – thanks for stopping by! And if you do get to make some, do send us a pic!!! Love seeing everyones craftiness!

    Reply
  31. Almost Unschoolers says

    December 19, 2010 at 12:03 am

    He did such a nice job on his ornaments!

    Reply
  32. Beth@ Wiccan Make Some Too says

    December 19, 2010 at 3:40 pm

    Thanks for the invitation to your party! Great stuff going on here. I am now following your blog & am eager to see awesome things happen next.

    Reply
  33. Amie Irwin says

    December 20, 2010 at 12:50 pm

    Thanks sooo much for the invite! I linked up! All of these are sooo cute.. I may have to “borrow” some to do with my kids!

    Reply
  34. Kim says

    December 20, 2010 at 1:09 pm

    Hi, thanks for stopping by my blog and the invitation to join the link up…such cute stuff here! 🙂

    Reply
  35. April says

    December 20, 2010 at 8:11 pm

    These look like fun! I love the paint first cut later idea it seems like it would be so much easier for the kids. Come link up to my Sew Crafty party…

    http://wildflowersandwhimsy.blogspot.com/2010/12/startin-early-for-orphaned-no-more.html

    Reply
  36. Elizabeth @ Ucreate with Kids says

    December 21, 2010 at 4:29 am

    I’ve happened upon this site before, but had forgotten about it. Thanks for reminding me! Love all your fun kid’s crafts! Maybe after the holidays I’ll join in on the linky fun! 🙂

    Reply
  37. Candace @ NaturallyEducational says

    December 13, 2011 at 6:38 pm

    Very cute! I had been planning on making paper balls like these–first I was going to make them out of orange paper for pumpkins or red paper for pumpkins and then I wanted to make them for Christmas ornaments but I never get around to cutting the circles!

    Reply
  38. Georgina says

    January 18, 2013 at 2:51 pm

    Hi Maggy,

    Just to let you know that I have linked to this post at my new blog, here:
    http://craftulate.blogspot.com/2013/01/baubles-made-from-childs-artwork.html

    I’ve also used one of your crafty badges – thanks!

    Georgina @ Craftulate

    Reply
  39. Adele- playfullearners says

    February 27, 2013 at 3:47 pm

    I love the photo idea. Iw would make great presents for grandparents

    Reply
  40. Ness @ One Perfect Day says

    March 6, 2013 at 10:51 am

    These are brilliant! I’m pinning this for later in the year (and I *really* need to order a copy of your book!)

    Reply
  41. Red Ted Art says

    March 6, 2013 at 10:58 am

    Ooooh yes, Ness, PLEASE do!! 🙂

    Reply
  42. plasterer bristol says

    December 5, 2016 at 3:06 pm

    great fun for the kids, really got involved with this…especially when the glitter came out

    Reply

Trackbacks

  1. 2011 Advent Calendar Activity List | lovenotesmama says:
    December 1, 2011 at 2:29 am

    […] Make a Christmas bauble […]

    Reply
  2. Red Ted Art's Blog » Blog Archive » Photo Christmas Baubles says:
    December 8, 2011 at 12:24 pm

    […] a Christmas Craft VLOG – how to make Photo Christmas Baubles… remember the kid’s art paper baubles from last year? Well this year, thanks to the clever peeps at Kodak, I am making some Photo […]

    Reply
  3. 30 Homemade Ornaments for the Kids | hands on : as we grow says:
    April 20, 2012 at 11:36 pm

    […] by the kids :Beaded Snowflake:School Time AdventuresStained Glass Gingerbread:NurtureStorePaper Baubles:Red Ted ArtSalt Dough Trees:The Imagination TreeGlittery Pine Cones:Mom SpottedBeaded Star:Mrs. […]

    Reply
  4. Festive Friday – 8 Sleeps To Go! - thinlyspread.co.uk | thinlyspread.co.uk says:
    April 30, 2012 at 2:46 pm

    […] 1. Convert Kids Art Into Baubles – Red Ted Art […]

    Reply
  5. DIY Christmas Ornaments | says:
    August 18, 2012 at 4:43 pm

    […] #6: Wooden Block Ornaments @ Possible [present for Grandma?!] #7: 3D paper Ornaments @ Red Ted […]

    Reply
  6. Monster Craft Ideas to make from your Kids’ Art | Kids Chaos says:
    February 26, 2013 at 10:46 pm

    […] then we had a google hangout hosted by Maggy at RedTedArt who talked about ideas for making Easter decorations to hang from her Easter Tree (as featured in her new […]

    Reply
  7. Glass Paint Jars – Kids Art Keepsakes | Zing Zing Tree says:
    March 3, 2013 at 11:03 am

    […] Ted Art – Paper Baubles, Playful learners – Artwork Bunting, PLus 2.4 – Pillow case Art work, Kids Chaos […]

    Reply
  8. 2011 Activity Advent Countdown says:
    October 30, 2013 at 6:54 pm

    […] down) 7.       7. Christmas Lights Coloring 8.       8. Marshmallow Trees 9. Make a Christmas Bauble Ornament          10. Christmas Alphabet Game          11. Cone Christmas Tree Craft […]

    Reply
  9. Craftulate: Bauble made from Child's Artwork | Craftulate says:
    November 11, 2013 at 4:20 am

    […] is a great idea from the fabulous Red Ted Art – turn your child’s paintings, drawings or crayon scribbles into baubles! This craft is […]

    Reply
  10. Christmas Ornament Craft says:
    November 30, 2013 at 3:20 pm

    […] 9 – Activity Advent Countdown This Bauble Ornament tutorial can be found at Red Ted Art. She even makes a Christmas tree shaped one. B had a hard time putting this ornament together so […]

    Reply
  11. 30 Homemade Ornaments for the Kids | Dorcreek DIY says:
    November 30, 2013 at 4:20 pm

    […] Paper Baubles: Red Ted Art […]

    Reply
  12. 6 frugal christmas decorating and craft ideas I want to try | A Life in Balance says:
    December 6, 2013 at 1:36 pm

    […] Christmas Paper Baubles from Red Ted Art – With paper showing up again on my crafting list, yes, I like working with paper. The kids love the paper trees we made thanks to Making Lemonade. These paper baubles are similar and perfect for the bits of leftover wrapping paper that I hate to throw away. […]

    Reply
  13. Christmas Tree and Advent 2013 | Suzy Homeschooler says:
    December 9, 2013 at 6:12 pm

    […] books out of her reach. The ornaments were made using two tutorials. The first can be found at Red Ted Art the second can be found at Things to Make and Do. We also made some classic paper airplanes out of […]

    Reply

Leave a Reply Cancel reply

Your email address will not be published. Required fields are marked *

Recipe Rating


Welcome!

Welcome

Hello! I am Maggy and I love all things crafty and sharing my craft ideas and how tos.

The aim of this site is to provide easy, do-able and fun crafts for all ages.

Categories

Archives

Crafty Blogs

Copyright © 2022 · Website Design By Jumping Jax Designs