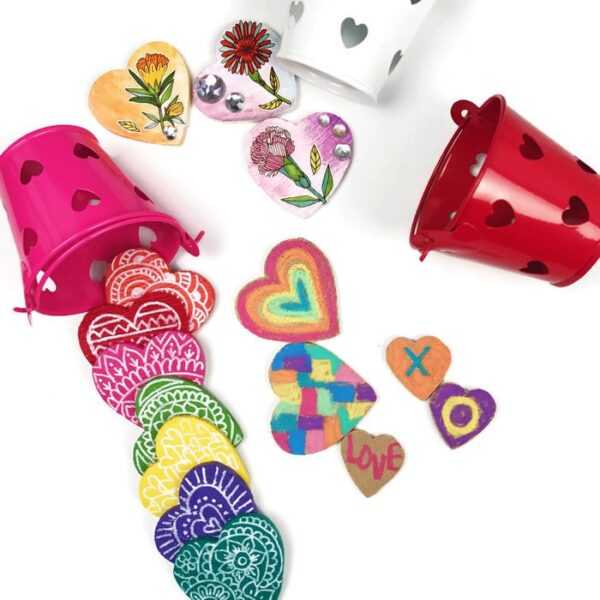
Rainbow Heart Magnets
Sam from Thrive 360 Living shares with us beautiful Valentine Decorations which also make lovely Valentines Gifts or even Mother’s Day Gift Ideas. Not only are these DIY Heart Magnets simply GORGEOUS, BUT Sam shows us 3 different ways to decorate them. Wonderful. We have more wonderful 31 Days of Love Guest Posts grouped into these themes for you to browse – Valentine Craft Ideas for Preschoolers, Valentine Day Treats, Valentines Science Ideas and Valentine Cards for Kids too! Over to Sam!
Sam here from Thrive 360 Living! If you visit my Instagram page you’ll find I’m not only a fan of rainbows, but I love doodling and creating on surfaces beyond just paper. I’m excited to show you some fun ways to decorate on wood for Valentine’s Day, and the best part is that these same decorating techniques can also be used on rocks, leaves and, of course, paper.
How to Make Wooden Heart Magnets
Supplies you’ll need no matter which technique you choose
Affiliate links added for convenience
- Wood hearts. I got mine from Michaels but you can also find them here: US/ UK
- Matte or gloss sealant – I prefer this matte sealant – US/ UK.
- Magnets. Your magnet size might change depending upon the size of your heart (US/ UK)
- E600 glue. My favorite and extremely durable glue. US/ UK
Technique 1: Acrylic paint & paint pen heart magnets
Supplies:
- Colored acrylic paint. My favorite acrylic paints are Martha Stewart Living acrylic paints (For UK, these are great).
- Paint pen. I used an extra fine white posca paint pen – US/ UK.
Directions:
- Start by painting your heart with two layers of acrylic paint. If you’re making a magnet, you really only have to paint one side.
- Once the paint is completely dry, use your white paint pen and draw a design.
- Spray a sealant on your finished heart.
- Using your E600 glue, adhere a magnet to the back of each heart.
Technique 2: Watercolor & sticker heart magnets
Supplies:
- White acrylic paint (for UK readers – use this paint)
- Watercolors – I used my favorite OOLY Lil’ Watercolor Paint Pods set because I love the color variety. (US/ UK)
- Stickers – I used these OOLY flower stickers. I also love their city themed stickers too.
- Mod Podge. (US/ UK)
- Rhinestones (optional).
Directions:
- Cover your heart completely with two layers of white acrylic paint and let dry completely.
- Apply your watercolors over the white paint and let dry.
- Add your sticker(s). And apply a layer of mod podge over the entire heart to ensure the sticker is adhered.
- Spray with a sealant to keep your designs from fading or chipping.
- For additional sparkle, glue on mini rhinestones (optional).
- Using your E600 glue, adhere a magnet to the back of each heart.
Technique 3: Chalk crayon heart magnets
Supplies:
- Chalk Crayons – These Chalk-o-Rama chalk crayons by OOLY might be one of my favorite art supplies currently. You can use them on just about anything. US/ UK
Directions:
- Using your chalk crayons, draw a design directly onto each wooden heart.
- Spray with a sealant to keep the chalk from rubbing off.
- Using your E600 glue, adhere a magnet to the back of each heart.
Once your heart magnets are complete you can package them up in little tin pails or put them in a decorative box. They are sure to sweeten anyone’s day and they would make a fabulous Valentine’s gift.
If you’re looking for some other fun and colorful crafting ideas, check out these posts:
- Tips & Techniques for Drawing on Rocks
- 4 Simple Ways to make Incredible Art on Leaves
- How to Create an Art and Crafting Space for Kids
There are also many more wonderful Valentines Decorating Ideas for kids to make here –
Enjoy your DIY Rainbow Heart Magnets!


