
Recycled Crayons: Valentine’s Gifts for Kids
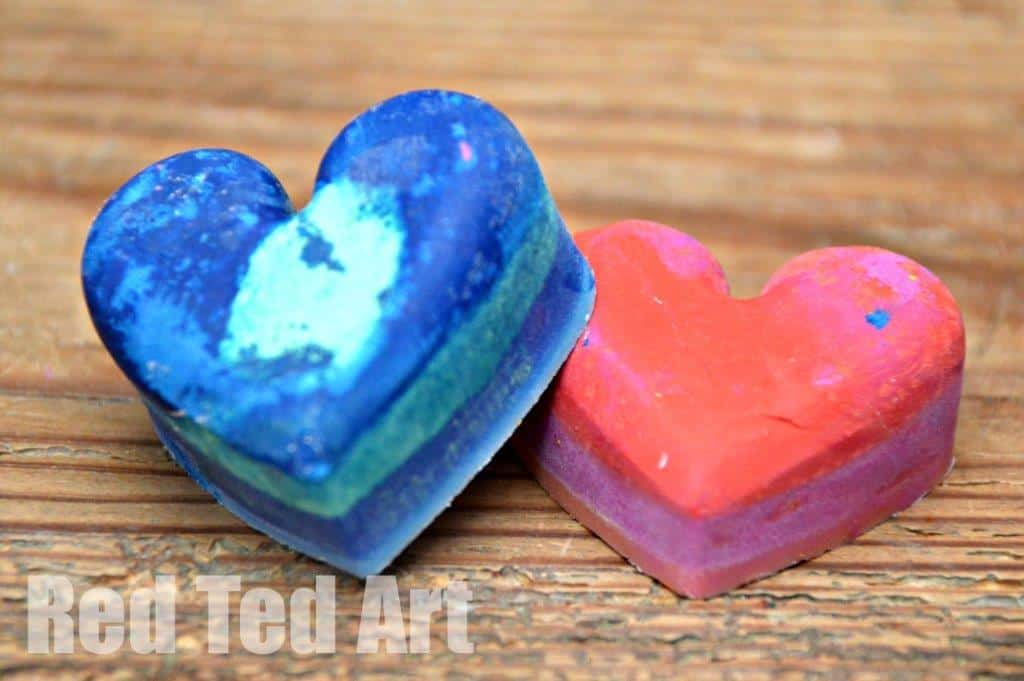
After the success of our Christmas Stars Gift that the kids made for their friends, they wanted another go this Valentine’s… well that was easy enough, we hadn’t used any of the other colours – so plenty of Crayons left to recycle. This is a great easy heart craft for kids! We made a mix of colours this time – blues, greens, reds, oranges etc. Whatever colour took the kids fancy – and created our Recycled Crayons for Valentines. Another lovely gift for kids to make!
(Nun auch auf Deutsch: Waxmalkreideformen!)
So.. as before:
Recycled Crayons Materials:
* Old crayons
* A heat proof silicon mold (in our case star shaped)
* Knife for cutting & oven for heating
Recycled Crayons How To:
Let’s start with top tips –
* Take care when “mixing colours”, crayons are not made from “pure colours” (i.e. red is not JUST red), so normal colour theory does not a applu (a blue and a yellow, may result in a brownish green)
* Personally, I would say, stick to pure colours (e.g. just yellow) or “adjacent colours” – e.g. red and orange, orange and yellow, yellow and green, green and blue etc – the crayon is likely to mix a little
* Caryons are made from different materials – some will melt better than others. You will also find, that some crayons will “separate out” into different layers that they are made up of – I like to give them a good stir at the end, to get those layers “back together again” and the resulting crayon working better. That is why not mixing too many colours is best!
* To clean your silicon tray – I found dish soap with boiling water good and then wiping it immediately with some paper Kitchen Towels. Repeat 2-3 times.
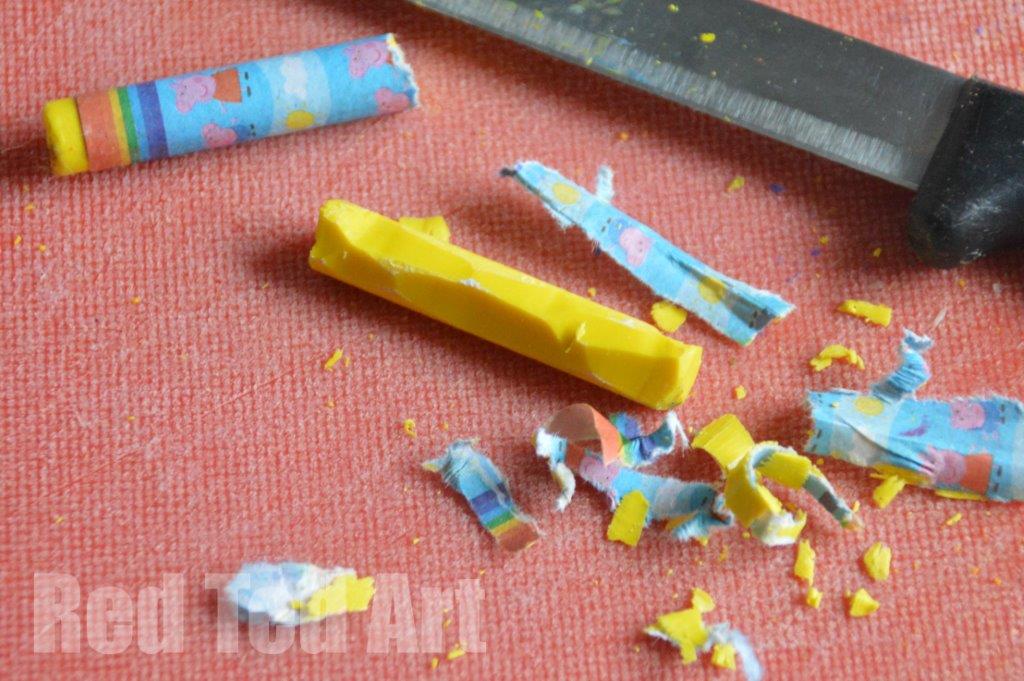
1) Strip your crayons of all paper – we found “peeling” them like a carrot with a knife worked best. If your crayon is VERY DIRTY looking, I recommend taking that top dirty layer off too – you don’t want the dirty inside your brand new crayon!

2) Fill your silicon trays – try and pack them as best as possible.
3) Place in the oven and heat to 100C. Keep checking. Once you can see they have all melted remove the silicon tray and let cool.
4) At this point I like to give them a quick stir with a toothpick. If you have mixed colours, don’t be too vigorous at this point.
5) Once fully cooled turn out! And ta da! I do quite like the layering of the colours in these!!
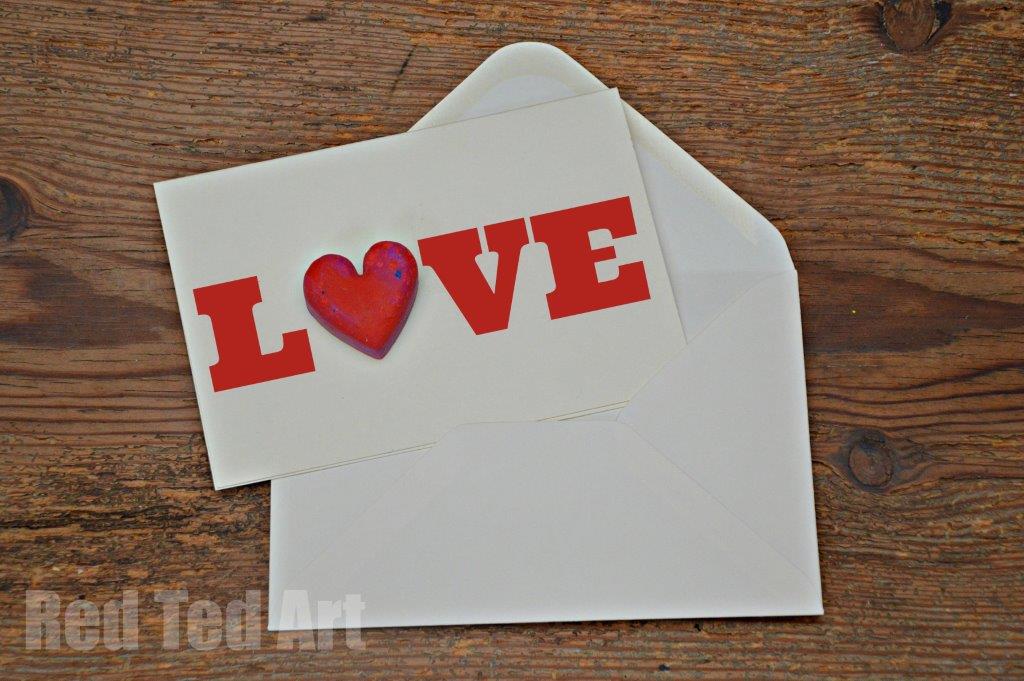
This time we used our recycled crayons to make some Valentine’s Cards too. We cut out letters and stuck them on a card with our Recycled Crayon Hearts. Don’t they look just lovely? Perfect.
You could also make a small bag of these crayons and give the bag as a gift – great as a “Sibling to Sibling” gift or if you have friends with younger children than you own.
More wonderful and Easy Heart Crafts here (in fact 101 and more hearts!!)

More great Valentines Day Crafts for Kids:
