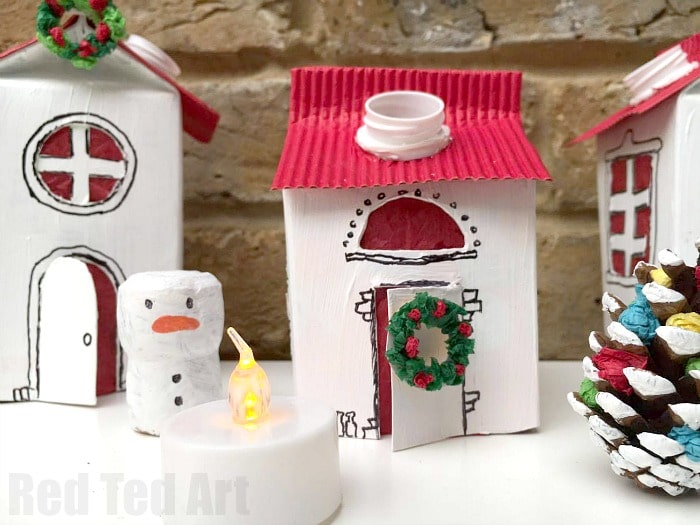
Recycled DIY Winter Village Luminaries
Yep… it is that time of year again – time to make some lovely little luminaries. As Christmas approaches, we love the idea of a little DIY Winter Village Luminary set. We used some old Juice Cartons and upcycled them into this fabulously cute Juice Carton DIY. You can use any sort of tetra pack for this – whether you are using and upcycling milk cartons of juice cartons. It doesn’t matter. But it is nice to find a carton that has that trianglur pointy top, to give it that juice carton house feel. I hope you like our Winter Village luminaries too (a perfect Christmas Craft for kids)! The best bit about this DIY, is that you can add as much detail or as little as you wish. Just have fun and keep adding lots of little DIYs over the Christmas and Winter season. Perfect for brightening up the place not just at Christmas, but throughout the boring months of January and February too!

First shared in December 2016
DIY Winter Village Luminaries – Materials
- Per house a juice carton
- White paint (acrylic paint like this is good – US/ UK)
- Tissue paper
- Black Sharpie (US/ UK)
- Corrugated card in desired colours – or make “tiles” out of cardboard
- Tissue paper (in desired colour)
- Tea lights (stock up on them here US/ UK)
- Scissors & Glue
(affiliate links added)
Juice Carton Winter Village Luminary – How To
As with many of our crafts, you can watch our video or follow the instructions below!!! Today we show how to make the little Juice Carton Winter Village – in addition, you can make Pine Cone Trees, Origami Christmas Trees, Snowman Corks and Mini wreaths. Your imagination is the limit!
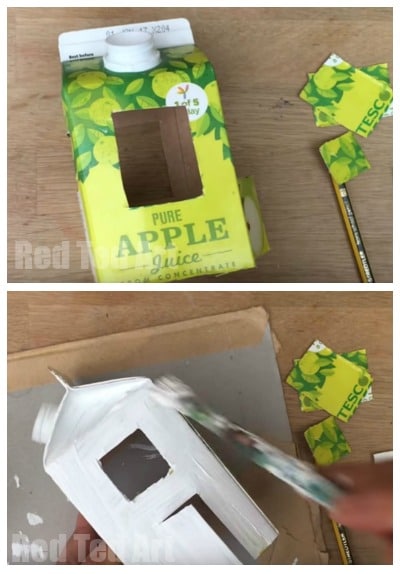
1. Cut your Juice Carton down to size (different heights are nice). Use a pencil to draw on windows and doors and cut out. KEEP the window cut outs, as you will use the for the frames later.
2. Paint your houses AND your little cut out pieces. We used white acrylic paint. But enamel paint or spray paint will work too. Alternatively you can stick tissue paper on your carton and paint over that.
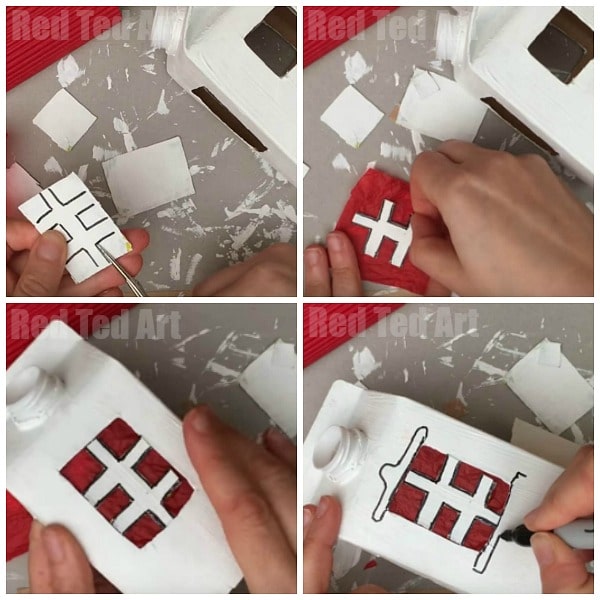
3. Paint your cut out rectangles from your juice carton white.
4. Once dry draw some window frames and them out.
5. Stick the frame onto your tissue paper. You now have the basic window for your Winter Village Luminary.
6. Add a little glue to the outside of the tissue paper and stick from the inside of your Juice Carton.
7. Now add some details to your juice cartons with a black pen. Sharpies tend to work well.
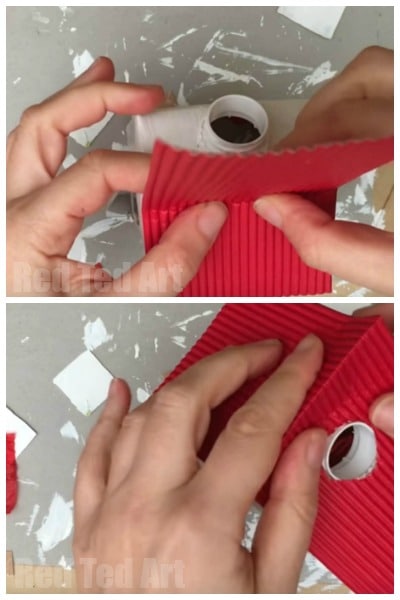
8. Now it is time to add a roof to your Winter Village House! We did this by cutting out some corrugated card. But you can paint your roof or maybe cut out some roof tiles and stick them on indivdually. We cut our juice carton house roof out by, taking a long rectangle that pops over the width of the house. Putting the folds in place to fit over the top of the house. Roughly marking out where the hole for the juice carton chimney goes and cutting out a circle a bit smaller. Then trimming the whole for a snug fit.
9. We then glued the rood down onto our winter luminary.
And done. Your basic house is COMPLETE! Yay. We made 3 at the same time.
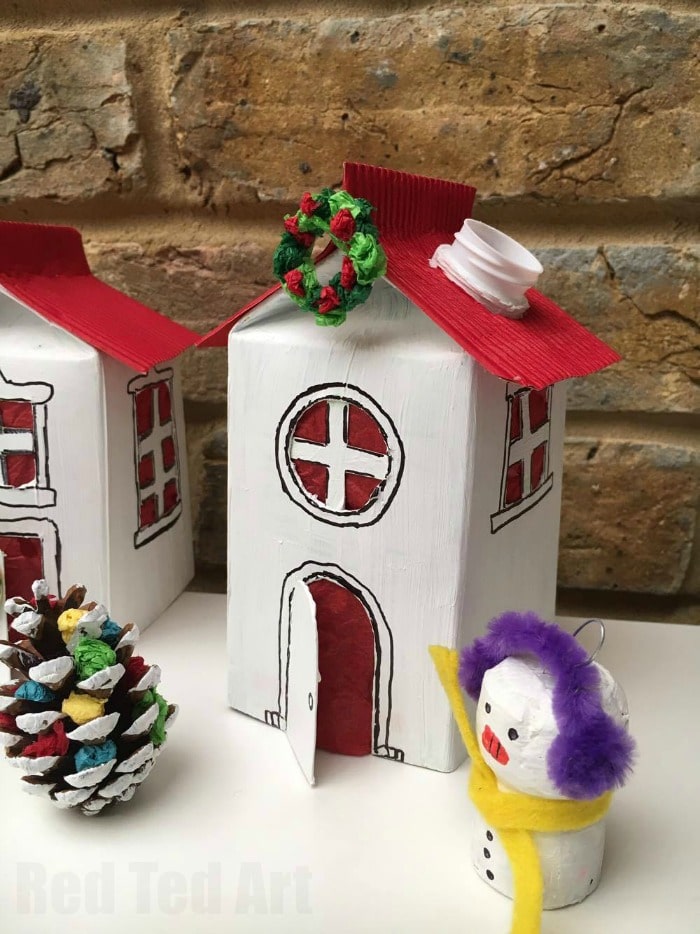
Then we started adding our details – we ADORE the mini wreath, simply gorgeous.. and love the simple pine cone trees and snowmen too!!! Happy Upcycled Crafting. Hope you love our Winter Village Luminary as much as we do!

This would make a fun little nightlight set too!
Now go and see how easy it is to make our Mini Snowmen or have a go at these Origami Christmas Trees!

And we have LOTS more Easy Christmas Crafts for Kids for you here!