
Easy Spring Paper Easter Bonnet Craft for Kids
Need an Easter Bonnet in a hurry? Only have paper? Don’t worry, we have the most adorable Easy Spring Paper Easter Bonnet Craft for kids today!! This is a gorgeous Bonnet DIY shared with you by a Red Ted Art reader – Gracious Rose Design!
I love how this Easter Bonnet gives you lots of opportunities to customise and experiment. This was a project created by Mum, Big Sister and Little Sis.
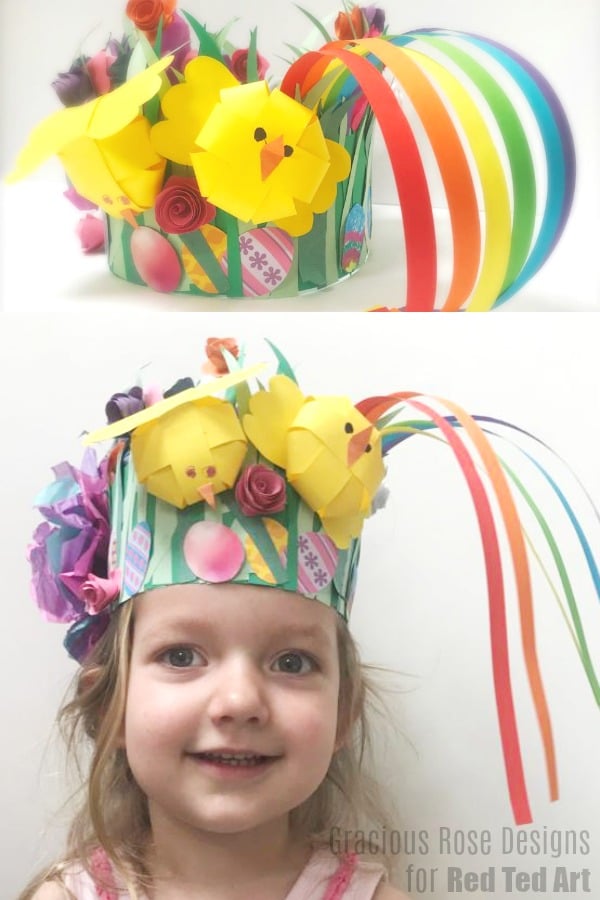
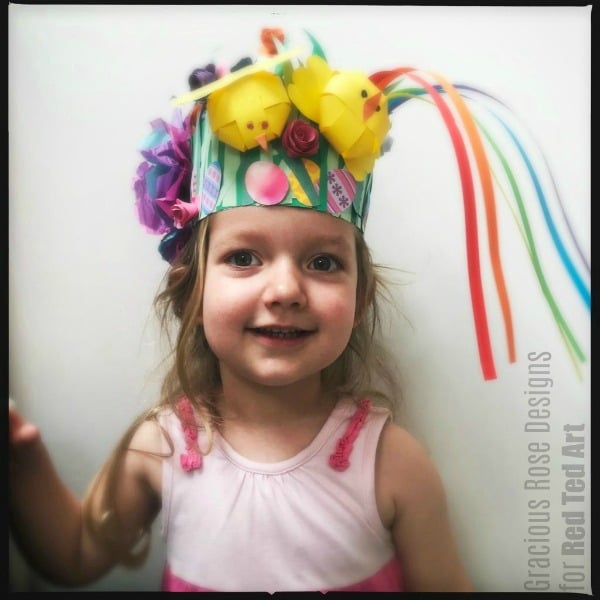
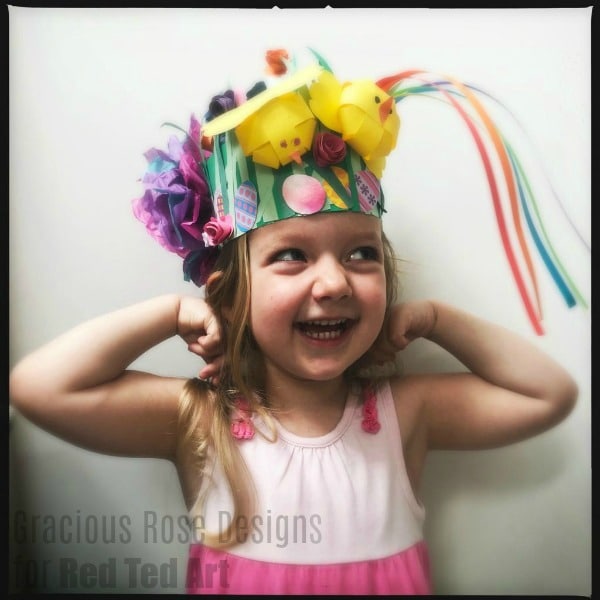
…and I think the collaborative element is super cute! You have some adorable paper chicks, a gorgeous paper rainbow, paper roses, grass and a giant tissue paper flower. Just gorgeous and oh so fun!
Collaborative Chick Easter Hat for Kids – Materials:
This is definitely one those “use what you have at home” approaches to Easter Bonnet making! The way it should be. Getting crafty with the kids for a school parade should not be expensive, but creative and fun. Gracious Rose Design made the perfectly gorgeous Easter Hat in this way using –
- Strips of paper for grass and rainbows
- Yellow paper for the adorable Paper Chicks (you can find how to make these on Easy Peasy Fun)
- Paper roses
- Paper Easter Eggs (you can use pre cut shapes, or make your own from coloured or patterned paper)
- Tissue paper
- Large piece of construction paper or light card for the base of the hat
- Scissors
- Glue
The base of the hat is a large strip of construction paper cut to fit around the little girl’s head.
How to make a Spring Easter Bonnet from paper
The basic bonnet itself
Begin by making the base of your hat. For this you will need a strip of green construction paper – 15cm wide and as “long as it takes” to fit around you child’s head. If your paper isn’t big enough, glue or tape two sheets of construction paper together. I am all for being frugal – why not cut one sheet of A4 in half length ways and glue together. This should be sufficient, but do test it on your child.
You can either keep it flat (for ease of decorating) or tape the other end together to make the basic hat shape first. It is a question of preference. I think leaving it flat first to add the basics is easier. Then glue together at the ends before adding the final pieces.
Making the Spring themed Easter Bonnet details
Now get creative with paper. We know how versatile paper crafts are and that there are SO MANY wonderful thing you can make. So… create some:

- Blades of grass in different greens. Make sure they longer than your hat is wide. Cut out thin, long triangles
- Cut out some Paper Easter Eggs. Gracious Rose Designs used some pre printed paper eggs as well as made some of her own. The kids would love to colour and design their own eggs on white paper. Or cut them out from coloured paper and stick on stickers.
- Make some paper mini roses. Toby and Roo shows us how to make easy paper roses from circles of paper!

- Make some adorable Easter Chicks – we love these paper chicks Easy Peasy Fun they really make a great paper bonnet “centre piece” and are a total “must make”.
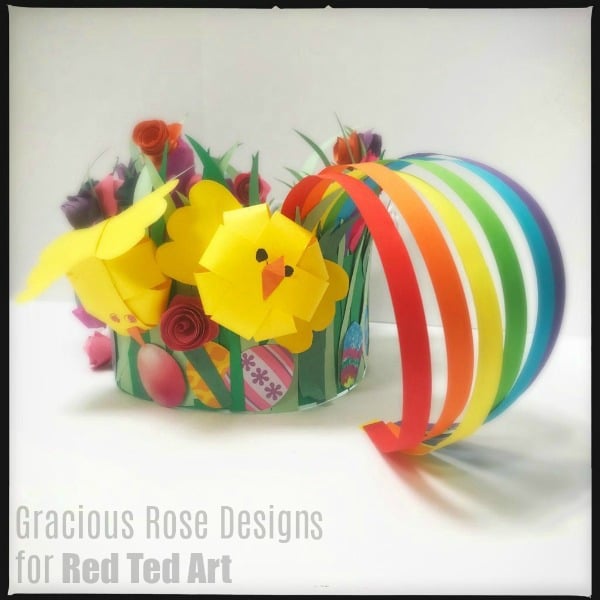
- Create a rainbow – long strips of rainbow paper look simply amazing

- Make a giant tissue paper flower. Tissue paper flowers are easy to make. In this example, Gracious Rose Design used 5-6 layers of tissue paper brought together. Two large petal shaped tissue paper flower layers, one medium petal shaped layer and 2 smaller ones. Layer these together, scrunch up a little and you have a fabulous flower.
Assembling your Spring Themed Easter Bonnet
As mentioned above, I think it would be easier to leave your bonnet base “flat” to begin with.
Glue on your smaller decorations: grasses, paper easter eggs, paper roses and start layering your decorations.
Leave your “main” decorations until last – e.g. the paper chicks, the large flower and the rainbow, as you will want to take your time over where to position it!

Glue the ends of the hat together to fit your child preferctly and NOW add your rainbows, chicks and flowers! Some of the details are glued in from the “inside” – it really is a case of playing around with the elements you have decided to make!!
Though this was made for an Easter Bonnet Parade at school.. I think it makes a fantastic paper hat accessory for any costume design or play accessory!
We have more Easter Bonnet Ideas for you to browse here…
