Easy Toilet Paper Roll Groundhog Day craft for Preschoolers
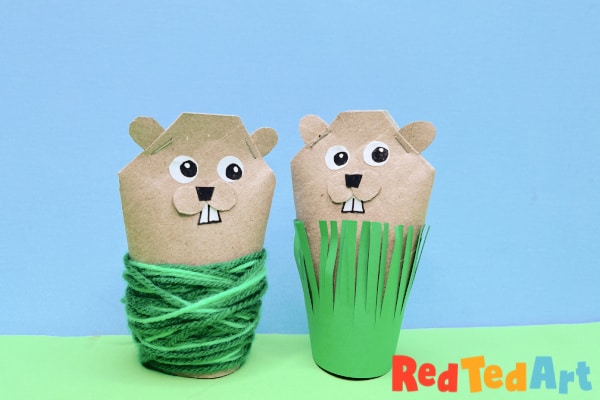
I don’t know about you, but the weather is COLD here right now. January and February can be such a winter drag! I can’t wait for Groundhog Day… and finding out if Spring is coming our way, or if we are facing another 6 weeks of Winter! In eager anticipation (of Spring, I hope!), I have a cute and easy Toilet Paper Roll Groundhog for Preschoolers to make. There are two groundhog craft versions – one maybe a little more suitable to toddlers and the other to preschoolers. Read on to find out more about this Paper Roll Craft!
You can pop you fingers into the bottom of these toilet roll groundhogs and play with them as little groundhog puppets. Alternatively they make fun little decorations for the windowsill (will the light cast a shadow, I wonder?!).
Today’s paper tube groundhog day craft is SO easy to make, that you will need NO templates! It is a perfect craft for toddlers and preschoolers, though kids of all ages can have a go. Then use your little groundhog puppet as a predictor of the weather, by placing him on the windowsill and waiting to see if he will cast a shadow. This groundhog craft is super inexpensive and thrifty to make, as well as being environmentally friendly.. so he makes a great classroom craft for groundhog day too!
What is the Groundhog Day Tradition?
Groundhog Day is a fun annual tradition that was first celebrated Punxsutawney, Pennsylvania in 1887! Groundhog day is always on February 2nd. On this day, you wait for the groundhog to come up from his burrow. Should the Groundhog see his own shadow, he will be scared away and winter will remain another 6 weeks. If there is no shadow, then spring is around the corner! Read more about Groundhog Day and this quirky tradition here.
Let’s hope for a nice CLOUDY day.. so there will be now shadows for us!
How did the groundhog get its name?
Did you know that the groundhog day groundhog is called Phil? There is only ONE Phil.. and Phil lives forever as he drinks the elixir of life! He is married to Phylis, has no kids and can be found at a museum in Punxsutawney, Pennsylvania!
Supplies needed to make your groundhog craft for preschoolers/ toddlers
To make this little guy, you will need the following materials! They are super simple, so hopefully, you will have all the supplies to hand without need to make any additional purchases at the dollar store!
- One empty toilet paper roll per groundhog (or a kitchen paper towel tube can make two!)
- Stapler
- Scissors
- White paper scraps
- Green yarn OR green paper/ construction paper*
- Glue stick
- Black markers
*as mentioned I have made two versions of this groundhog peeping out of his burrow- depending on the age of your kids – a yarn wrapping version, which is great for toddlers and a paper grass version, which is great for preschoolers practicing their paper cutting skills! Both crafts compliment each other and make a lovely little groundhog playset for preschoolers come Groundhog Day!
Toilet Paper Tube Groundhog – Step by Step instructions
Let’s get started! If working with paper towel tubes – cut them in half first.
Shaping the paper tube into a head
Begin by shaping your toilet paper tube’s top end, into a simple groundhog head. Squeeze the top end of the toilet paper roll flat.
Then cut off two triangles on either side. You will need these triangles for the groundhog’s ears and puffy cheeks.
Take the cut offs and cut out two ears at the same time from one cut off. And two circles from the second cut off.
Cutting out additional groundhog’s face
Now take a piece of pape, the black marker and draw on two teeth and cut out. Next cut out two circles for eyes. And draw in the pupils. Finally, colour in a small rectangle black and cut out a little nose.
To be honest.. all these features could also be beaver features, don’t you think? Anyway.. I digress.
Assembling the groundhog’s head
Staple the little groundhog’s ears into the diagnoal’s cut into the top of the cardboard tube.
Glue on the paper eyes (googly eyes would be fun too – but I prefer the paper eyes as they are biodegradable and also “free” to make!).
Glue on the teeth, cheeks and black nose. You can draw on some whiskers if you like too. But we decided not to.
Your basic super cute groundhog craft is finished. Now onto the burrow!
Making the Groundhog’s Burrow – Preschool Cutting Skills

Take some longer pieces of green construction paper and wrap it around your cardboard tube to measure the “length” you will need. Using this as a guide, cut out a long rectangle.
Then practicing your cutting skills, cut all along the top of the green paper to make blades of grass, representing the top of the little guy’s burrow!
Add glue along the edge of your green construction paper and glue it to the base of your toilet paper roll groundhog!!
Your first “version” of our Groundhog Day decoration is finished!
Making the Groundhog’s Burrow – Toddler Yarn Wrapping Skills
Take your toilet tube and tie some green yarn around it. We used two different colour of green yarn – simply because we could. Of course one colour is plenty! You could even make it a brown burrow using brown yarn instead of green… your call! Work with what you have to hand.
Now get your toddler wrapping round and round.
Finally cut the yarn, and knot it in place!
Your toddler version of this Groundhog Day craft is finished! Woohoo. Isn’t this little guy adorable too?
Finished Groundhog Craft

Ta-daaaa you now have made your own groundhog craft TWICE! Once for preschoolers and once toddlers! Isn’t this a fun way to explore and celebrate Groundhog Day on February 2nd?!
Use our groundhog craft as little shadow puppets and see if the light coming through your window throws a shadow or not! Alternatively, the kids can insert 3 fingers and turn the groundhogs into little finger/ hand puppets to play with.
Excited about Ground Hog Day?
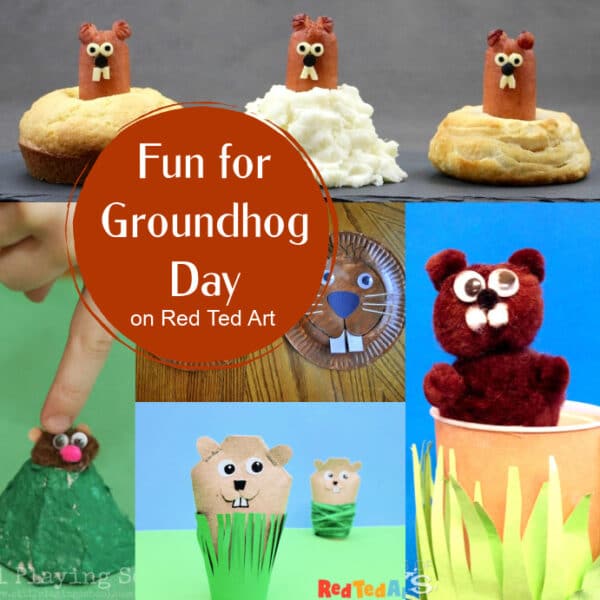
More Groundhog Day Ideas you will love!
Check out this collection of fantastic groundhog day crafts today:


