
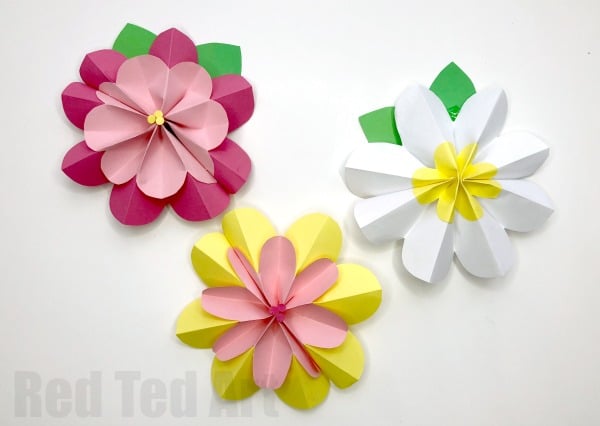
Easy 3D Paper Flowers for Spring
Time for some great 3d Paper Flowers! We love paper crafts and we love all things SPRING! Today, we bring together our passion for paper crafts and flowers together, to creat these easy 3d paper flowers for spring! These paper flowers can be made in all sorts of sizes from small, to giant paper flowers for wall decor!

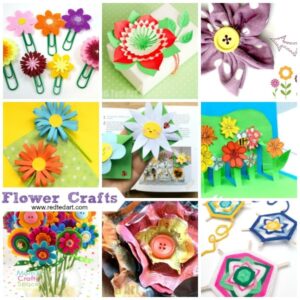
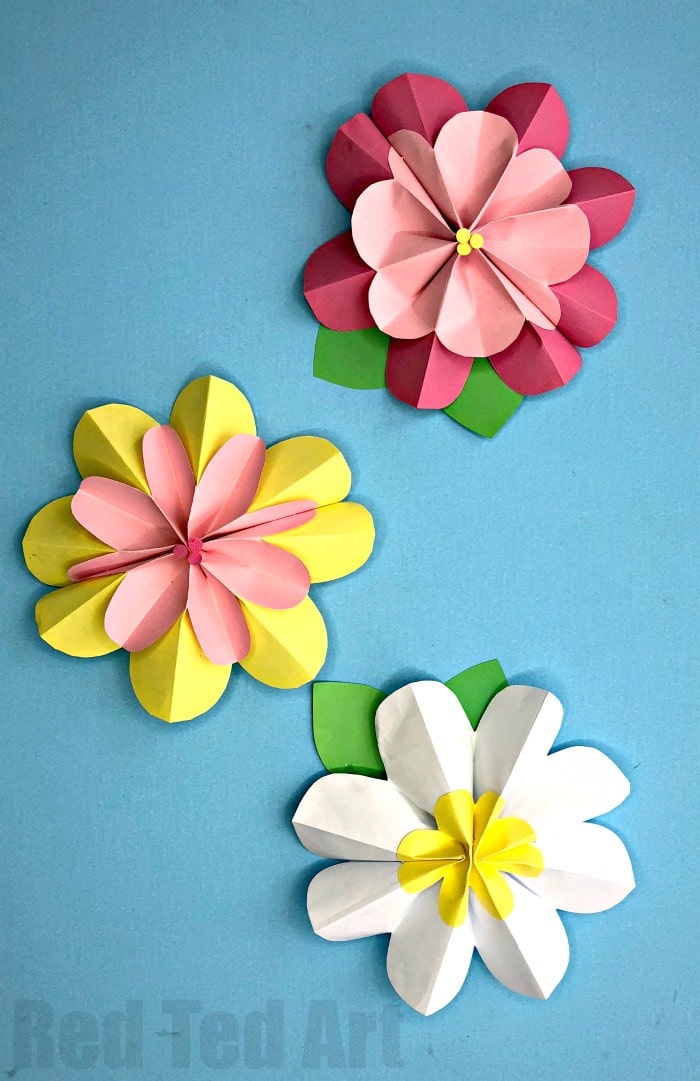
I love the spring colours and the shape of these lovely 3d Paper Flowers, I hope you do too! We have lots more great Flower Crafts to browse on Red Ted Art, as well as a great collection of further homemade paper flower tutorials. Do hop over and take a look at these too!
I think you could also uses the paper flowers as part of spring wreaths – combined with some paper leaves, or crepe paper leaves inbetween the flowers themselves.
This accordion-style paper flower tutorial works well in different colors. We made them again in winter as a poinsettia flower craft (wouldn’t these be amazing with a little biodegradable glitter sprinkled over the ends?)! These would look lovely as a garland, or as part of gifts at Christmas. So pretty!
New Paper Crafts for Kids Book
This oh so popular project features in our new Paper Craft Projects for Kids book:
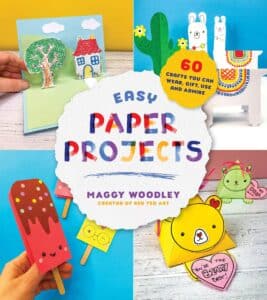
Check out the Easy Paper Projects Book here!
DIY Paper Flowers for Spring – Materials
Per DIY Paper Flower you will need:
- One sheet of A5 (approx 10 x 15cm)
- One sheet of Ag (approx 7.5 x 10cm)
- Stapler (no hot glue needed!!)
- Paper scraps & glue stick for decorating (optional)
As mentioned, you can make these bigger to and use them as giant paper flowers for party decorations. They would look great both indoors and outdoors for an Easter celebration or summer party. But note, that they aren’t waterproof!
Note: We have made a similar Paper Flower before – the Poinsettia Paper flower for Christmas and the New Year – they work well in different colors too! You need to tweak the flower shape for these. Enjoy!
How to make a Paper Flower Step by Step Instructions
You will see from these paper flower step by step instructions that these really are DIY easy paper flowers to make. I would say this a great flower craft for older kids. If you are working with a preschooler, maybe give our tissue paper flowers or the coffee filter flowers a go first?
NOTE: watch the auto play paper flower video tutorial for our easy Paper Flower VIDEO! Or follow the step by step instructions!
Preparing your folded paper
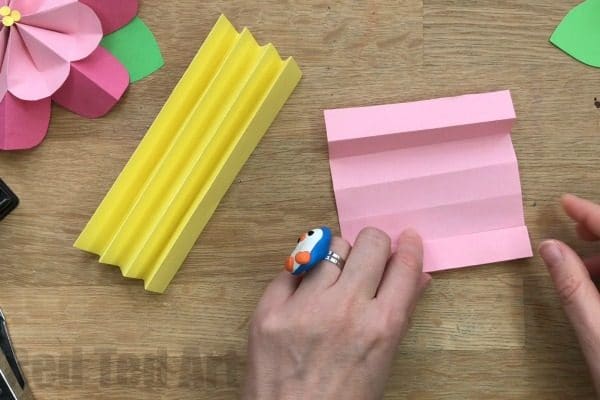
The basis of this paper flower tutorial is the accordion fold. A fun and versatile technique for making beautiful paper flowers. Fold both pieces of paper across the “short” edge into exactly 8 sections (they probably worked out to be approximately half-inch wide for the small flower and an inch wide for the bigger one? but it isn’t an exact science!). The easiest way to get this done neatly is to keep folding the paper in half, then unfolding it and refolding your paper concertina style along the creases made.
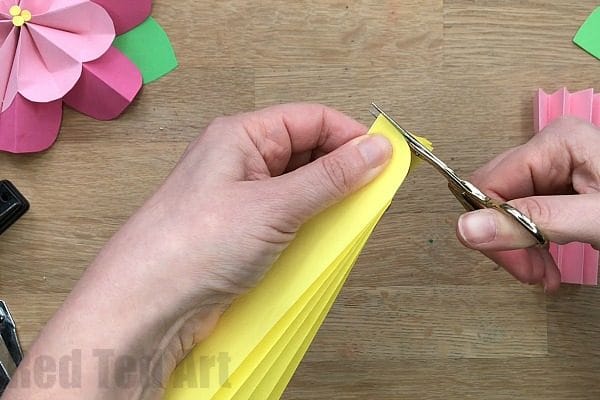
For the leaf to pop OUT at you, you now have to take your concertina paper and point the open flap towards your scissors and cut a curve – to get the ROUNDED shape of the petal (rather than a poinsettia point), you must make the top of your cut more curved – finishing off at a right angle.
For the paper flower lead to pop AWAY from you, you need to have the “closed” side of the concertina paper facing your scissors and cut a similar curve. This time with the top of your curve ending on at the open flap.
Assembling the paper flower
Now fold both concertina papers in the middle. Make a crease half way and fold it in both directions. So the crease easily works both ways.
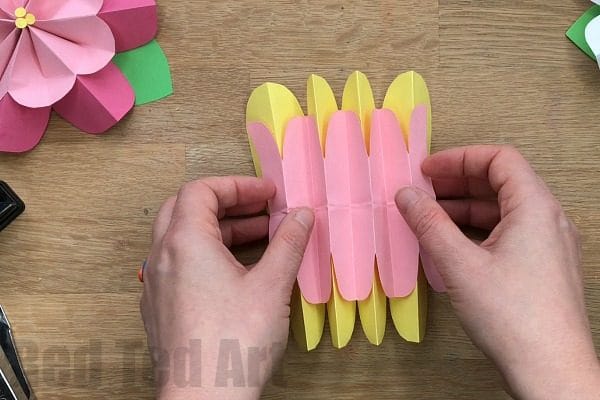
Slot the two concertina papers together – with the middle lines lining up.
Securing your flower – step 1

Find the centre fold and staple as close to the centre as possible.
Securing your flower – step 2
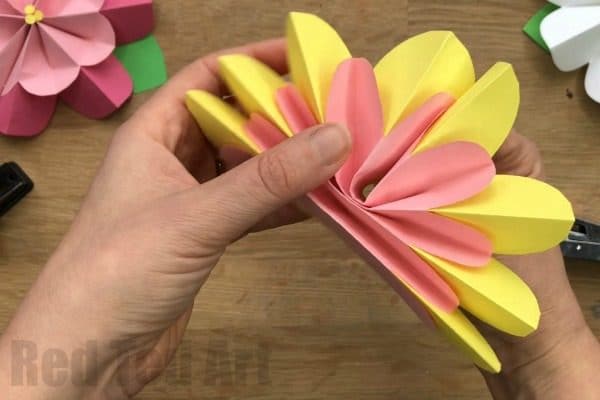
Now comes the MAGIC part. Take the top and bottom of one side of the concertina and fold towards each other – one half of the flower is finished. Secure with a staple.
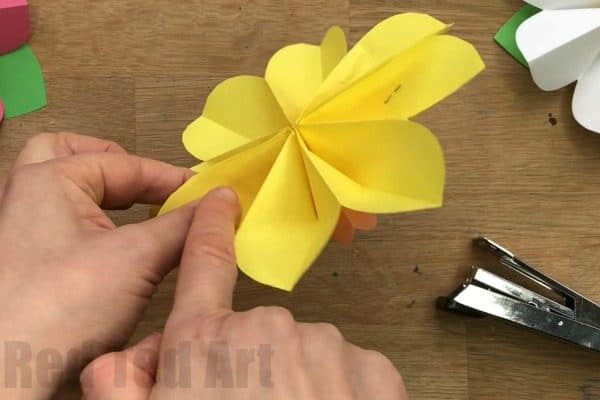
Repeat on the other side. When stapling try and “catch” the pink part of your flower too, to secure it in place. If you wish, you can make the center of your flower smaller – experiment with different sizes of paper and see what you like best!
Adding finishing touches to your paper flower
You can now glue on decorative details such as little dots to the centre of your flower or additional leaves made from green construction paper or crepe paper.

What to use the 3d Paper Flowers for?
I think you could use these lovely paper flowers in a number of ways:
- For Party Decorations – be it indoors or outdoors – attach the flowers to walls/ fences/ shrubs. They would be adorable as part of an easter decoration
- Make a set of baby pink and blue ones for baby showers
- Make a smaller set and use them as part of gift wrap decorations
- Cut a large circle from cardstock or cardboard and glue these paper flowers on to make a wreath
- Use them as part of a photo backdrop
Fancy some more beautiful flower inspiration? Take a look here
More wonderful Flower Crafts here:
We have more step by step Paper Flower Crafts here too:

Watch our 3d Paper Flower Video
As per usual, we have a fabulous and easy to follow Paper Flower How To video for you to check out!
Hope you give these easy DIY Paper Flowers a go!!! And share your paper flower photos with me!!