
Easy Ballerina Corner Bookmark Design
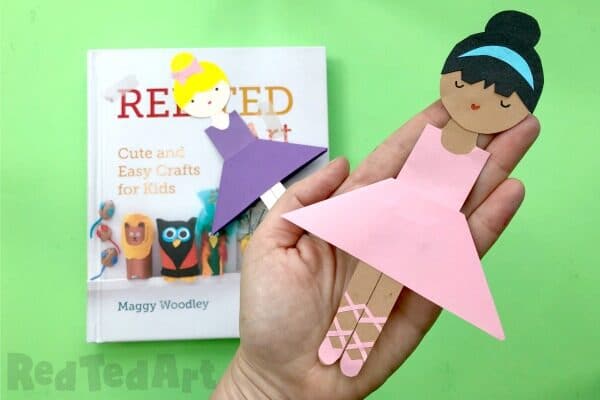
Our love afair with Paper Craft for Kids continues (in fact, check out my brand new Paper Projects book!) as we make a brand new easy ballerina corner bookmark design for you.
This is a popular request to add to our extensive Corner Bookmark Design collection. Hooray! I hope you like this little paper ballerina bookmark as much as we do!

Ballerina Corner Bookmark – Materials
- A piece of square paper in the desired Ballerina tutu colour (we cut down A4 into 2 squares of approximately 15 x 15cm – but any size is fine!)
- Some scraps of skin tone coloured paper for for the ballerina’s body – enough for a round head, rectangular body and legs
- Scraps for t he ballerina’s hair and any contrasting features (e.g. a bow or alice band)
- Pens for the ballerina bookmark’s features
- Glue stick
- Scissors
How make an Origami Bookmark Ballerina Design
Watch the video on auto play for the full instructional video.. or follow the step by step photo instructions provided too!
Corner Bookmark Ballerina Step By Step Instruction
Begin by making a basic Origami Bookmark using tutu coloured paper – we made a pink and a purple one!. We have Origami Bookmark Step by Step Instructions (including photos)!
Cutting out your Ballerina bookmark’s embellishments
Cut of the trianglur “flap” at the bottom of the bookmark – do this neatly, as you will need the flap to make the bodice and the shoes.
Snip a small triangle across the tip of the corner bookmark.
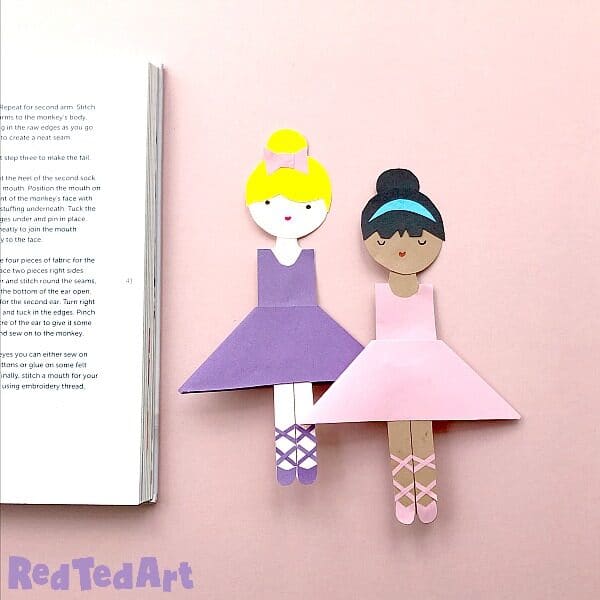
The ballerina needs a number of key features:
- a matching bodice
- legs and ballet shoes
- a head and hair

The ballerina bodice: using the small triangle you snipped off the top as a guide, cut out a purple rectangle bodice. Then cut a semi circle out of one end to make the neck shape. Stick that onto the skin tone paper and cut out another rectangle but this time include a longish neck (long, so there is space to glue the head).
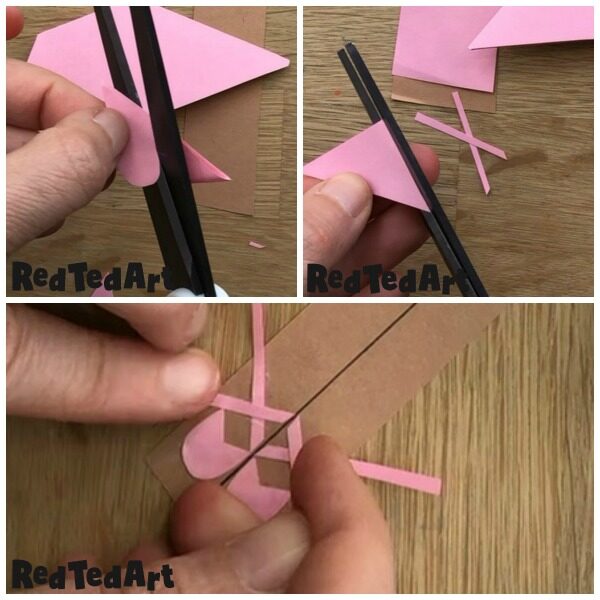
The legs and ballet shoes: cut out a long thin rectangle for the ballerina’s legs. Then using the left over pieces of purple, cut two small shoes (semi circles) and some strips of paper for the ballet shoe ribbons. Draw a black line down the centre of the legs and then glue the shoe embellishments in place.

The head and hair: cut out a fairly large circle (4cm diameter). Then use this circle to trace a second circle in the desired hair colour. Cut out the hair and make a hair style. Cut out a smaller oval as a hair bun. Glue together. Add any details if you wish like a hair bow or hair band.
Bringing your ballerina corner bookmark “together”
Glue your bodice and legs in place (inside the bookmark).
Glue on the head. Finally, add the ballerina’s features in pen.
Enjoy!
The Ballerina video is also available on youtube:
