
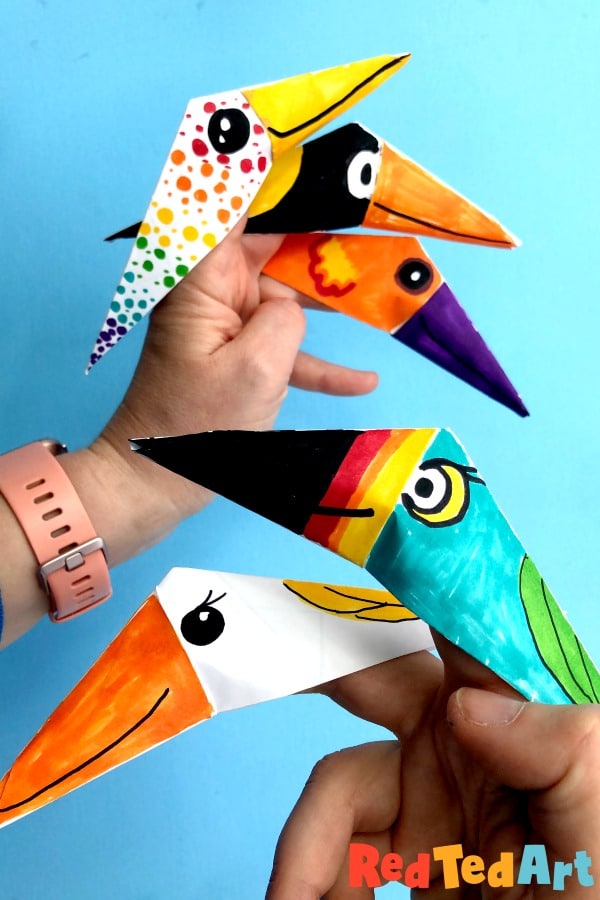
Easy Bird Finger Puppet Origami
You know we adore easy Paper Crafts for kids, right? Well, we have a super duper special and EASY Bird Finger Puppet Origami project for you. These are so easy, and so fun to turn into doodle birds, that you will wonder **where** they have been all your life! So fun.
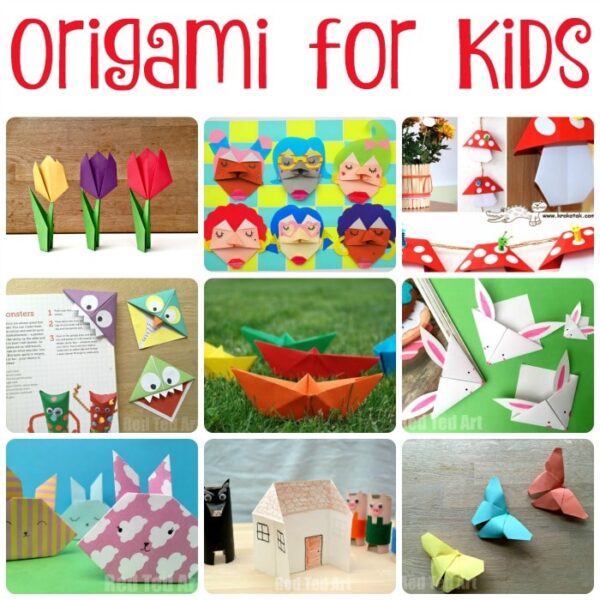
They make a great addition to our Easy Origami Projects for kids, as well as Paper Puppet collection!
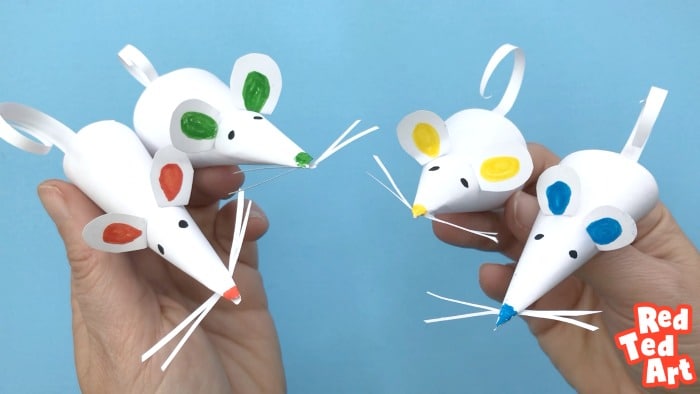
You may also love our super popuplar Paper Mice Finger Puppets (made differently and a great way for exploring shapes and basic fractions:
Materials needed to make your Origami Bird Puppets:
- Square piece of paper – we used A4 cut down into two sheets of 15 x 15cm to make two birds (do experiment with different sizes to fit your children’s hands!)
- Pens for decorating – experiment with pens, biros, pencils, crayons.. whatever you can find!
No scissors. No glue!!
Yep can you believe it, this craft really requires no glue or scissors (well apart from having to cut down paper to a square, but that can be achieved with careful tearing too!).
How to make paper bird finger puppets with scrap paper:
Do watch our easy to follow Bird Finger Puppet video. I always find video instructions sooo much easier to follow.
But have also invluded step by step written instructions below!
This written instructions also include some step photos, which I hope will help you make this cute little Finger Puppet!
Here we go… How to make a Paper Bird Finger Puppet
As you can see from the images below, I really did use the paper from my recycling bin! It is a great way to upcycle and still have fun.
Begin my making a square piece of paper. Fold the A4 sheet of paper in half.
Bring one corner up to the central fold. Cut that “triangle” out. When you fold it open again you will have a square.
Fold your square across the diagonal (again) to make a triangle and a nice diagonal crease.
Open up.
Bring one flat edge of the square to align with this central diagonal and start forming a “Kite shape”. Repeat with the other side.
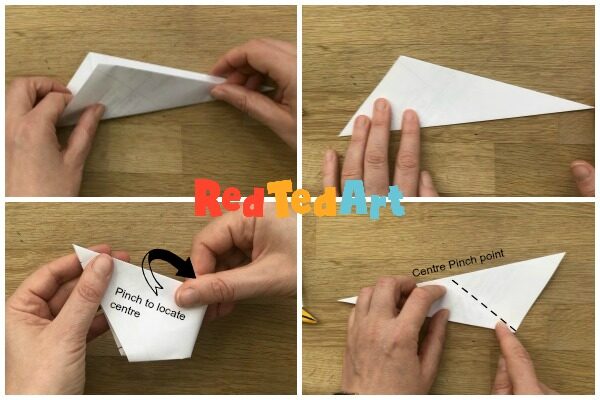
Fold your paper along the diagonal again (so your other fold are on the inside).
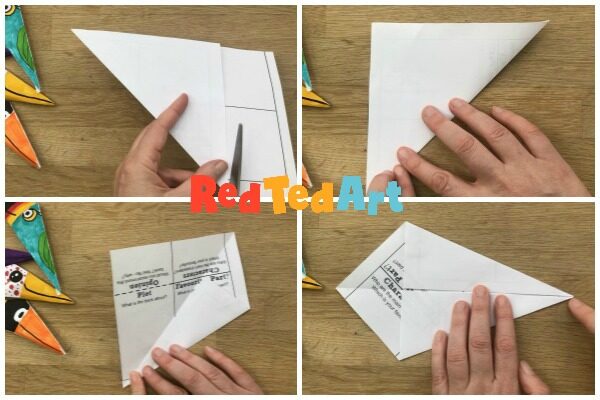
You now have one long edge. And two short ones. Fold the long edge in half to find the mid way point and pinch as a “marker” (bottom left photo).
Open again.
Fold up the short edge to make a crease (the video shows this really well- or look at the dashed line in the image!) -(bottom right photo).
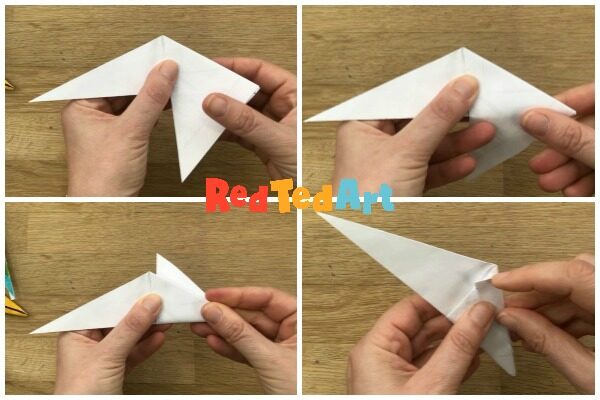
Folding the paper down (top left photo).
And then back up (top right photo).
Now wrap the paper around itself and “tuck in”.

One side will show the “folds and tuck”. This is the “rough side” (but can of course still get decorated).
Flip over and you get a “neat” side – this is the side that is easier/ more fun to decorate!
Your basic bird is finished.
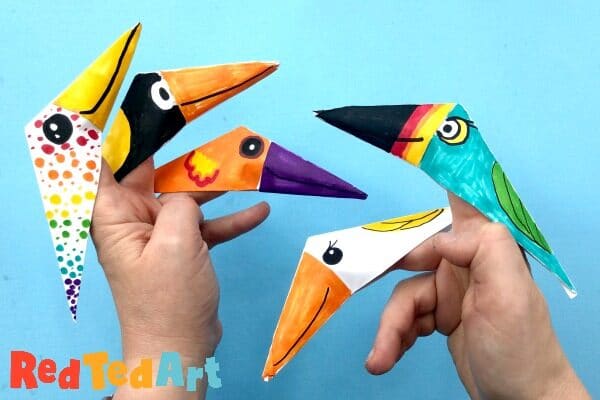
Be as creative as you like! Invent your own birds or google your favourite types of bird and be inspired by their beaks and plumage. Maybe you can make some parrots, some parakeets, some puffins and more?!
How to make your paper bird point the other way?
If you want the “Neat” side to point the other way, make the folds in the other direction.
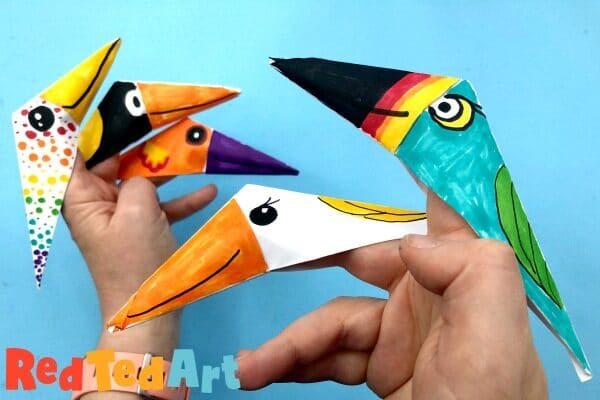
Now it is time to have fun with decorating!! Use lots of colours and have fun.
Check out more Easy Origami Ideas for Kids:
As well as the rest of our Paper Puppets!