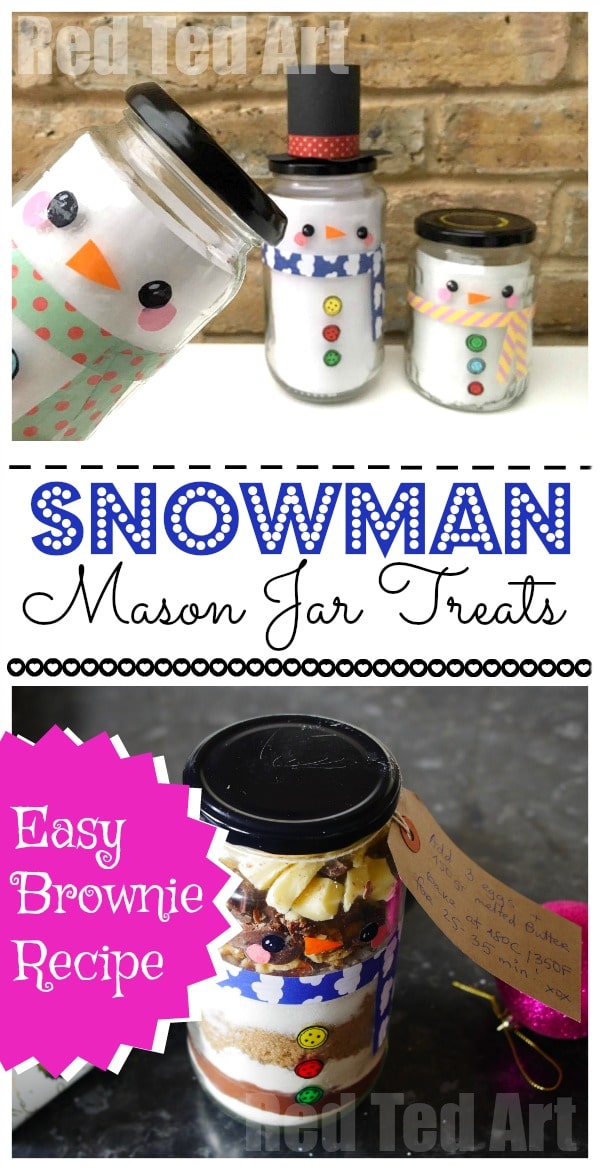
Easy Snowman Jar DIY
Ok, so most Jar Decorating Competitions are now over. Clearly they are part of the Christmas School Preparations.. and we did make our Snowman Jars before Christmas. Unfortunately, I have only now had to the time to share these cute and easy teacher’s gift or jar decorating idea with you now (Pssst if you like to recycle old jars – here is a great How to remove sticky labels from a jars hack!_. To be honest though, I think this little snowman diy so cute and easy and fun, that you should be able to enjoy him right through Winter regardless! Do bookmark this for next year though, as well as all our Easy Christmas Crafts for Kids and Snowman DIYs, plenty to browse and enjoy!
This is a collaboration with my friend Alla from Alla’s Yummy Food. She put together the Brownie Recipe, whilst I did all the decorating!
Snowman Jar – Materials
- a jar (large is good to hold enough for a generous brownie recipe, though you can use a smaller jar and make “cupcakes in a jar”)
- Paper
- Decoupage glue or PVA glue
- Scissors
Brownie Recipe:
The brownie recipe is quick and easy to put together, but first I must give Alla and her AMAZING YouTube channel a massive shout out. Packed with diverse, easy to follow recipes, I know you will enjoy having a browse. But be warned.. you mouth may begin to water and instead of crafting.. you may just get into the baking mood!
….and now to the recipe…. Alla explains all here:
Isn’t that fun AND delicious?
Snowman Jar How To:
As with many of my crafts, I have a handy youtube video which you can watch with the kids (in fact, I would like to think your kids can watch this and get crafty on their own (depending on age).. and I have also put some written instructions for you below!
Snowman Jars – How To:
- Firstly remove all your sticky labels! It is nice to have a lovely smooth surface
- Select the paper and colors you want to work with.
- Cut out eyes, nose, rosy cheeks and buttons and a long strip for the scarf
- Add details with a black pen where necessary
- Add some decoupage glue to your jar. Carefully place your paper item on top.
- Seal with a layer of glue on top.
And yes, that is LITERALLY IT!!! So so sooooo easy.
If you are filling your Snowman Jars with trinkets, small toys or sweets, you can add a layer of white paper to go around the INSIDE of your jar and give the snowman that white appearance. However, I think the layered brownie recipe looks wonderful too!!!

You can also make a simple paper hat to go with your Snowman Jars, but I think I prefer them without (and they are easier to transport without the hat too).
On the look out for more SNOWMAN DIYs… take a peak at these:

We also have more Christmas Crafts for Kids: