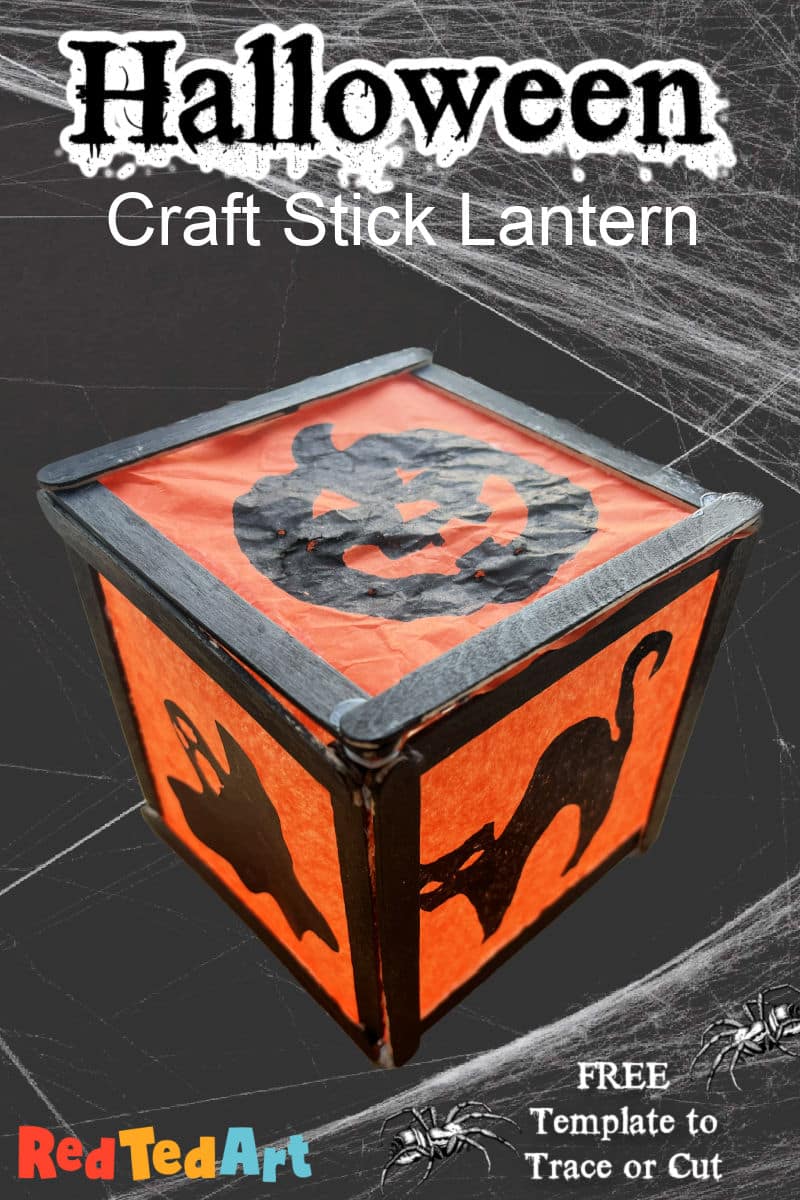
Easy Halloween Popsicle Stick Lantern Craft for Kids
Ok ok… this is a bit of a late 2 for 1 craft. A couple of weeks ago, I shared our Halloween Popsicle Stick Suncatchers… and then as they were hanging there.. I thought – hang on, these would work so well as little Halloween Popsicle Stick Lanterns too! All you need is an additional two lantern panels and some sticky tape (or similar – see below).
I am particularly interested in Halloween Lanterns this year, as we, as a family, are looking into “No carve pumpkins”. There are lots of reasons for making no carve pumpkins (for one, they are a lot less messy!!), but they also last much longer (a pumpkin should last ALL autumn), but it also means you can eat them! Yes. Eat our pumpkins. Fancy that, eh. We have a bit of a “no food waste” thing going on here.. and pumpkins are great in soups (the easiest way to use them), risotto (our second favourite) or grated into cakes (think carrot cake). So really.. you can have lots of fun with your pumpkins AND still eat them.
But that means you need some fun “light” sources. So homemade lanterns it is. So I can get off my soap box now. And let’s get crafty!
These instructions, essentially replicate the ones from our Halloween Suncatchers. I hope that is ok. All you need to do is glue them together at the end.
Whilst I have your attention.. you may also like these Mason Jar Lanterns or Halloween Luminaries – love making these especially with preschoolers, whilst the Halloween Popsicle Stick Lanterns are probably better for older kids or tweens:

Craft supplies needed for Halloween Craft Stick Lanterns

- 5 x 4 same sized popsicle sticks per suncatcher – so 20 craft sticks in total
- Black paint (though felt tip marker pens can also be used)
- Tissue paper in desired colors or coffee filter paper*
- Black marker pens for tracing OR free printables to cut out OR black construction paper to cut, and glue in place
- Glue stick
- Scissors
- Electric tealights (I like to put 2-3 inside each lantern)
*NOTE: I do find that tissue paper is a little fragils and COULD rip. SO. You could use coffee filters (that you have colored in with pens and water first) or baking paper too!
The halloween outlines are hosted on gumroad for ease. Simply add $0 at checkout for this freebie!

How to make your Halloween Tissue Paper Lanterns
We have a video tutorial of this craft on auto play for you too! This shows you how to make the suncatchers. I confess, I haven’t added the last step.. but it is easy! I promise (see below)!
Preparing the popscicle stick frame

Paint or color in your popsicle sticks in black. You don’t strictly speaking need to do this, but we think it looks better.
Let dry fully.

Now glue the popsicle sticks into a square frame. Again let dry. Glue stick is actually strong enough for this. But PVA glue is more durable. So choose what supplies you have to hand. You MAY wish to make the frames ahead of time.
Adding the tissue paper background to the suncatcher frames

Add glue to the two parts of the frame that lie flat.
Stick on top of the tissue paper.
NOTE: I do find that tissue paper is a little fragils and COULD rip. SO. You could use coffee filters (that you have colored in with pens and water first) or baking paper too!

Cut out the paper, so you are left with a neat edge.
Adding your black outlines for the lantern panels


Now you have a choice of three ways to add your spooky outlines:
- Trace the templates with a black pen (take care not to rip the tissue paper)
- Cut out the templates (there are two types – one for tracing in more detail and one more suitable to cutting)
- Cut your own shapes from black paper!
All three methods work and look great! They are just different ways depending on your child’s dexterity.
Now choose what designs you would like to add to your Halloween lanterns. Pumpkin lanterns are super popular, as are ghosts! Though I rather like the spider and spider webs. And use any of the three methods suggested above.
Here we made a jack-o-lantern and black cat using the tracing method. and made the ghost using the paper cut out.
Assembling the Halloween popsicle stick lantern

Blu Tak: As I assemble the lantern on a whim, I confess to not taking any photos!! I am sorry! Ha. But it really was very easy – in fact, I used Blu Tak (sticky tak) to connect each pannel to make the lantern sides. And then again to add the top.
Sticky Tape: Having said that.. you can line up the four lantern side panels. And tape them together with a strip of sticky tape. Then stand them up to form a cube and connect the first pannel with the last. Finally tape the top on.
Hot Glue: Hot glue would work the same way as blu tak, but you have to work a little faster. So I prefer the tape or blu tak method.
FINISHED! Pop some electric tealights underneath and you are finished!
If you are looking for more DIY Halloween Decorations, do check out our collection of Halloween Crafts here on Red Ted Art.. alternatively, if you are her for the popsicle sticks, we have craft stick craft inspiration ideas too!