How to Sew an Owl Bag with Pocket
Well. Here is another lovely sewing project… today I would like to share with you our “How to sew an owl bag with pocket” tutorial.
I created this owl pattern off the back of our Ted Purse and especially for my son’s year 6s class – who are known as “Owls” at school. We created an end of school, upcycled school uniform sewing project especially for them as they move on to secondary school in the new year. This is perfect for the Sew A Softie project that Coloured Buttons runs each year!
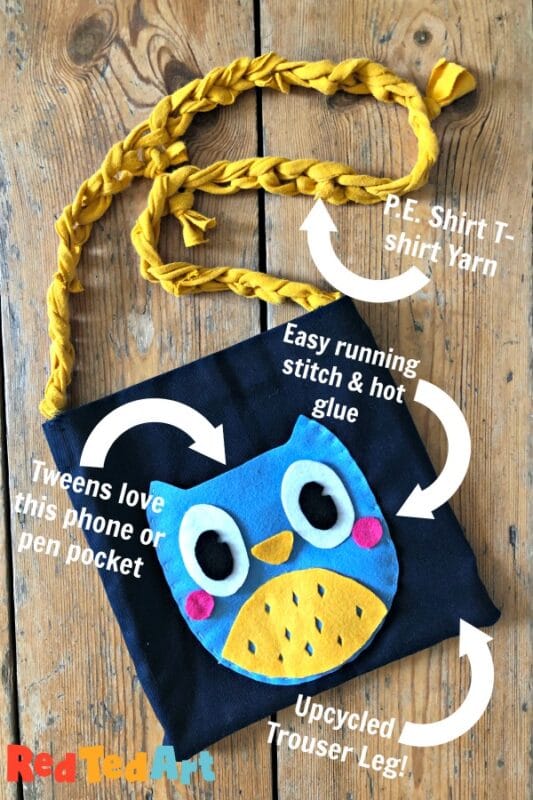
Essentially, this Owl Bag with Pocket is exactly the same as the Ted Purse (as is the process), I just made a new pattern for it. I also tweaked the process a little for working in the classroom with 28 children and not quite enough resources (ha, it was “interesting” to say the least). However, the kids LOVED their bags, I saw them wearing them the rest of term, as well as to out and about and in the supermarket and it was all worth it.
So you can choose to sew these in class (check my Top Tips for this) or at home. And as before adapt the process to suit your time constraits and resource restraints. Hope you like it!
Owl Purse – Materials
- base fabric for the purse itself – the kids used their old school sweatershirts and trousers. Denim is nice too!
- t-shirt yarn – we made t-shirt yarn from the kids’ old PE t-shirts
- felt – we used new for this. I bought it by the meter in our local fabric shop which made it more econimical for a class project (by the meter effectively gives you 4 times the amount of felt!)
- thread and embroidery yarn
- hot glue gun – this was mainly because we working with such a large group… I would prefer hand sewing as it keeps the details more secured
- your owl template
Enter $0 at check out (or leave a small donation) to get this lovely hand drawn Owl Template!

How to make your owl purse with pockets for your mobile phone

We had three making stations to begin with
- Fabric cutting – cutting out your base fabric
- Finger knitting – turning your t-shirt yarn into purse strings
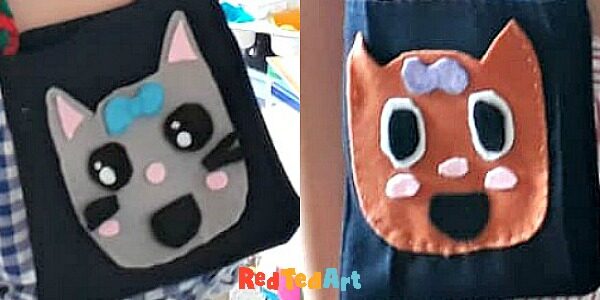
- Felt cutting and gluing – cutting out your purse’s pocket design – the majority of the kids used the owl as per their class name but a number created their own designs such as wolves, unicorns, tigers and teddy bears
Once the children had been to all 3 stations and had all their parts, we started sewing.
TOP TIPS for Group Work (esp. when you are not used to it!)
Adult/ child ratio – if you can improve on our 3 adults to 28 children, that would be very helpful…. I would say 1 to 6 would be ideal
Recruit the more abled children – once I noticed that someone was good at something (e.g. finger knitting), I “recruited them” to help their classmates
Upskill the more abled children – once i realised that some of the kids were quite good at sewing, i showed them how to “tie off”, so they could a) tie off their own work, but also help others with their work
Prepare needles – I didn’t do this…. I underestimated how long it takes to thread and knot needles. Even if I had prepared just a handful, I think it would have helped!
Fabric Cutting
One parent helper was in charge of fabric cutting! She cut out lots of trouser legs (they are great, as already hemmed, therefore less sewing needed) and jumper rectangles (to make a square once sewn together. The size really doesn’t mmatter, but 16 x 16cm is a nice size!
The Finger Knitting
I was in charge of Finger Knitting – it was more “finger crocheting” – making on single loop strand. I will add a video on how to do this ASAP!
Felt Owl Pocket Cutting & Gluing
The teacher took charge of the hot glue gun and helped the kids cut their owls, unicorns, monsters, wolves and more. The key to good felt cutting is to have good sharp scissors! Remind the children to trace their patterns near the edge of the fabric to save on material.
Keep off cuts for details such as eyes, cheeks and wings!
The teacher then also hot glue gunned all the features on. This was the best solution for the time we had… if you have more time or more pairs of hands, I recommend hand sewing on the features – as they will last longer this way!

Sewing your purse
Sew the owl to the front of your purse – be sure to leave the “top open” so that you can use it as a little pocket.
We basically did this using the RUNNING STITCH. Overstitch is also nice and makes the stitch more secure.
Once the pocket is secured to the front – decide on whether you want your seams to be on the inside or to show (e.g. on our Ted Purse, we made a feature of it). Also check if you need to hem anything. In the classroom environment we didn’t really have time for hemming (some children did, but not all).
But the “right sides” together to have the seams on the inside. Then sew the sides that need sewing. Personally, I think a back stitch is best at this point as it is stronger.
Turn your purse right side out.
Then sew on your handles. This the part the majority of the children found the hardest as the goingthrough the sides of your sewing and the bottom of the tshirt yarn finger knitting was quite stiff. Many of the kids succeeded, but the helpers helped sew on a number of these for the kids.
DONE! ENJOY!!!
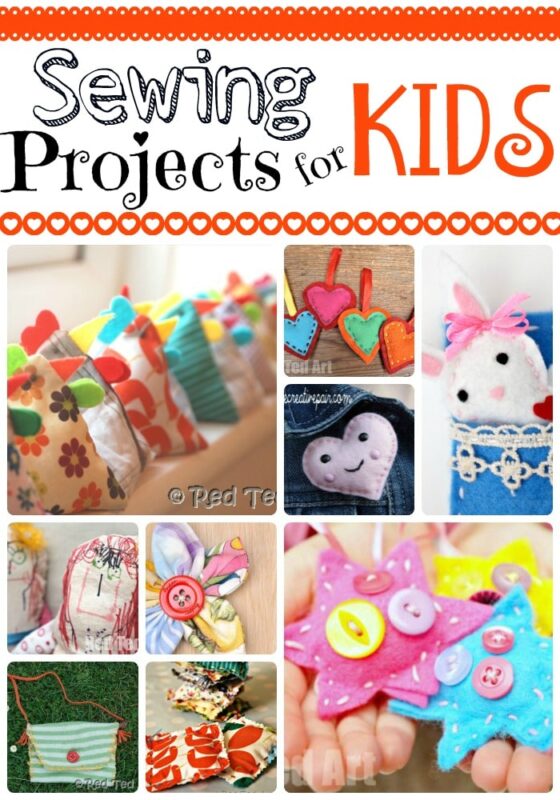
Do check out the rest of our Sewing Projects for Kids