Make Your Own Tiger Bookmark Corner for Chinese New Year
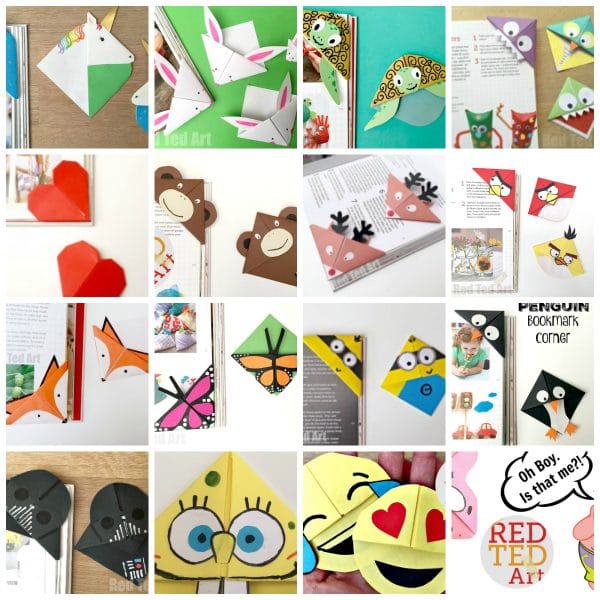
We love Corner Bookmark Designs on Red Ted Art. Paper Corner Bookmarks are easy to make and there are so many ways to decorate for all occasions.
Let’s make a tiger corner bookmark
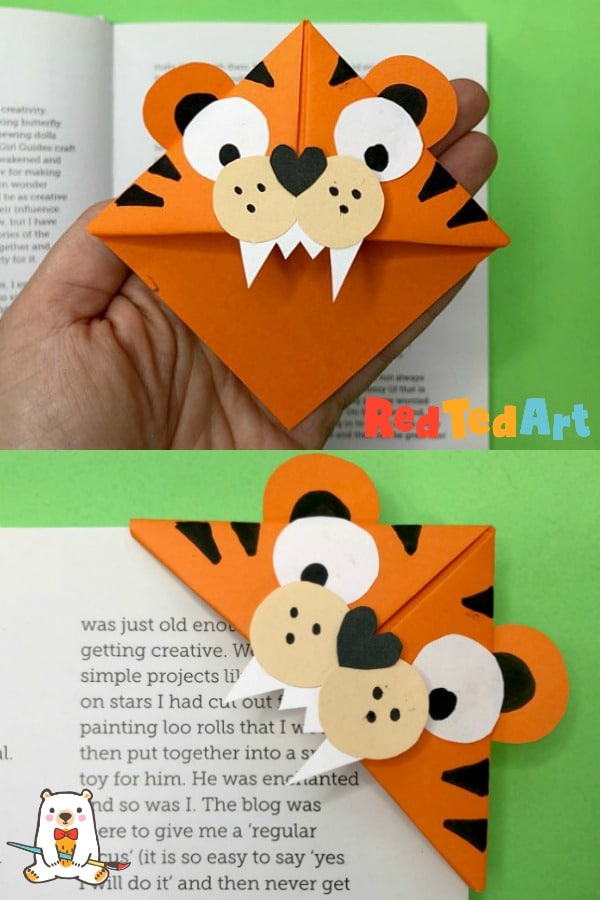
Today, we show you how to Make Your Own Tiger Bookmark Corner. Perfect for all Wild Animal Bookmark Lovers or for the Year of the Tiger children. A fabulous way to celebrate Lunar New Year 2022!
To make your own Tiger Bookmark you will need:
- Orange square paper (we used A4 folded in half and cut down to approx 21 x 21cm)
- Orange, beige, black, white paper scraps (or work with what you have and improvise)
- Black marker pen
- Scissors
- Glue stick
(No googly eyes needed! We will draaw our own… much better for the environment and just as cute and still a fun craft!)
If you would like to make use of our printable worksheets over on Teachers Pay Teachers, please do. Your support for running this website is very much appreciated!

How to make a Tiger Corner Bookmark
Begin by making your classic basic origami bookmark corner in orange paper. You can watch the video tutorial here or follow the step by step photos below!
How to make a basic corner bookmark
How to make a Corner Bookmark Corner – Basic Shape
Begin by making a classic Origami Bookmark with an orange piece of paper. We like using paper roughly 15 x 15cm in size.. but any size will do.
First you will need to make a square out of your paper. Corner bookmarks need squares of paper, but here we show you how to create that perfect square!! If you are cutting down your paper to shape it into a square, keep the orange cut offs for your tiger’s ears.
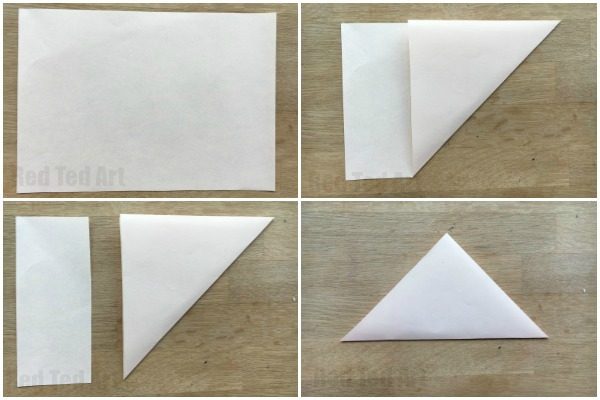
- Take your A5 sheet of paper and fold over one corner to create a triangle.
- Cut off the excess and rotate your triangle so the long edge is at the bottom and the right angle faces up. Make sure the top of the triangle is looking up and you have the long edge running perpendicular.
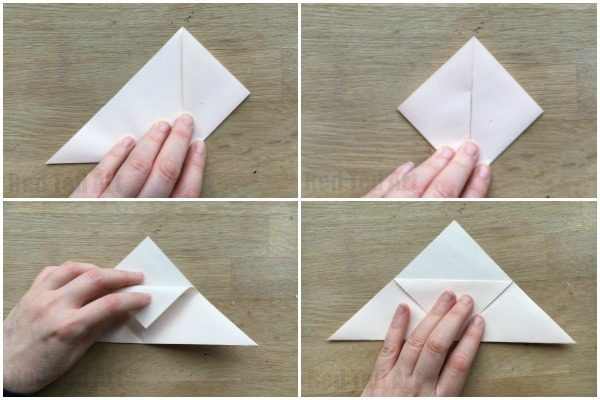
- Fold the lower right corner up to meet the top right angled corner.
- Repeat for the left side.
- Fold these two back open.
- Flip down ONE of the top sheets and crease.

- Now fold the flaps you created back up and tuck INTO your bookmark.
Now to embellish your Corner Bookmark
Now you need to take your basic corner bookmark and turn it into a tiger, by adding some simple features and shapes!
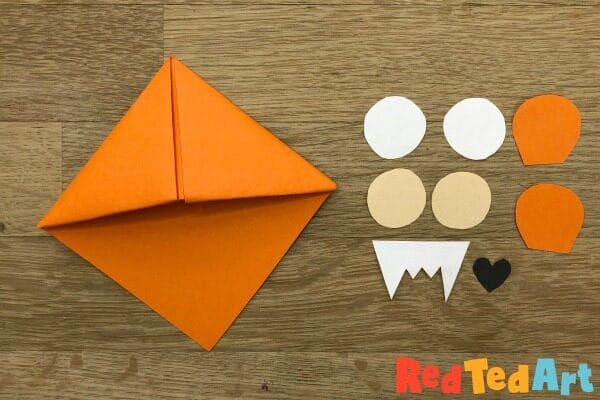
Your Tiger Bookmark corner will need the following features:
- Tiger ears (ovals with the bottom cut straight)
- Tiger nose – two circles in beige, orange or white + a little black heart or triangle
- Tiger eyes cut from white paper
- White tiger “zig zag” teeth
- Pen embellishmens (see below)

Once you have cut out all the shapes. Glue the mouth parts together. Be sure to add the nose and teeth. You could even cut a cheeky tongue in red!

Add facial features with a black pen, aswell as pupils to the eyes and “black bits” to the ears.

Glue these in place on your Tiger Bookmark base.

Once they are all in place, you can add black triangles as tiger stripes, to give it that finished tiger look!
Your Tiger Bookmark is finished.

We made this Tiger Corner Bookmark Design to go with our collection of 12 Chinese Zodiac Animals. Why not check out the rest and make your zodiac animal today?

Check out the rest of our easy and fun Tiger Activities collection

as well as our Chinese New Year Crafts for Kids:
See all of our Corner Bookmark Designs here: