
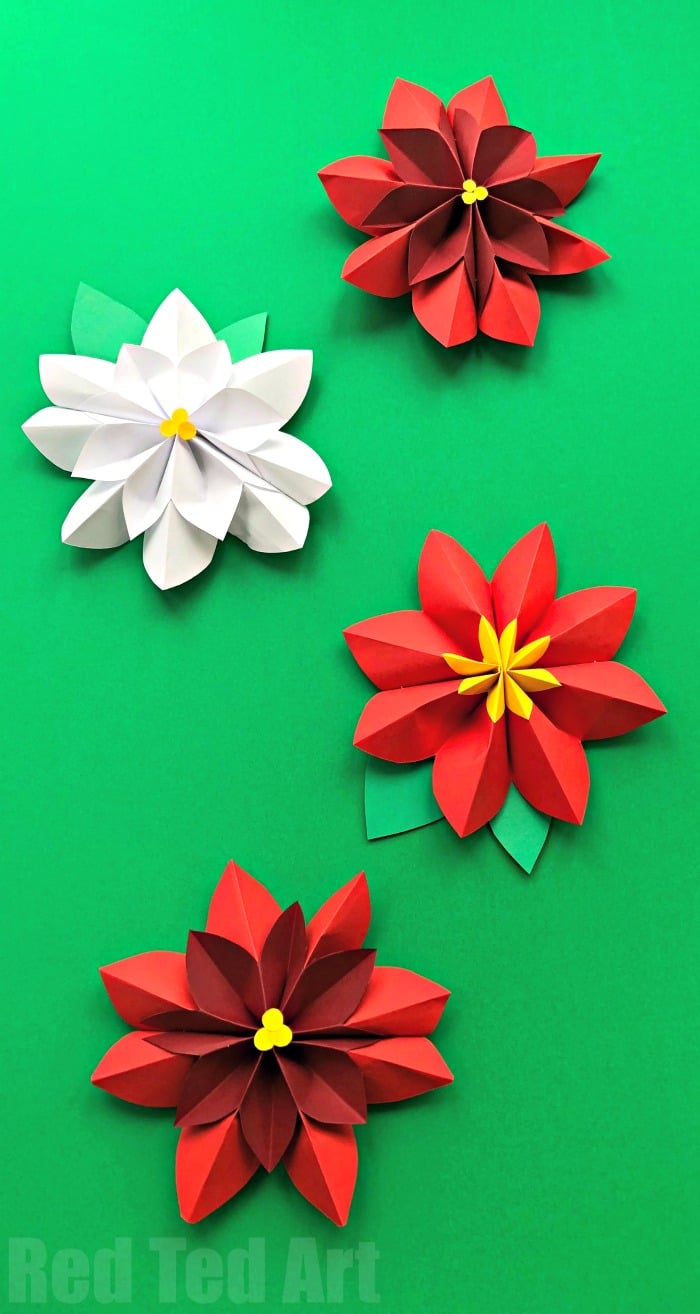
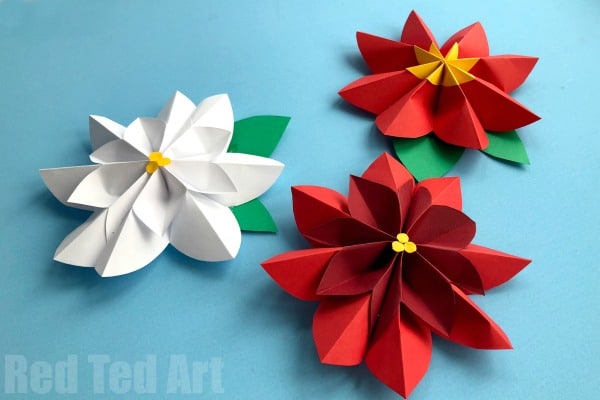
Easy Paper Flowers Poinsettia
Oh my, I am SO excited to share these GORGEOUS and Easy Paper Flowers with you today. Make them in reds, whites, silvers and golds and they make a perfect Christmas Poinsettia decoration. But of course can be an “ordinary” paper flower diy all year round. We made ours relatively small.. but they can quickly and easily be upscaled and made as large paper flower decorations that are quick to make.
In fact, I think the larger these paper poinsettias are, the easier they are to make. They make lovely room decor, Christmas tree decor.. combine them into a paper wreath or use them to decorate large spaces at the church or school Christmas fair! Just scrumptiously lovely!! The perfect Paper Christmas Craft for the holiday season!
New Paper Crafts for Kids Book
This oh so popular project features in our new Paper Craft Projects for Kids book:
Check out the free gifts for the fist 100 pre-orders! I think you will like them!!
To make a Paper Flower decoration you will need
- A5 sheet of red paper
- A6 sheet of dark red paper
- Scraps of yellow
- A little glue (for the yellow)
- Scissors
- Stapler
To make a larger flower, use A4 and A5 sheets of paper. Experiment with different sizes and colours. We also cut out some paper leaves and stuck them to the back.
How to make an easy Paper Flower (from a concertina fan)
We have a number of Paper Fan or “Paper Concertina” crafts on Red Ted Art at the moment. Concertinering paper really results in some fabulous and magical crafts!

How to make a paper flower step by step instructions
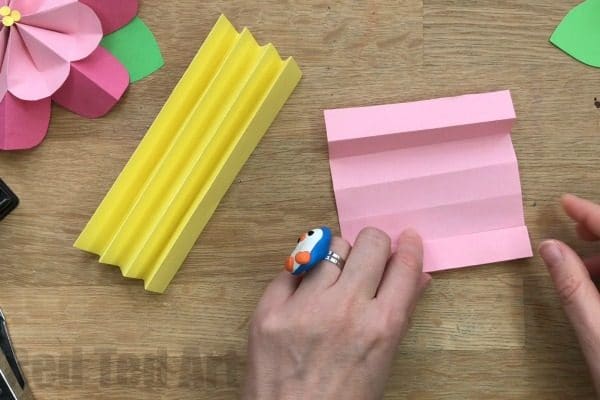
Fold both pieces of paper across the “short” edge into exactly 16 sections. The easiest way to get this done neatly is to keep folding the paper in half, then unfolding it and refolding your paper concertina style along the creases made. (NOTE: I am cheating as using the spring flower images!)
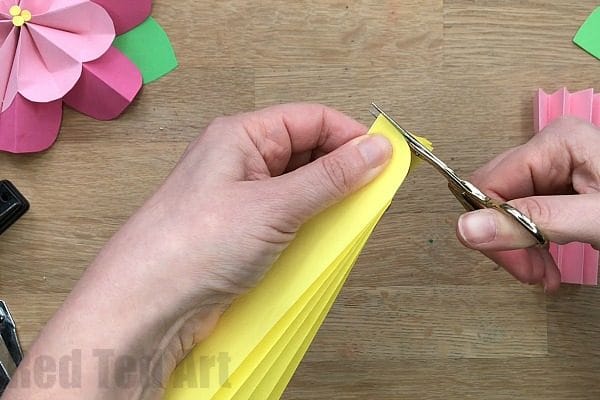
For the leaf to pop OUT at you, you now have to take your concertina paper and point the open flap towards your scissors and cut a curve – so the point of your curve is on the closed side of you concertina paper. (CHECK THE VIDEO FOR THIS BIT – the image shows the opposite curve as they are for the spring flowers – which have a different shape).
For the paper flower lead to pop AWAY from you, you need to have the “closed” side of the concertina paper facing your scissors and cut a similar curve. This time with the point ending on at the open flap.
Assembling the paper flower
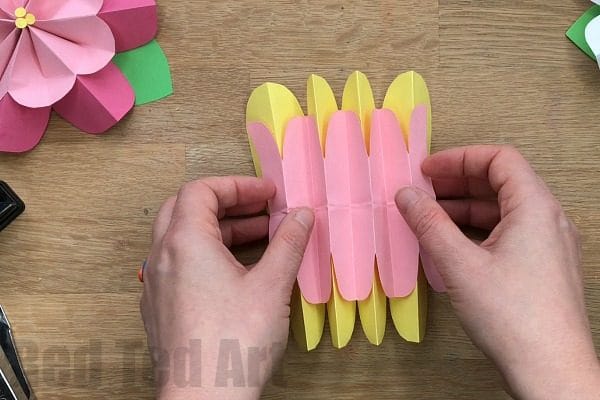
Now fold both concertina papers in the middle. Make a crease half way and fold it in both directions. So the crease easily works both ways.
Slot the two concertina papers together – with the middle lines lining up.

Find the centre fold and staple as close to the centre as possible.
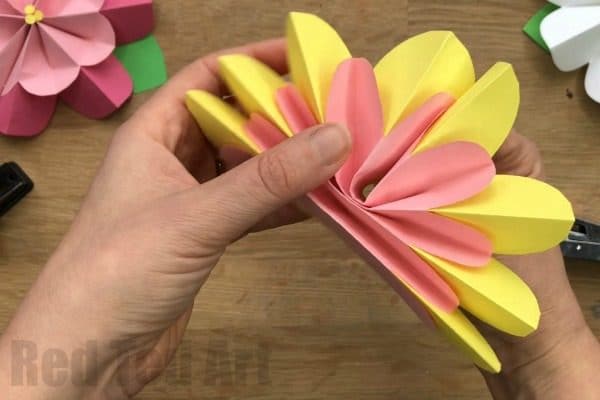
Now comes the MAGIC part. Take the top and bottom of one side of the concertina and fold towards each other – one half of the flower is finished. Secure with a staple.
Repeat on the other side.
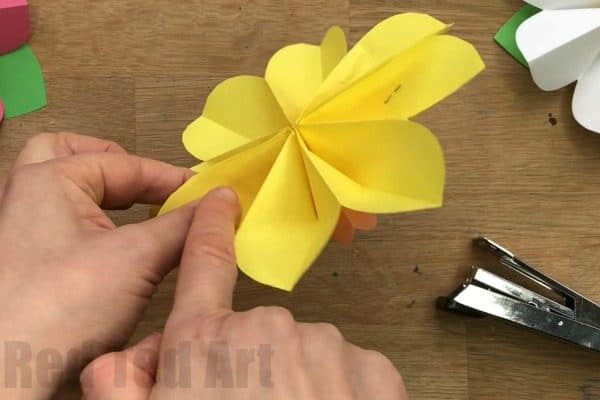
You can now glue on decorative details such as little dots or additional leaves.
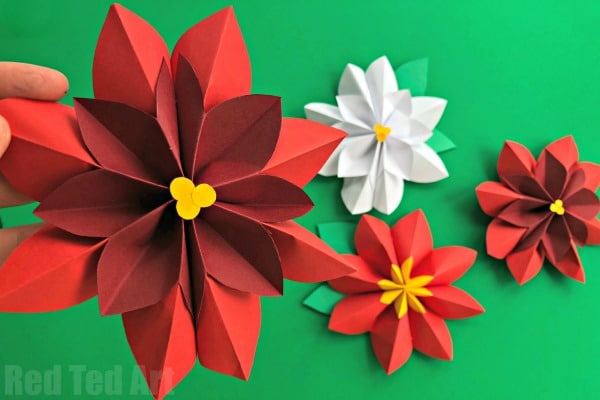
What do you think? Isn’t this Paper Flower DIY gorgeous? I do love Poinsettia Decorations this time of year. Just so festive and beautiful. Hope you enjoy this 3D Paper Poinsettia Craft as much as we do!
Enjoy!
More wonderful Paper Crafts for Christmas:

Do check out our Spring 3d Paper Flowers too!