
How to make Finger Pom Poms
Today we are making finger pom poms. Learning how to make finger pom poms is a quick and easy craft! And you can easily vary the size of your finger pom poms by changing how many fingers you use! Here we make 2 finger pom poms – adorable small pom poms to make! Check out all our pom pom making techniques here.
Small Finger Pom Pom How To

Those who know my blog well, will spot, that I shared these finger pom pom making instructions before – as part of our basketball hoop & ball paper toy…. I am sharing it again separately, because, many of you will LOVE making pom poms and will want to see how quickly and easily it is to make a finger pom pom.. and how using just TWO Fingers to make this pom pom, results in a really cute pom pom size!
Do ignore the black links on my fingers.. I had just finished drawing the basketball hoops! Ha.
Two finger pom poms are a very similar size to fork pom poms. So you may want to try those too!
Finger Pom Pom supplies:
- yarn
- sharp scissors (making pom poms with blunt scissors really is very frustrating)
- Optional: thin baker’s twine or thing string*
* The baker’s twine isn’t strictly speaking necessary.. a piece of regular yarn should be fine. However, I do find that yarn can snap when pulled tight. Which is why, I like to use the baker’s twine!
Making a pom pom using only your fingers
Making a finger pom pom really is quick and easy! We have made a four finger pom pom before when making our Easter Chicks, so you can see how easy it is to make different sizes of pom pom by using more or less fingers to make a small pom pom or a big pom pom!
Watch the 2 finger pom-pom video tutorial here.
How to make a pom pom with your fingers – photo step instructions!
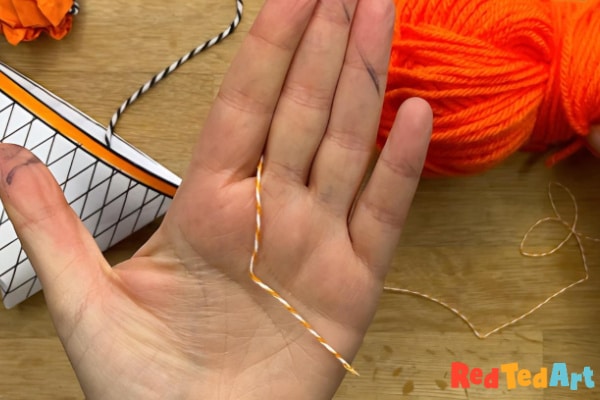
Place some THIN baker’s twine between your index and middle finger. We used thin bakers twine here, as it is strong but also the thinness will allow you to tie the pom pom better. Though a piece of yarn should work as well. Leave a long tail for hanging or using later depending on the pom pom craft you will use this for!
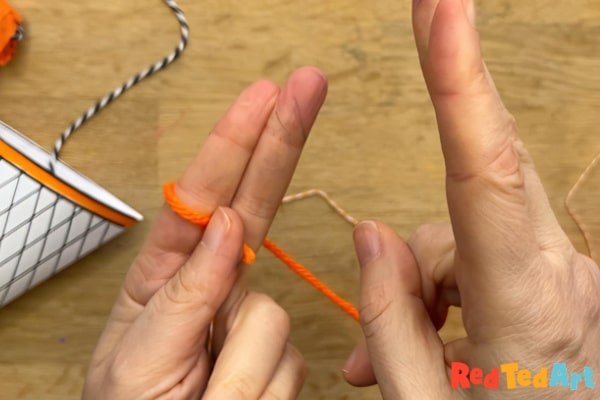
Start wrapping yarn around you two fingers (only two fingers, if you use three or four fingers, you will get a much bigger pom pom).
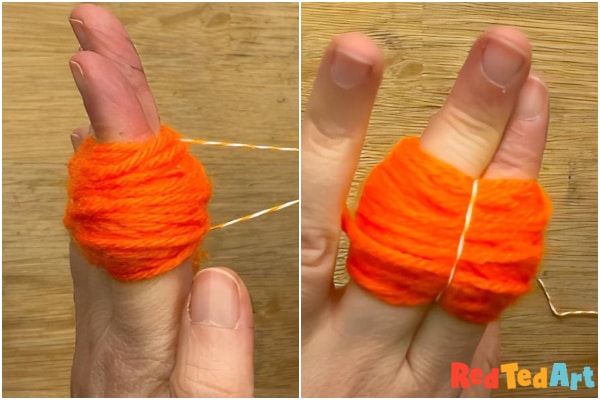
When you feel you have enough yarn (it is a guess, see my images for guidance), pull the baker’s twine up and into place. See images.
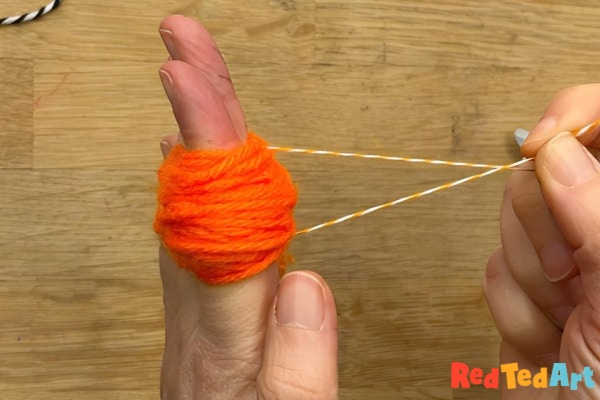

Carefully knot – slide off your fingers and make sure the knot is super tight – but also centred in the middle of the pom pom.
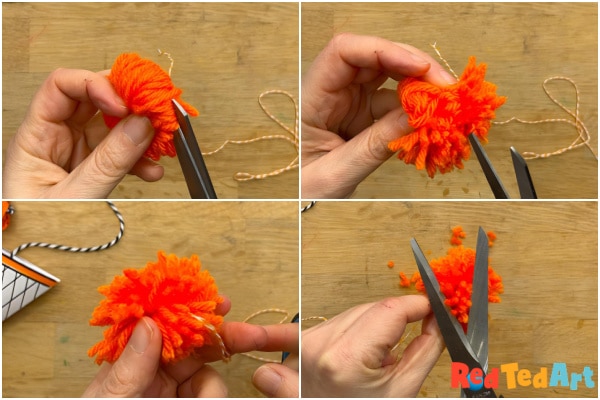
Cut open the loops using a sharp pair of scissors. Your pompom will look oblong and messy.
You will need to trim your pom pom!
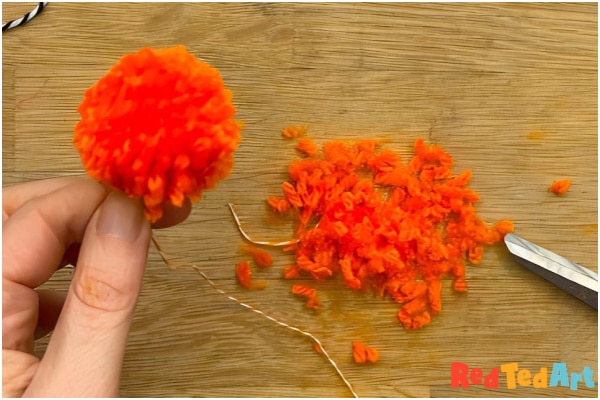
Done! You have made your very own pom pom! Now make lots of lovely fluffy pom poms!
Save the scraps for toy stuffing.
Hope you liked this cute little finger pom pom!
Here is a glorious collection of Pom Pom Ideas:

And as mentioned, we have many pom pom making techniques – for younger children we love the cardboard circle pom pom method (free) or the pom pom maker (easy for young children to handle):
