Origami Tangram Chicken Craft for Spring
Oh we do love a bit of Easy Easter Origami for Kids! Paper is so fun and versatile and you will love how easy it is to make some paper tangrams and then connect the pieces into a chicken!
Learn how to make an Origami Tangram Chicken for Spring or Easter Crafting. So cute! Easy Easter crafts for kids.
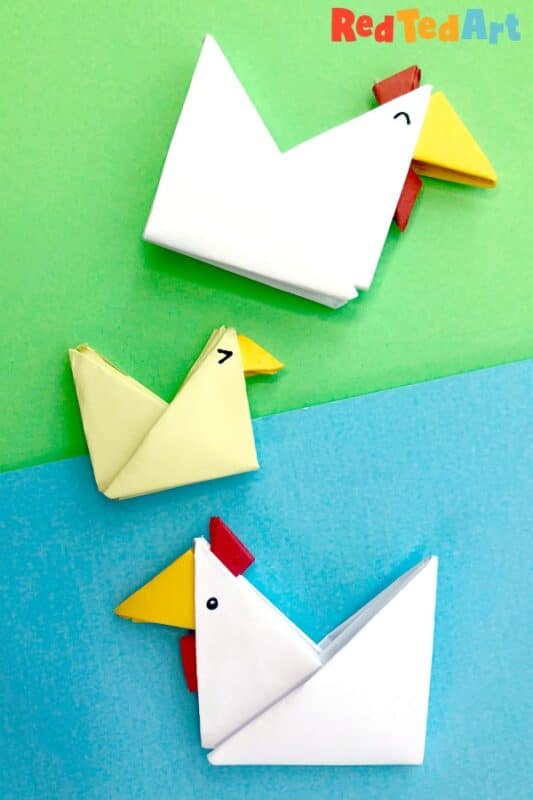
Super cute! Have fun with different colours and sizes? Or maybe even add some doodle details?

So cute!
To make your Tangram Origami Chickens you will need:
Paper in different sizes, we used:
- 2 sheets of white paper approx 15cm x 15cm (A4 sheet of paper cut down)
- one sheet of yellow paper 7.5cm x 7.5cm
- two sheets of red paper approx 3.7cm x 3.7cm
- a pen

Note how the square pieces of paper have half the length of the previous size – ie in total are quarter of the size before! A great opportunity to talk a little maths about squares and areas.
How to make an Origami Tangram
Follow our video instructions or the step by step photo instructions below!
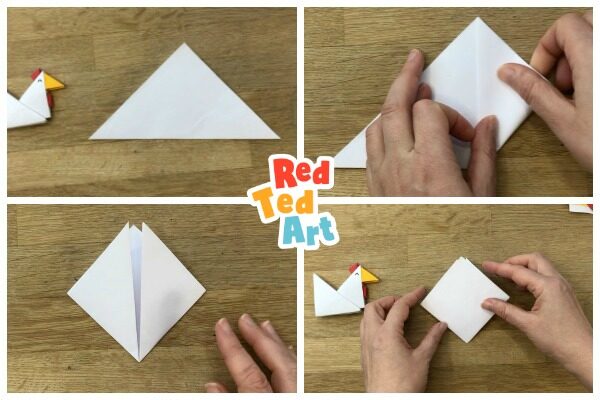
You will need to make a set of Tangrams. Here we demonstrate how to make the first paper tangram. Then repeat it for the other colours and sizes.
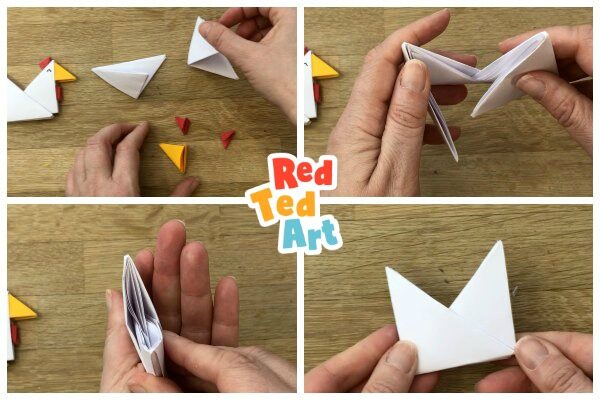
Take your square paper. Turn it 90 degrees, so you have a diamond. Fold up the bottom half to make a triangle.
Now as with our Corner Bookmarks, fold up one pointed end to meet the top. And repeat on the other side. You now have another diamond, with a line down the middle.
Flip over, so the line is at the back!
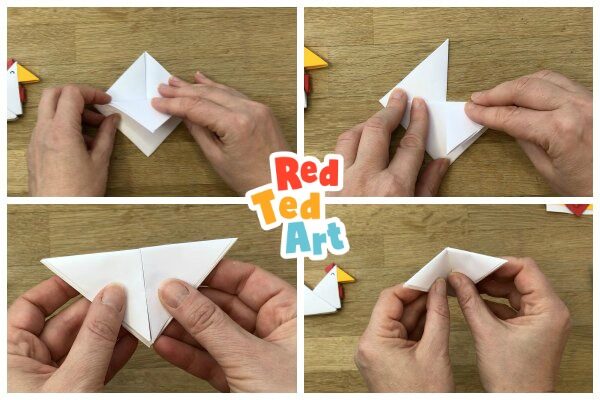
Now fold down the top flap (this is two sheets of paper.
And then fold down the two individual flaps. You now have another triangle (see bottom left).
Fold in half towards you. This is key. If you fold AWAY from you, this will not work!
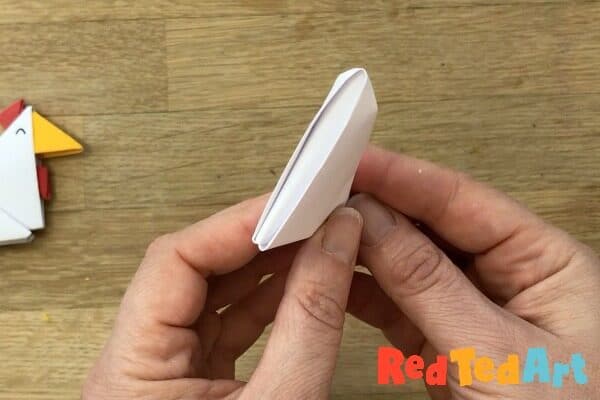
This is what the back of your tangram should look like. If it doesn’t reverse the last fold!
How to make an Tangram Origami Chicken
Make another white tangram, the smaller yellow one and two little red ones. These will be a little fiddly, but you should have plenty of practice now.
Insert the two white tangrams into each other as per the image at the top right and bottom left. Once connected you should have the basic body (bottom right).
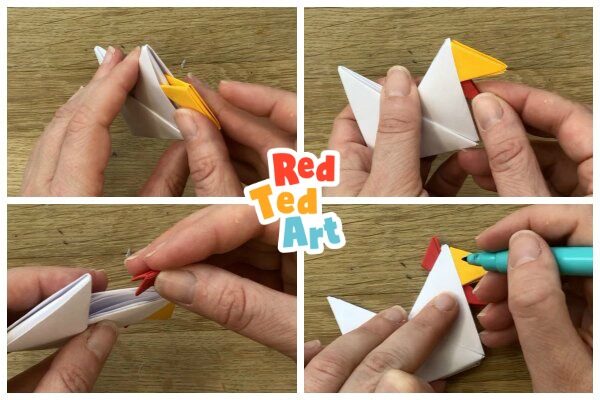
Now slot the yellow beak, wattle and comb in palce. These should hold by themselves, but you may wish to add a little glue.
Finally, add an eye! And your paper chicken is finished. Make more!!!

Hope you like this simple paper chicken craft and that you do have a go!
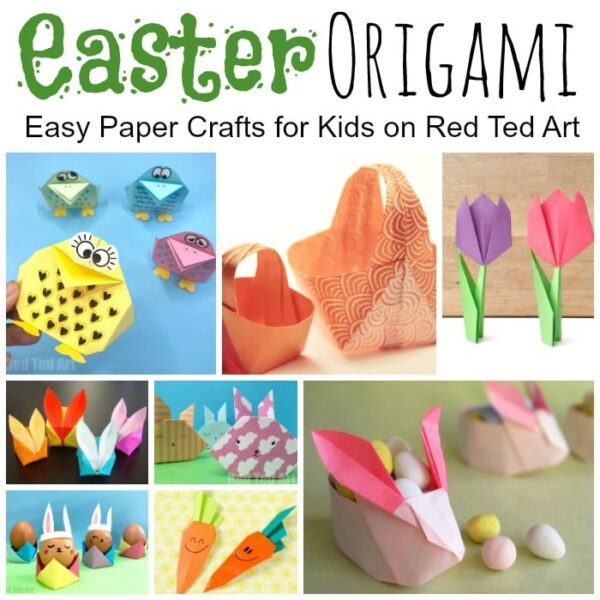
More wonderful Paper Easter Crafts here:

We also have lots more wonderful Easter Origami Ideas: