
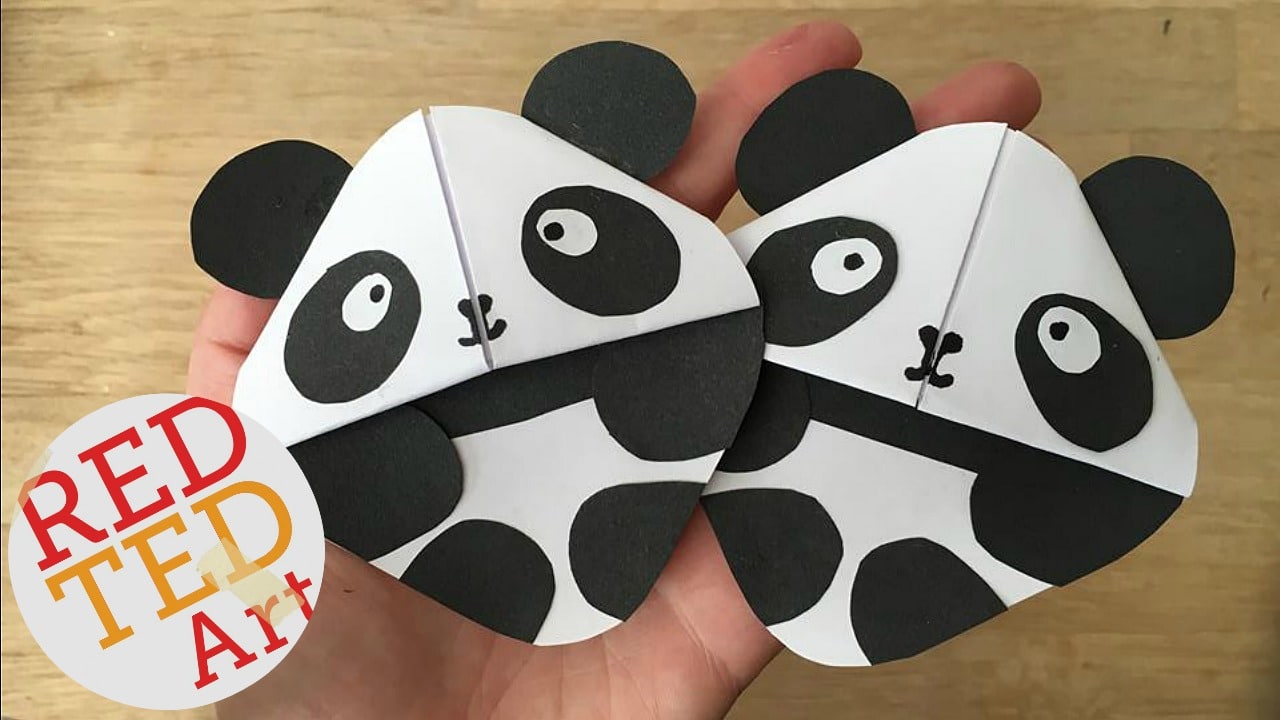
Panda Bear Bookmark Corner
We have had lots of requests for some Panda Bookmark Corners. So I decided to have a go at some. I think that these Pandas work great for anyone that adores the Panda Emoji… or for anyone trying to find a craft to go with the Kung Fu Panda movie too.. or simply for those among us that ADORE Pandas, just because.

I have some great and easy panda origami bookmark instructions to shreare with you today. As with all our Bookmark Corner these Panda DIYs are based on a simple Origami Corner Bookmark pattern, which I have then adapted using a little cutting and sticking where necessary! You may also love our Panda Bear DIY Origami (nice and easy!!)
New Paper Crafts for Kids Book
This oh so popular project features in our new Paper Craft Projects for Kids book:
Find Full info here and for UK Readers Available on Ebay!
Easy Panda Bookmark Corner – Materials:
To make your easy Panda Origami Bookmarks, you will need:
- white paper (eg from the printer)
- some black paper or a black pen
- scissors & and a glue stick
You won’t need a panda bookmark template as these are so easy to make!
How to make a cute Origami Panda. Panda Bookmark Corner DIY:
Watch the basic origami bookmark video on auto play and the add the additional panda features outlined below! Or scroll to the bottom of the post for the full YouTube Panda Video! Enjoy.
Step by step Panda Bookmark in structions:
We have a basic origami bookmark video you can watch.
How to make a Corner Bookmark Corner
Begin by making a classic Origami Bookmark with a white piece of paper. We like using paper roughly 15 x 15cm in size.. but any size will do.
First you will need to make a square out of your paper. Corner bookmarks need squares of paper, but here we show you how to create that perfect square!!
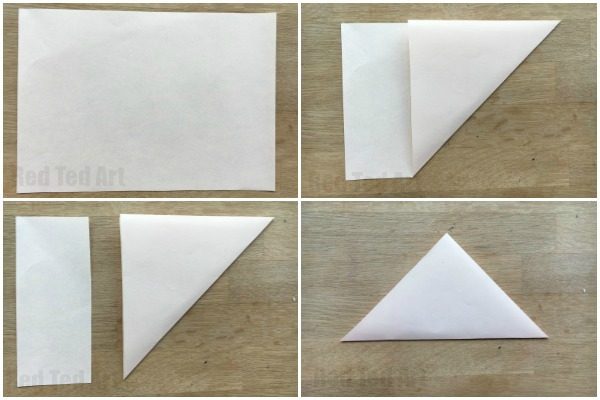
- Take your A5 sheet of paper and fold over one corner to create a triangle.
- Cut off the excess and rotate your triangle so the long edge is at the bottom and the right angle faces up. Make sure the top of the triangle is looking up and you have the long edge running perpendicular.
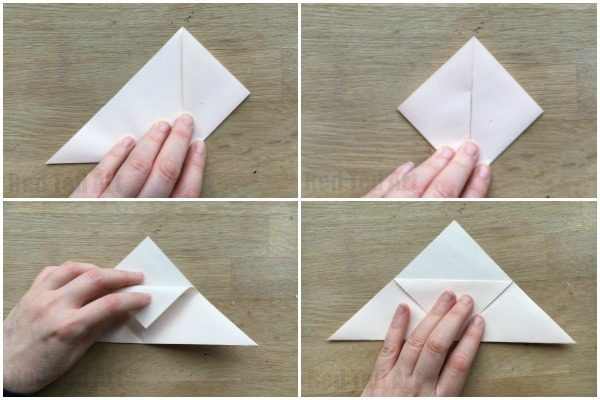
- Fold the lower right corner up to meet the top right angled corner.
- Repeat for the left side.
- Fold these two back open.
- Flip down ONE of the top sheets and crease.

- Now fold the flaps you created back up and tuck INTO your bookmark.
- Repeat for the other side
Now how to turn your Bookmark into a Panda

- Cut out two black ears and stick them to the back.
- Cut out two large panda eyes + two small ones in white, position on the top of your bookmark and glue down. You can now add the nose and both.
- Finally cut a black strip for the Panda’s body and glue down.
- And now it is time to cute 4 arms and legs. I cut rounded rectangles, glued them down and then trimmed to fit the shape of the panda origami bookmark.

- Next I rounded of the corners, just to make the panada bookmark that little “cuter” with the softer edges.
- FINISHED!!! Enjoy your cute panda bookmark!!!
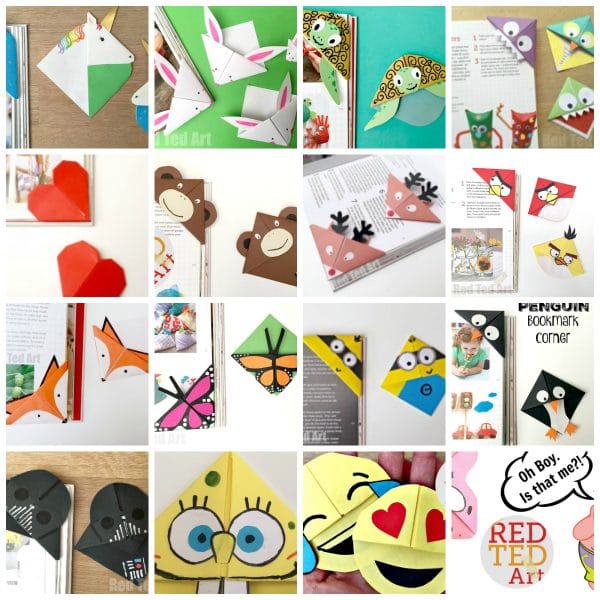
We are really enjoying crafting with paper at the moment.. and have lots and LOTS AND LOTS more ideas for you here… firstly we have a special Bookmark Corner Page – it currently has 20+ designs for you to browse at your leisure. And I keep adding more!
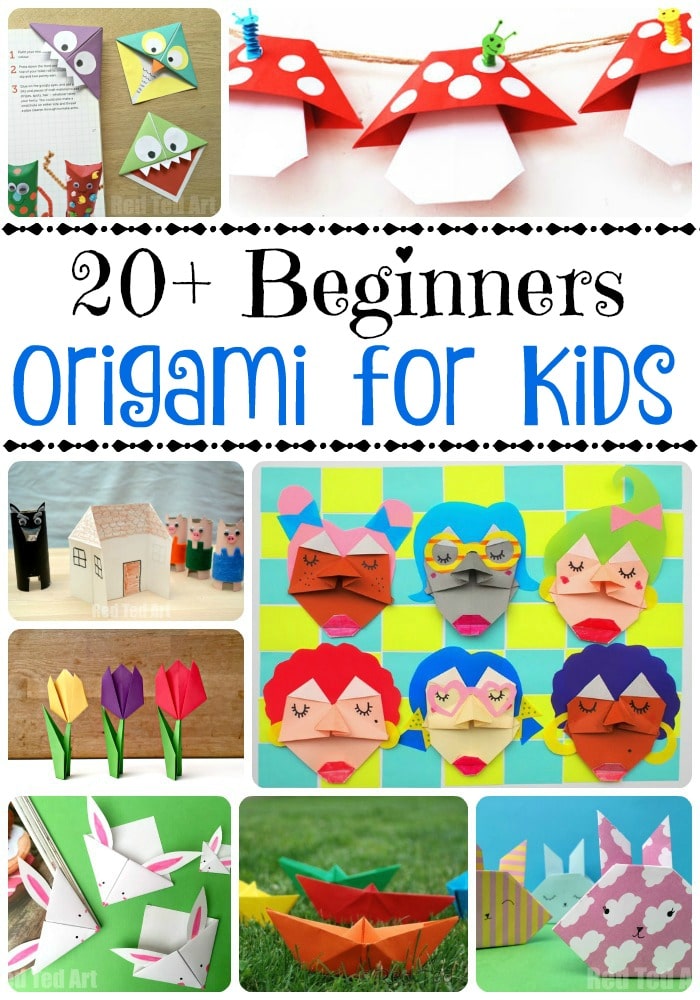
Also may want to give these Beginner Origami ideas for Kids a look. Super cute and fun…
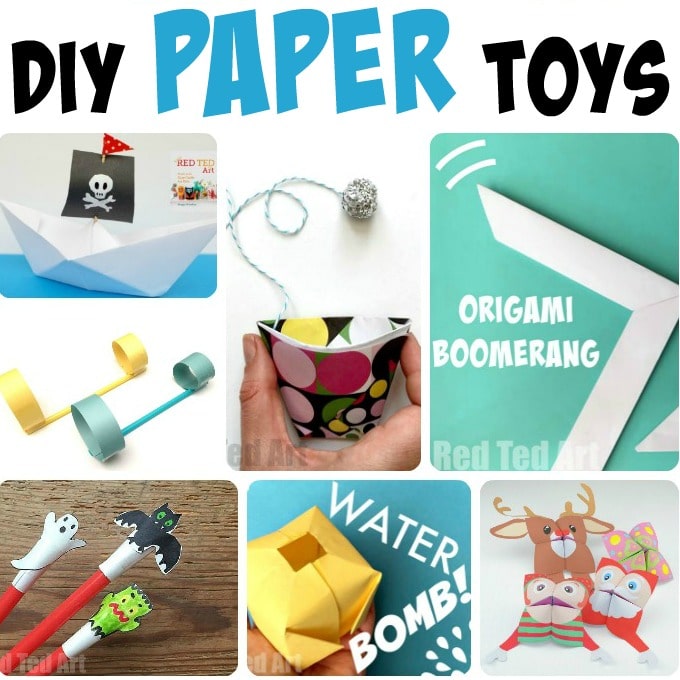
And finally, we also have a GREAT set of DIY Paper Toys which are HUGELY popular with the kids:
The full Panda Bookmark Corner tutorial is also available on YouTube: