
Simple Polar Bear Origami
This is just a super duper quick post to share with you our simple Polar Bear Origami Pattern! Truth be told.. I have shared this little guy before (see our Origami Bear).. but I know how easy it is for “things to get lost” and I so wanted you guys to see him. This Polar Bear is super quick and easy to make – I love that you just need printer paper – something available to most people I would hope AND is a great Introduction to Origami for Preschool and kids of all ages! Origami is a wonderful skill to teach kids, and you can start them quite young. There are some fantastic Educational Benefits to Origami – from fine motor skills, to spacial skills, as well as learning to follow instructions etc.
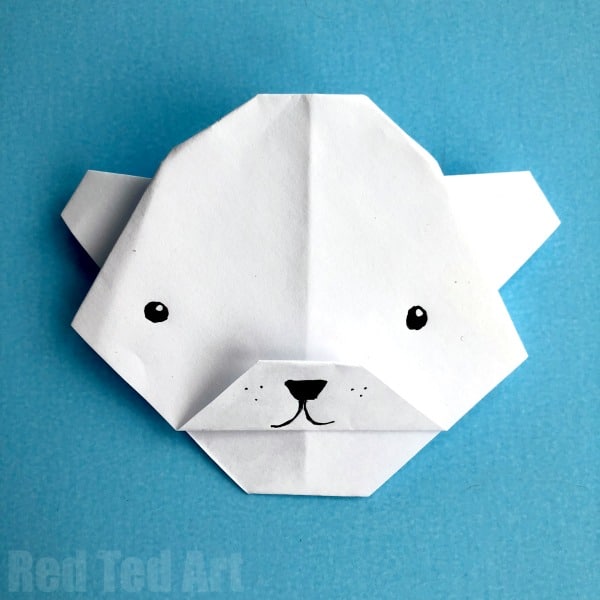
Isn’t this little polar bear simply adorable?!
To make your easy Origami Bear you will need
- a square sheet of white printer paper
- pens for decorating
We used a sheet of paper 15 x 15cm to make our Origami Polar Bear! Basically, we folded down an A5 sheet of paper and cut of the edge to create a square.
How to make an Origami Polar Bear
In our video we show you how to make the easy Origami Panda Bear.. but of course the origami pattern is the same for the Origami Polar Bear and “basic” Origami Bear… you just need to choose the colour of paper and pens to fit your bear making needes. Enjoy!!
Watch the video on auto play:
Now to it is time to make an Origami Bear
Learn how to make an origami bear by watching the video on auto play. It really is very simple. I promise. And the video is a super quick and easy tutorial to follow! But of course you can follow the step by step instructions below! The photos show how to make a brown bear.. needles sto say, use white paper for a polar bear!
Shape the bear’s ears
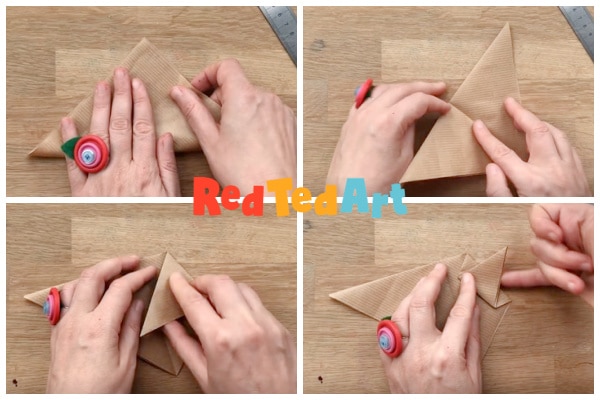
Begin by folding the square piece of paper across the diagonal to make a triangle.
Make a guide line fold down the centre of the triangle (top right)
Approximately 1/3 of the way along from the guidline fold down the right hand corner (bottom left)
And then fold back up (bottom right).
This is the basic position of one ear. Watch the video for additional info about the angles and how that shapes your bear’s features.
Repeat for the left hand corner.
Continue to shape the back of the head
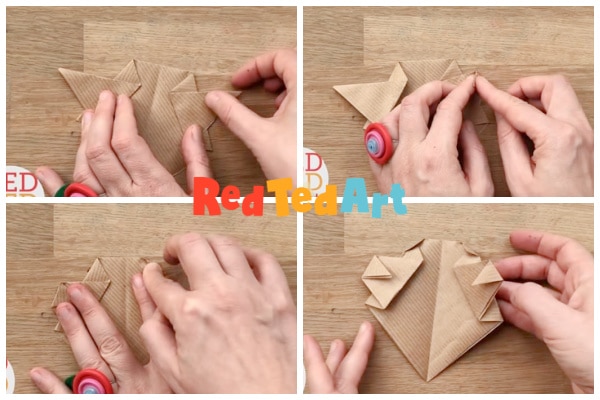
Now fold down the right tip. (Top right)
And repeat for the left tip.
Then shape the top bits of the head (bottom left).
The back of your head should look like the bottom right image.
Shape the bear’s nose/ mouth
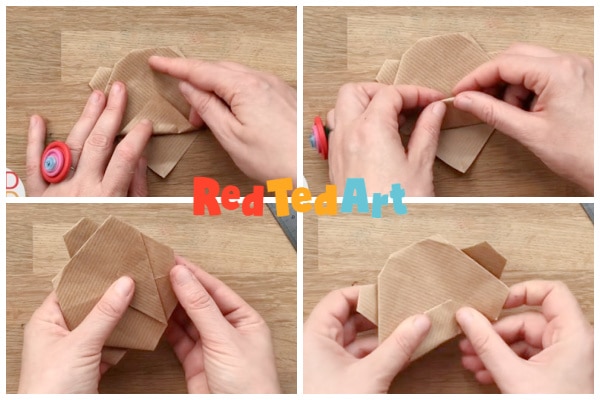
Filp your origami paper over and now shape the bear’s nose and mouth by folding over one flap (top left).
Tuck the top of the flap in (top right).
Now you have a choice of shaping the bear’s face. You can either tuck the chin in a little (bottom left)…
… or fold it over completely (bottom right).
Add the finishing touches with a marker
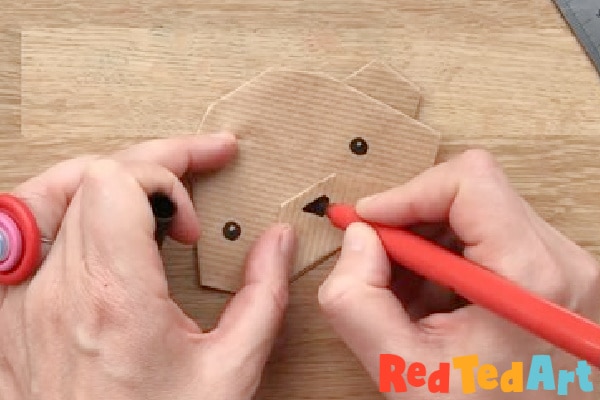
Finally, add your bear’s features with a black marker pen!
Aren’t they adorable?! And of course so so soooo easy. Enjoy making your very own quick and easy Paper Polar Bear Craft for kids!
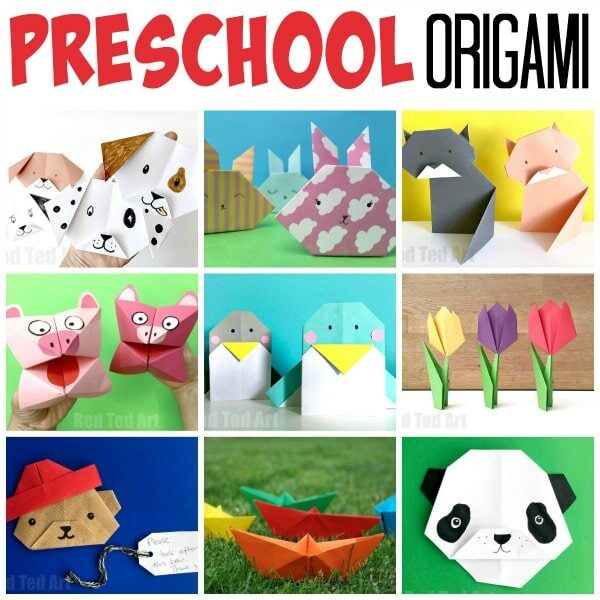
Check out more fabulous Origami for Preschool patterns here:

As well as these great Winter Preschool Crafts!
The origami bear video is also available on YouTube: