
Easy Butterfly Bookmark Corner
Time for some lovely Butterfly Crafts for Kids! Part of our extensive collection of Corner Bookmark Designs, we have for you a lovely and easy butterfly bookmark corner craft today.
I have to confess, I am rather pleased with how these butterfly bookmarks turned out – as with all the others – they are super easy and fun and make for a great little gift. These butterflies would be lovely for paper crafts idea for Mother’s Day, as a small spring or Easter gift or even for “Back to School” after the long summer holidays. An easy craft for beginners!
They join the ranks of all our other corner bookmarks – monster bookmarks, minion bookmarks, owl bookmarks, and possibly our favourites, the Bunny Bookmarks! (You can view them all in one place here: Easy Bookmark Corners).
This is a great adaptation of the classic “Origami Bookmark” and with a few simple embellishments turning it into an easy Butterfly Origami Bookmark design!
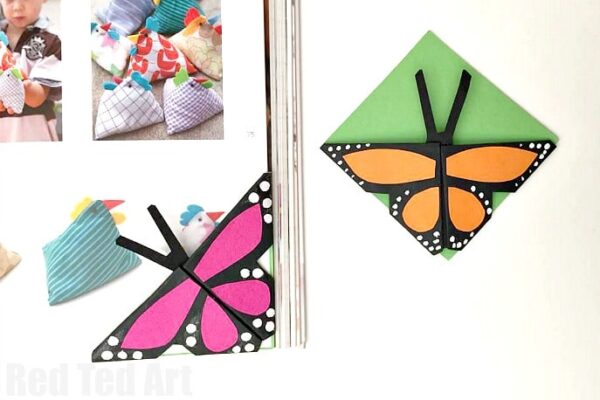
These two are designed as “Monarch Butterflies”, but of course you can design them in any colour combination that you wish – you could make them out of white paper and decorate them with felt tip pens!?
To make your easy butterfly bookmark you will need:
- a piece of paper approx 15cm x 15cm in your butterfly “base colour” – we like using black paper*
- scraps of coloured paper for decorating, including black for the anntenae and head
- scissors
- glue sticks
- a little white acrylic paint, if you want to add the dots the monarch butterfly
*the insructions below will show you how to cut down a rectangular piece of paper and make a square. But you can start off with a square piece of origami paper or construction paper if you wish. As mentioned, we love using black construction paper as it is the best colour for a monarch butterfly bookmark!
** you could also make these from white printer paper and simply use markers to decorate and turn into a fabulous butterfly bookmark!
Easy butterfly Origami bookmark DIY:
We have a butterfly corner bookmar video tutorial on auto play. Or follow the simple step instructions below! This butterfly bookmark is based on the classic corner bookmark and is then decorated to make the butterfly details.
We do also have a “full” origami paper butterfly bookmark here – with no pens or decorating needed:

How to make a butterfly corner bookmark step by step tutorial
We begin with the classic and super simple Origami Bookmark Corner! Take an orange piece of origami paper to make your butterfly. You will also need some scrap pieces of coloured paper.
Begin by making your bookmark corner- step by step instructions:
We used black paper as the “base” colour for our corner bookmark. The instructions here use different paper… it doesn’t really matter!
First you will need to make a square out of your paper. Corner bookmarks need squares of paper, but here we show you how to create that perfect square!!
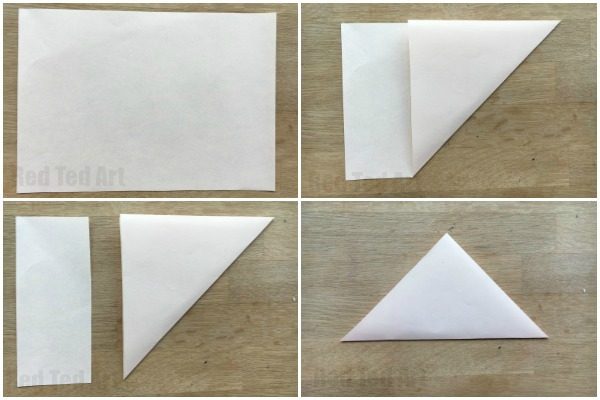
- First you need to cut down your rectangular piece of paper. So, take your A5 sheet of paper and fold over one corner to create a triangle.
- Cut off the excess and rotate your triangle so the long edge is at the bottom and the right angle faces up. Make sure the top of the triangle is looking up and you have the long edge running perpendicular.
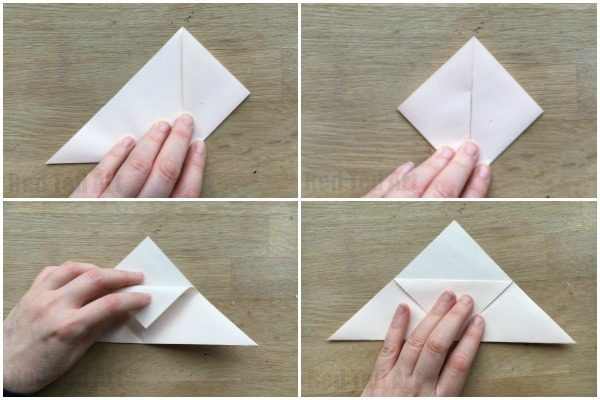
- Fold the lower right corner up to meet the top right angled corner.
- Repeat for the left side.
- Fold these two back open.
- Flip down ONE of the top sheets and crease.

- Now fold the flaps you created back up and tuck INTO your bookmark.
- Repeat for the other side
- Congratulations, you have just created your basic Origami Corner Bookmark!
How to turn the corner bookmar into a butterfly
Time to take your plain corner bookmark and turn it into a monarch butterfly – or similar! In these step photos, the base colour of the butterfly was purple…
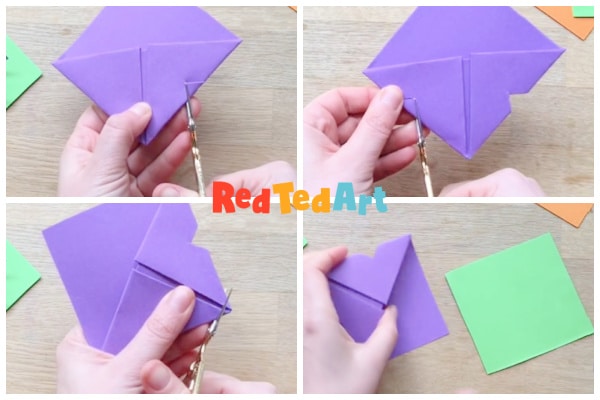
Begin by shaping the bookmark corner into butterfly wings.
I did this by making two small triangular snips to the sides of the corner bookmark. First the right edge and then the left edge to match.
Round off the bottom of the bookmark too.
Next, cut a green square piece of paper (trace it around the bookmark for size).
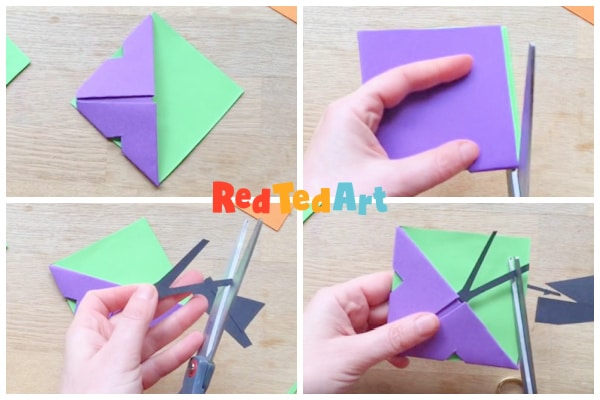
Glue inside the bookmark to represent grass.
Flip the bookmark corner over and trim off any edges.
Make a butterfly head and antenna – basically cut a V shape with a long base.
Glue inside the bookmark and trim a little if needed.
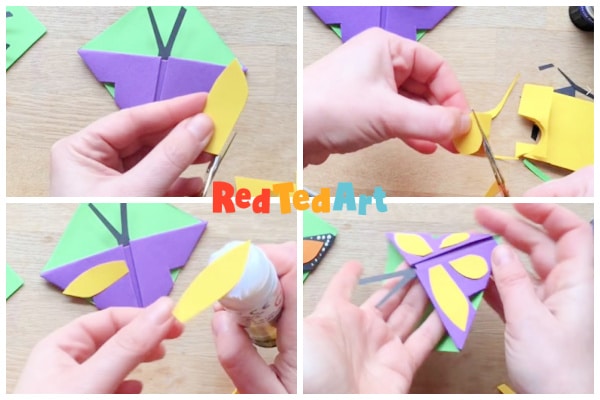
To decorate the butterfly wings futher, take coloured pieces of construction paper and cut some shapes – large and smaller tear drops work well.
Once you are happy with your shapes, glue in place.
Your basic butterfly corner bookmark is finished!
You can add white paper dots or use some acrylic paint and a toothpick to add details if you wish too!
Hope you liked our monarch butterfly bookmarks. So easy and fun to make! Such a lovely craft to gow ith any summer reading program! Handmade DIY Bookmarks are always so fun and special. You can customise this cute paper butterfly bookmark to suit your favourite colours too!
More wonderful Butterfly Crafts:

More great Corner Bookmark Designs:

Our Butterfly Corner Bookmark is also available to view on YouTube: