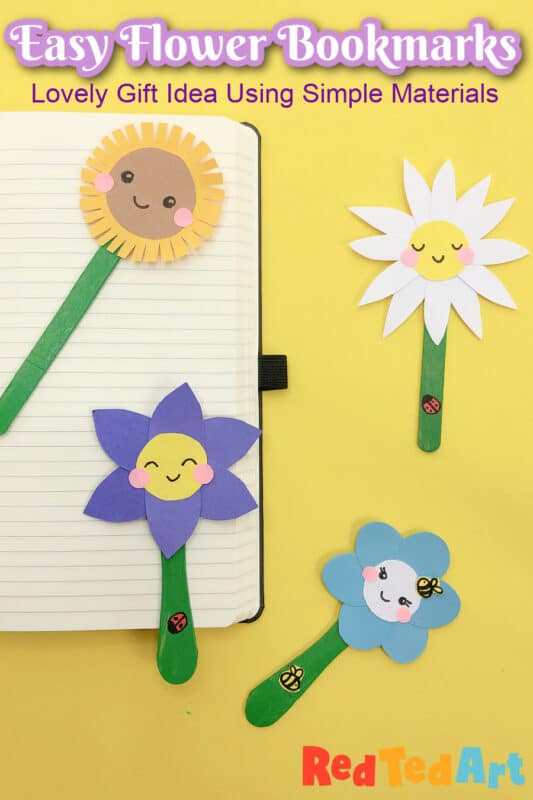
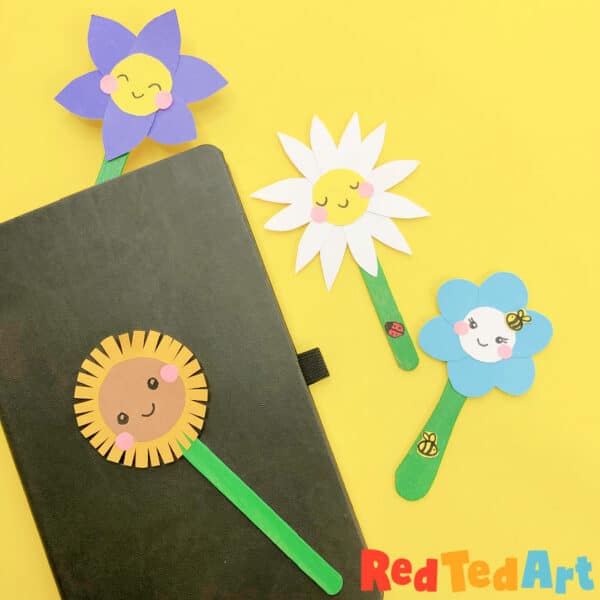
Popsicle Stick Flower Bookmarks DIY
Our Best Makes Ever series continues! A series design to use very day materials to get crafty! Today we make these adorable little Popsicle Stick Flower bookmarks using our recycled ice lolly sticks (we always pop them in the dishwasher for crafting!) and paper scraps! You can also make these using felt scraps if you wish.. or why not some colorful “kids’ art”? These are fun to make whatever the occasion, but would be extra lovely as a Mother’s Day Gift or a Teacher Appreciation Gift!
Lollipop Flower Bookmarks DIY
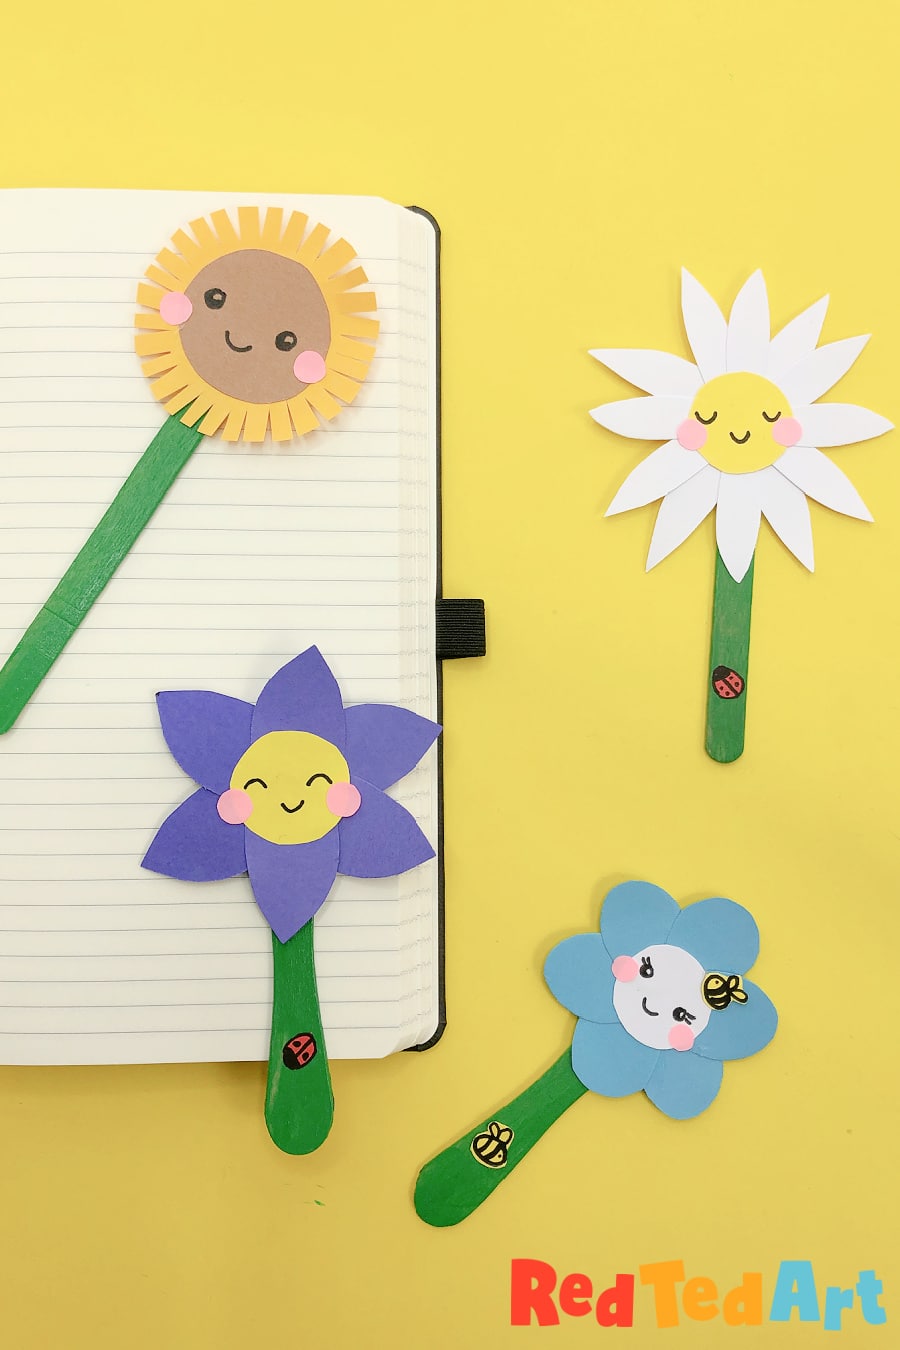
You can easily make these lollipop flower bookmarks personalised too! By adding lovely little details to the lolly stick stem – a name, a flower, a bug! You choose!
Note: affiliate links have been added to this post – should you choose to purchase via these, I will earn a small commission that goes towards the upkeep of this site!
About the Best Makes Ever series
The Best Makes Ever Series, is a series of art and crafty videos, that Art Crafty Kids and I produced for Sky Kids UK back in 2020-2022. They were designed to bring delightful arts and crafts projects to kids – using every day materials/ limited resources. Enabling everyone to join in and have fun! Now, 5yrs on, we are (slowly) able to share these lovely arts and crafts projects with you on our websites too! So, DO explore our Best Makes Ever Series tab for more info.. or check out some of our highlighted projects here:
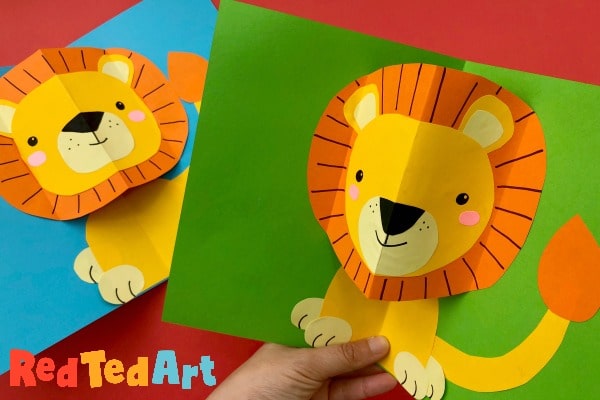
- Using basic shapes to make a Pop-up Lion Card
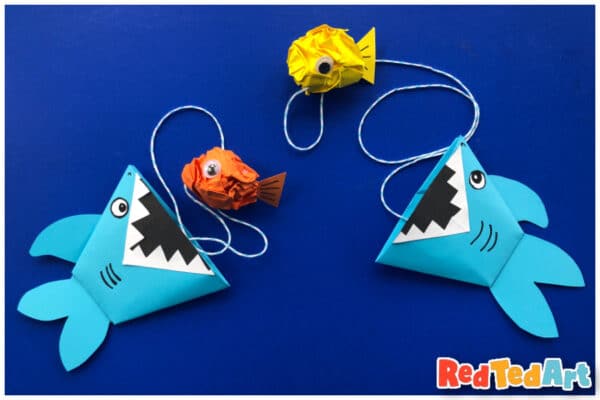
- Origami Shark Paper Toy
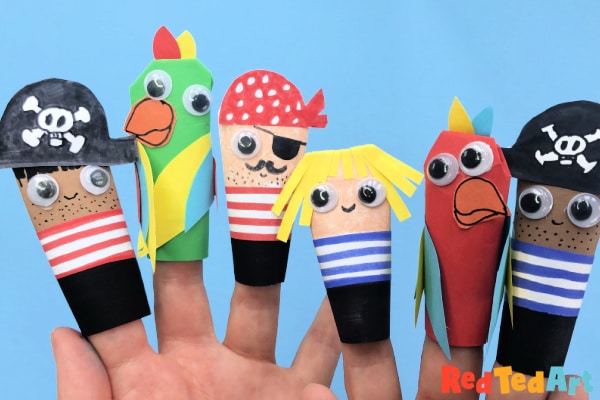
- How to make Pirate Finger Puppets
On to our Lollipop Flower Bookmarks!
Suppliesed needed to make these cute Paper Flower Bookmarks
We made these popsicle stick flowers using paper – to make them extra eco friendly and accessible to “all”. You could also use the same techniques using felt for longetivity or light card! For with what you have to hand!
- Washed and dried popsicle sticks (or craft sticks, though I encourage recycling your ice lolly sticks from summer)
- Paper scraps in desired colors
- Paint or Pens (for coloring in the popsicle stick and adding details to the kawaii flower faces)
- Single Hole punch (optional)
- Scissors
- Glue stick
I feel that if you use your wash ice lolly sticks and paper scraps this is practically a free popsicle stick flower bookmark craft!
DIY Flower Bookmark Video Tutorial
You can also watch this video tutorial on my YouTube Channel if you prefer!
How to make popsicle flower bookmarks
Let’s get started on making these super cute flower bookmarks for Mom, Teacher Appreciation week or just because! These would be lovely summer time craft for library craft sessions too!
Color your ice lolly stick green:
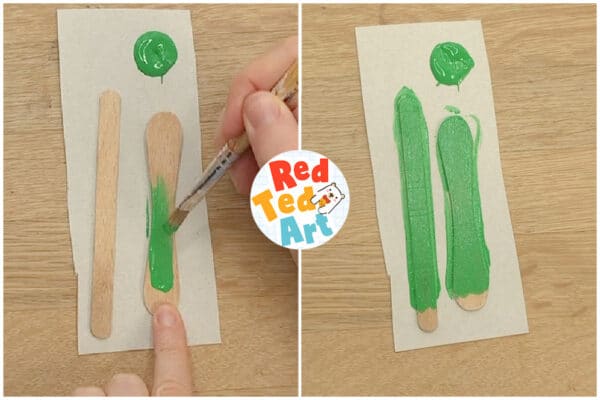
Here I painted the lolly sticks with green paint. However, in the past, I have been very successful with simply using felt tip pens to color our lolly sticks too! So, as ever, work with what you have to hand.
Also: as you will be gluing a flower to one end of the lolly stick, you can keep one end paint free – making it a less messy activity!
Decide on the type of flower you would like to make
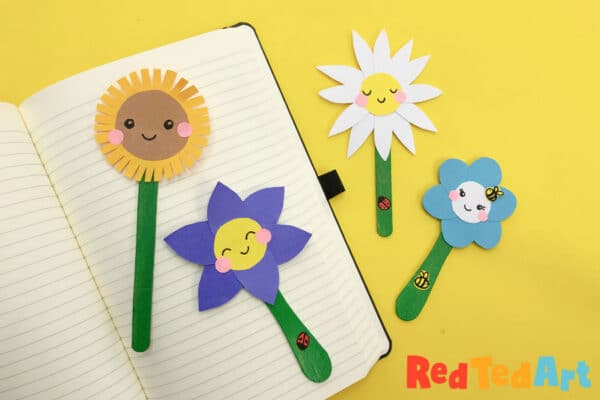
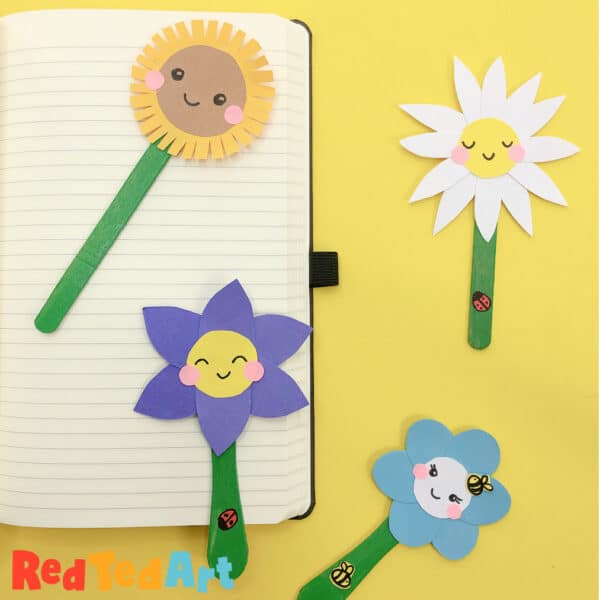
I share two types of flowers here today to help you be inspired! The first one our generic purple headed flower can easily be adapted to suit many more designs. The second is a gorgeous sunflower!
Cut your flower petals – we made 6:
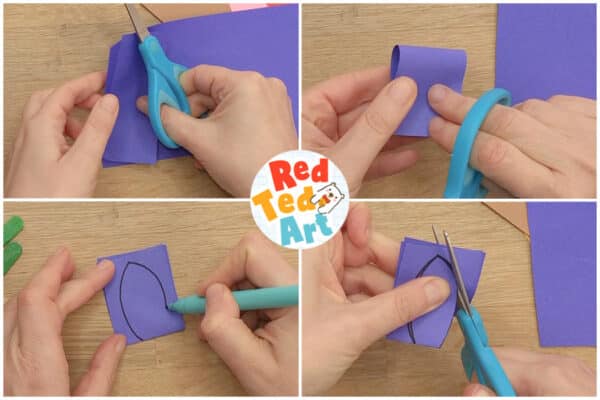
I decided to make a 6 petal purple flower.
The key is to get petal shapes the same size and shape. So I cut 3 strips of paper.
Folded them in half.
Then drew a petal shape.
I cut this out… and got 6 petals the same size.
Cut flower head centre – make sure the petals all fit:
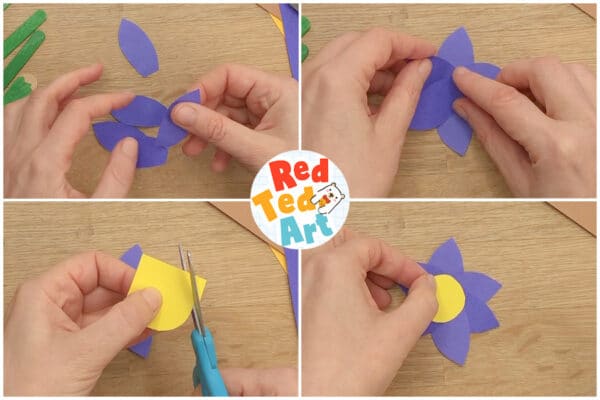
I checked that the 6 petals shapes looked nice as a flower (top right image).
Then I cut a circle for the centre of the flower. You could use a penny to trace if that helps.
Check that the circle looks nice against your petals.
When choosing colors – consider the color wheel for complimentary colors etc. I find purple and yellow work well together.
Assemble paper flower head:
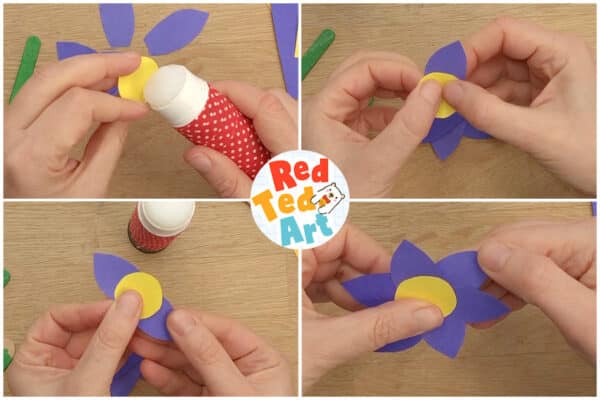
Add glue to the back of your yellow flower centre.
Glue a petal to it.
Then glue a second petal OPPOSITE to the first petal – this will help you space out the preals better.
Now glue the remaining petals. You have your basic flower shape finished. You could now stick this to your green craft stick.. but we like to add some cute flower details too!
Add Popsicle Stick Flower Details:
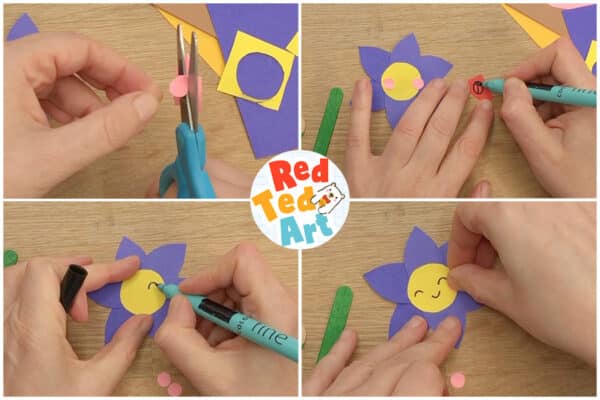
I cut some rosy cheeks. You could use a single hole punch to cut these too.
I also decided to make a mini ladybird. You can add other details.. like mini bees too.
Then I drew a simple face on the flower.
And glued on my rosy cheeks.
Final Flower Bookmark Assembly:
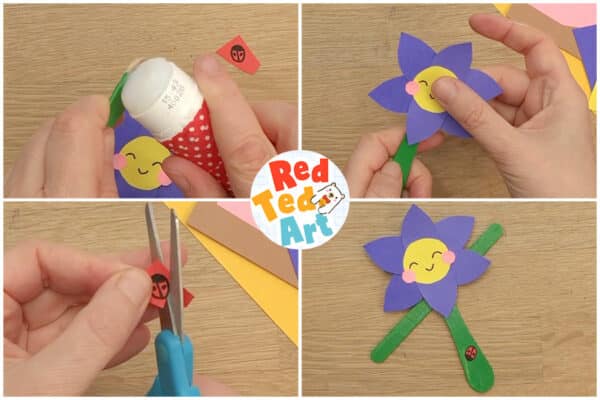
Now add lots of glue stick glue to your green popsicle stick stem and glue on the flower head.
Finally, add any quirky details, like the ladybird!
Your first Flower Craft Stick Boomark is finished!
Make a Popsicle Stick Sunflower Bookmark
Here is how I made my sunflower bookmark!
Cut the Sunflower Circles:
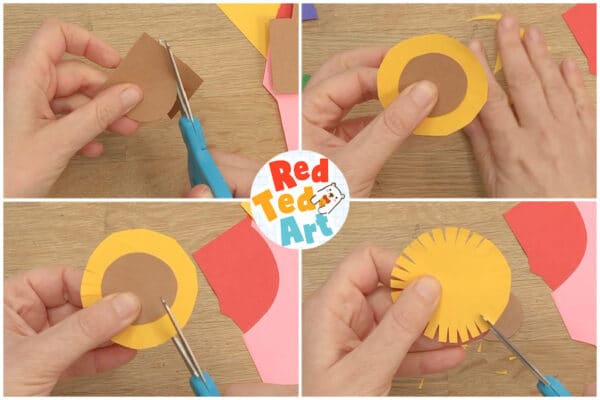
I cut one larger brown circle (the size of 2 pence piece maybe?).
Then I used this brown circle, placed it on yellow paper and cut larger circle around that.
I snipped into this larger circle (careful not to cut the brown, but the brown helps guide you how far to cut).
And then I trimed these cuts to make little indents. Like tiny triangles.
Final Sunflower Bookmark Assembly:
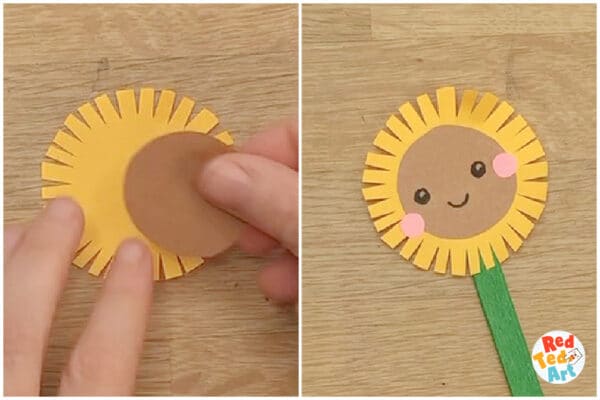
Glue the brown circle in place.
Add little facial features in black pen.. and of course some hole punch rosy cheeks!
You popsicle stick sunflower bookmark for Mom is finished!
Explore different flower petals and flower colors:
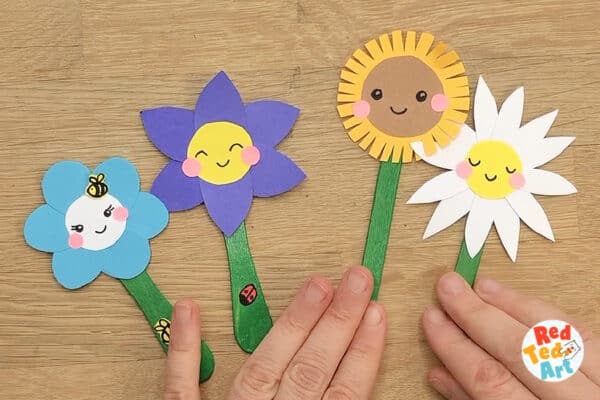
Now have fun with different shapes and colors and details.
You can mkae your petals round (blue flower) or pointy and thinner (white flower).
I also like how adding the bees and ladybirds, you can make them look like a hair bow! So fun!
Hope you make lots of these! And I also hope you enjoyed making these cute little Craft Stick Flower Bookmarks! I am sure Mom or Teacher will LOVE these!
More From the Sky Kids Best Makes Ever Series
More makes from the Best Makes Ever series – now on Red Ted Art!:
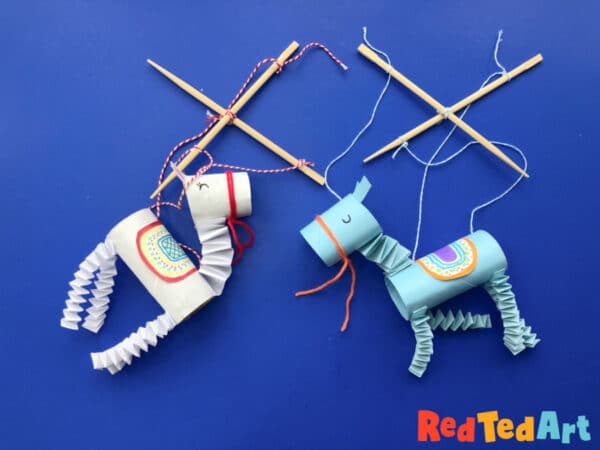
- Dancing Llama Puppets
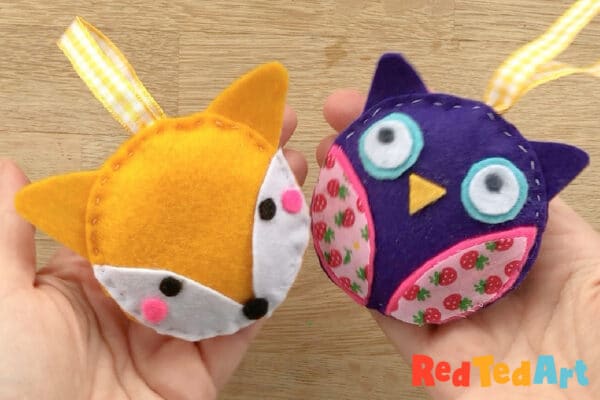
- Practice your sewing skills with easy shapped Fox Ornaments
- Make your own Board Games from Paper – play Go or Checkers (or make a Chess set!)

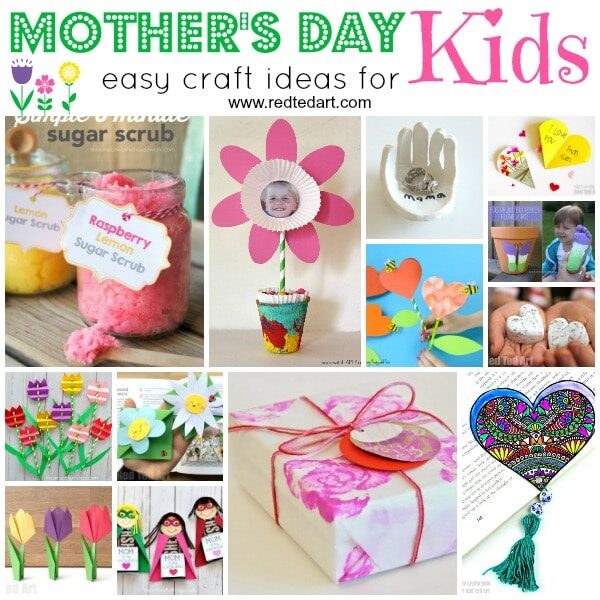
Or alternatively, explore all our Mother’s Day Crafts here: