How to Make an Origami Halloween Bat (Easy)
Time for some easy Halloween Origami. Well. With all our fabulously Easy Origami for Kids.. it was only a matter of (Halloween) time, that we would have a go at the “classic” easy origami bat. It really IS easy… or at least the basic origami bat is.. you can then choose to snip snap and decorate it to your heart’s content. So today, let’s learn how to make an Origami Halloween Bat.

These are part our collection of Fun Halloween Origami Ideas! or check out this extensive list of Paper Halloween Crafts.
What to do with your origami bats for Halloween?
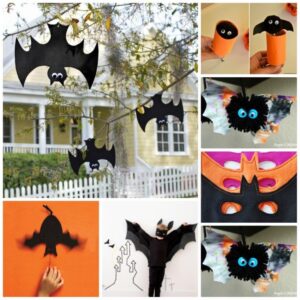
Once you start decorating, your little bats really will start taking on a personality of their own. Super cute and TONS of fun! These little bats can be used to decorate for a Halloween party:
- they would look fabulous simply “stuck” on the walls or a door. Or
- combine them into fun Halloween garlands.
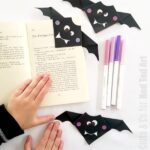
- As mentioned, they also work really well as bat corner bookmarks. So cute!
- You can also add them to greeting cards and add some BATTY puns
- stick them to the outside of any Halloween party bags
Is this the easiest Origami Bat? Does it use basic folds?
Yes it is! I have researched extensively, to find you the easiest and most fun bat origami for Halloween. There are number of fabulous bat folding instructions out there – but I promise you, these origami instructions are the easiest (and cutest.. well I am biased, I know!). The pattern also has the least folds, which means you have the least layers of paper – which makes it easier for beginners to manage this origami pattern.
More Fun Paper Halloween Crafts from Red Ted Art
And if you love bats, especially CUTE BAT CRAFTS we have plenty more! We also think this makes a great Fall Corner Bookmark Design, check out the other designs too!
This is a great post to show how very versatile Paper Crafts can be.. and is the perfect Paper Halloween Craft for kids!

You may also like this super easy Jack Skellington Wreath – love the technique to make this – adapte the colour scheme to suit your Halloween Decor.. and the best bit? It is all made from PAPER!!! Yep.. a fabulous Paper Halloween Wreath!
Bat Halloween Decor – Materials needed:
- Black paper (square) – this doesn’t need to be origami paper… but thinner paper is always easier to work with
- Embellishments (white paper, pink paper, pens) (optional)
- Glue stick (optional) – a basic paper bat won’t need any glue, nor scissors, we have added them in order to make your black bat extra cute!
- Pair of scissors (optional)
I have a handy worksheet that you can print off over in my Teacher’s Pay Teacher’s Store. By purchasing it, you not only get a handy one page printable to work from, but you are also supporting the upkeep of this website 🙂

2 for 1… Easy Bat Origami Bookmark
And look, as mentioned above, doesn’t this also make an AMAZING Origami Bookmark Bat?!?!
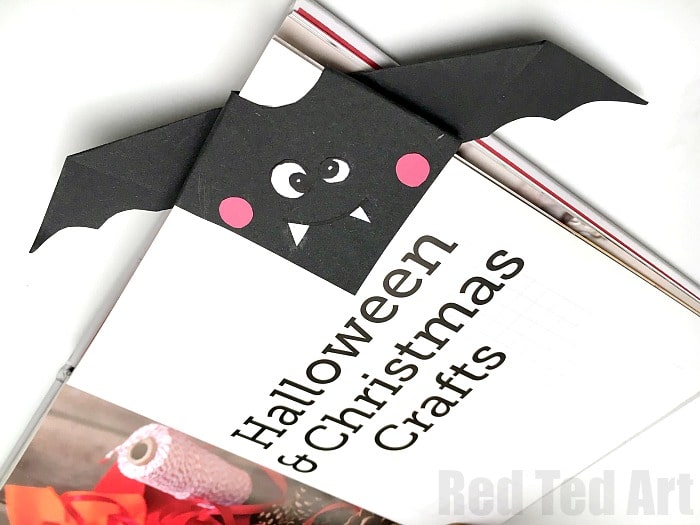
If you do CUT your bat, it also works REALLY well as a corner bookmark!! 🙂
How to fold an easy origami bat – step by step instructions
These steps are also summarised in the video tutorial on autoplay (or check out the recipe card below)! You may also enjoy watching the video for those fine details.
Let’s make this simple origami bat
Fold a basic triangle and create the wing flaps:
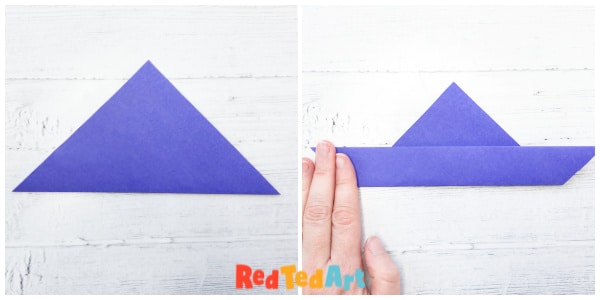
Take a square piece of paper 20 x 20cm is nice, but any size will do. (If you are using origami paper, and there is a white side, make sure the white side is on the INSIDE of your fold – you only want the black to show).
Fold across the diagonal to create a triangle. Make a neat crease.
Take the long edge of your triangle and folds up 1.5cm depending on the size you want your wings to be.
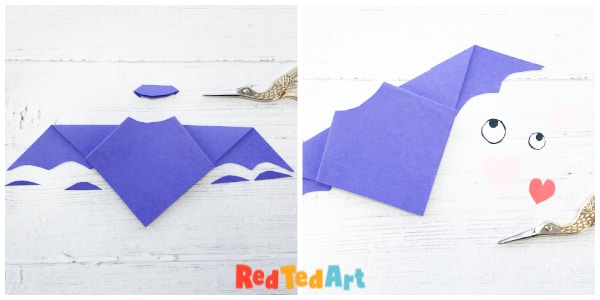
Shape the flaps to get them into position:

Draw two guide lines to help you get the wing shape even on both sides.
Lift the flaps to make the final bat wing position:
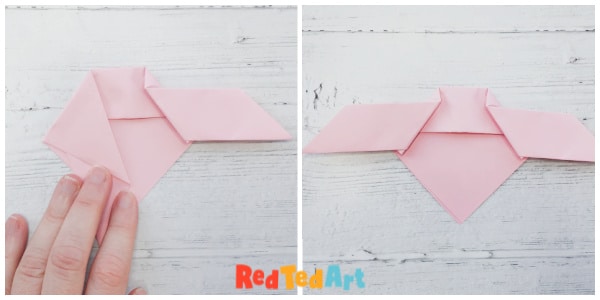
Fold a wing down at 45degree angle (creating a perpendicular), and then back up, making sure the fold back up is in parallel with the original.
Repeat for the second wing. Giving you a basic origami bat shape.
Shaping your bat with a pair of scissors
You can now go further and shape it with scissors and decorate. When you do the trimming of the bat’s head, you are also allowing your origami bat to be used as a corner bookmark.. as the bookcorner fits neatly into that section you have trimmed away.
Cut a wave into the wings, and cut a little shape out of the top of the head (this will also allow you to use it as a bookmark corner).
Finally, decorate with paper eyes, cheeks and add a mouth either in silver or with a darker pen.

Watch the Video Tutorial: How to Make an Origami Paper Bat
As with all origami – video instructions really are the best way to see how to make them!
I hope you like these cute bats and do have a go!
Final Tips for Beginners
- As mentioned above – regular printer quality type paper works great for these paper bats. Don’t use thick paper or card, most craft papers will be fine for this!
- Make your square paper as neatly as possible – I like using regular paper – folding a corner up to create a triangle and then cutting this out. It is a super easy technique. But you can also use a ruler and measure out your square – the video on our paper bunny bookmark shows you how (go to 30sec into the video).
- Don’t worry about perfection when beginning to learn.. these bats are meant to look fun and quirky, embrace and uneveneess
- Do watch the video tutorial.. I find for origami, videos really are the easiest way to learn
- Keep practicing!
Origami Bat
Equipment
- Black paper – 20cm x 20cm (approximate)
- Contrasting paper for decorating
- Scissors (if shaping your basic bat)
- Pen
- Glue
Instructions
- Fold across the diagonal to create a triangle. Make a neat crease
- Take the long edge of your triangle and folds up 1.5cm
- Fold a wing down at 45degree angle (creating a perpendicular), and then back up,
making sure the fold back up is in parallel with the original - Repeat for the second wing. The basic origami bat is finished
- Cut a wave into the wings, and cut a little shape out of the top of the head (this
will also allow you to use it as a bookmark corner) - Decorate with paper eyes, cheeks and add a mouth either in silver or with a darker pen
Video
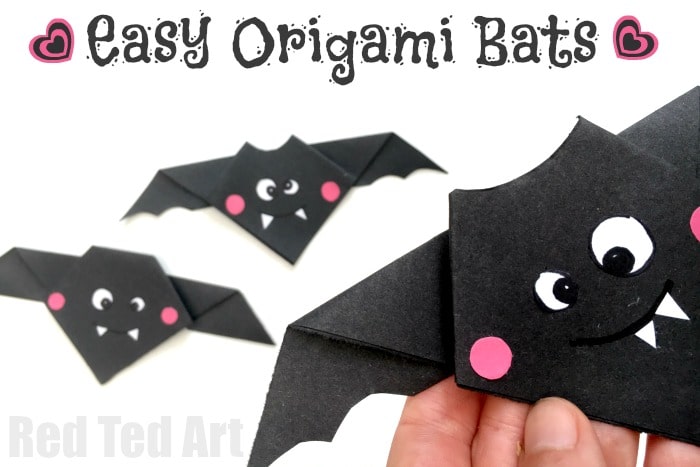
Checky little origami bat!
So, if today you were looking for how to make an easy origami bat? or learn how to fold a bat?… I hope I have answered your question!
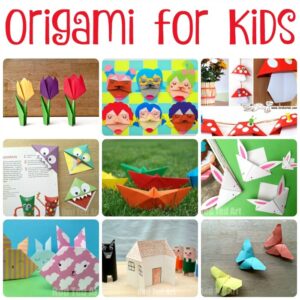
More Fun Halloween Origami Projects and Easy Origami for kids here:
25+ more wonderful bat crafts here: