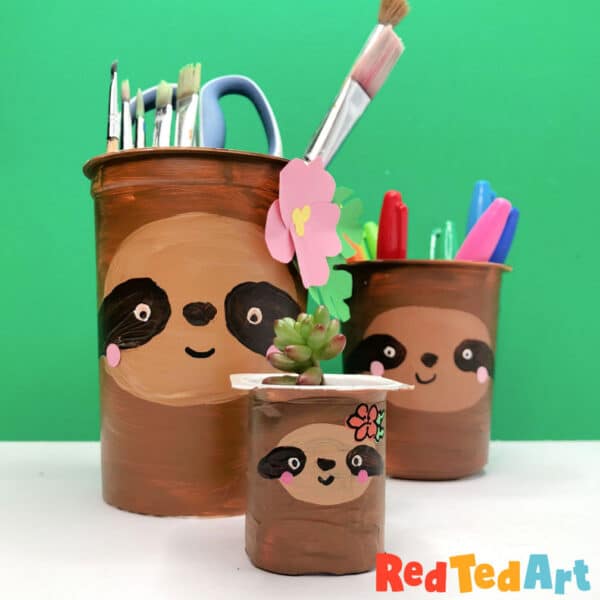
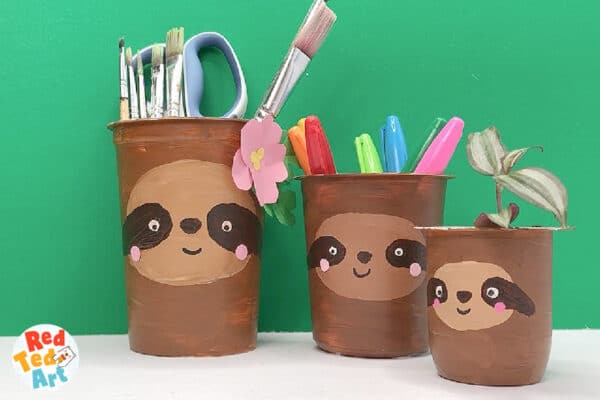
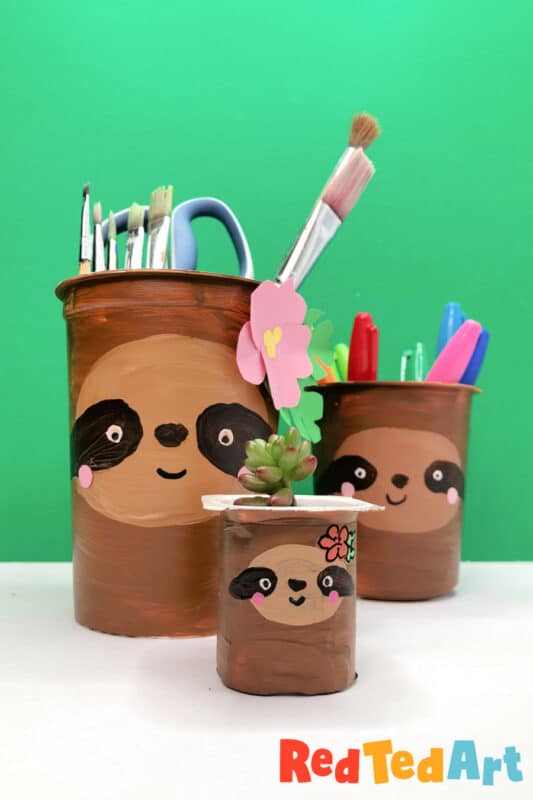
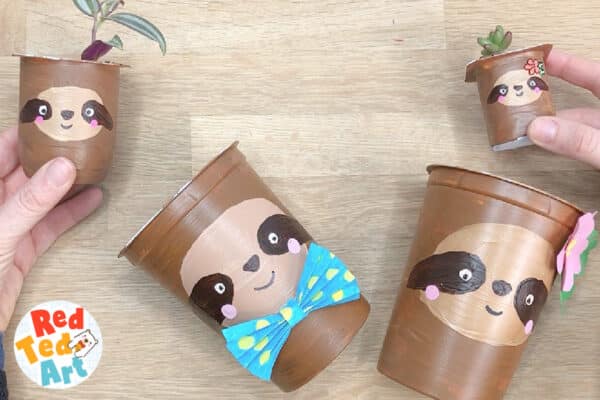
Sloth Pencil Holder DIY Craft for Back to School
Our fun with the Best Makes Ever Series continues, as I get to share this fun simple crafts for kids series with oyu over the coming weeks! Today, our craft is for all of you that LOVE a Simple Sloth Crafts for Kids! We are making super super cute and recycled Sloth Pencil Holders or Pen Pots.. Great for summer camp fun or for Back to School Crafts! These work as great little plant pots too, especially for slow growing succulents! They are so cute! Come one.. let’s take a look and see how they are made!
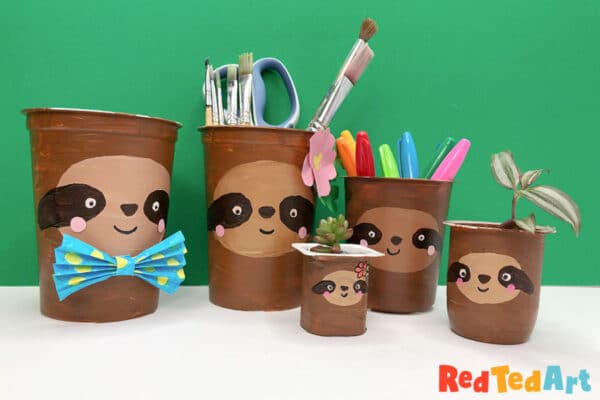
Aren’t they the cutest? I love their happy little faces and the fun paper details. You can use them as desk tidies, pen pots or even as little plant pots! So fun.
About the Best Makes Ever Series:
About the Best Makes Ever series
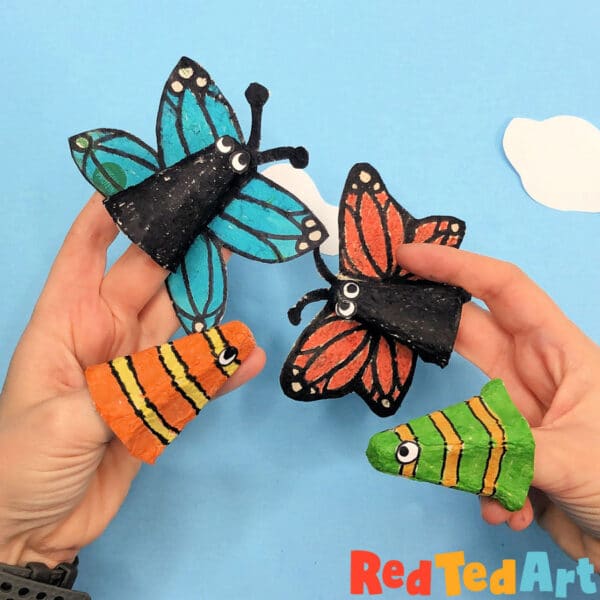
The Best Makes Ever Series, is a series of art and crafty videos, that Art Crafty Kids and I produced for Sky Kids UK back in 2020-2022. They were designed to bring delightful arts and crafts projects to kids – using every day materials/ limited resources. Enabling everyone to join in and have fun! Now, 5yrs on, we are (slowly) able to share these lovely arts and crafts projects with you on our websites too! So, DO explore our Best Makes Ever Series tab for more info.. or check out some of our highlighted projects here:
- Recycle egg cartons and use felt tip pens to make Egg Carton Butterflies
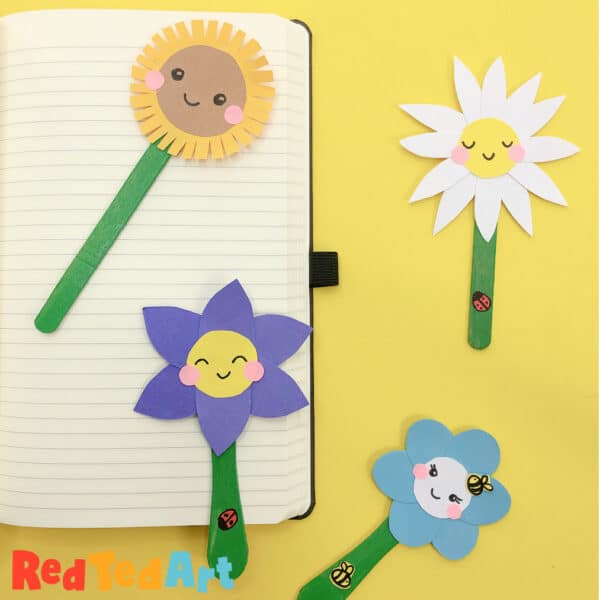
- How to make Lollipop Stick Bookmarks
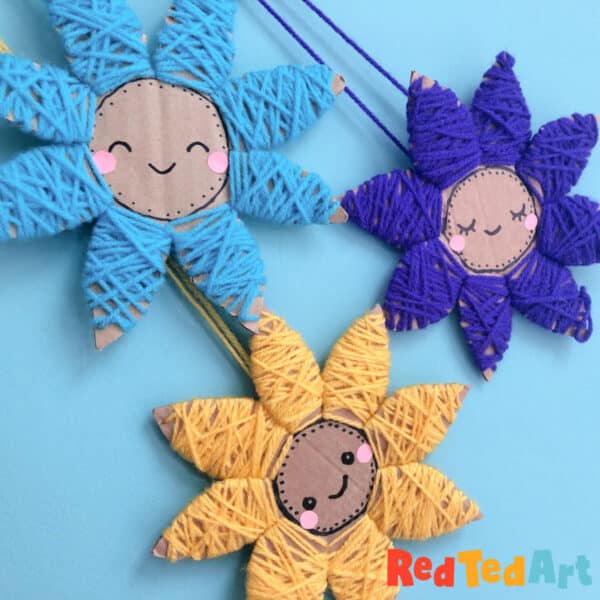
- Use yarn scraps and cardboard to make Yarn Wrapped Flowers
Aren’t they cute?
Time for our Sloth Craft!
Supplies needed to make your sloth plastic pots
- Plastic pots in different sizes – though tin cans work too
- Acrylic paint or paint that works on plastic (e.g enamel paints) – if you do not have these, you can use today’s pen pot design, but make it like our Penguin Tin Cans – which is a super easy technique too using tin cans and paper
- Paint brushes
- Paper scraps for embellishments – but you can use whatever you have – ribbons, fabric flowers, pom poms etc
- Pens for details
- Glue stick (for embellishments)
Watch the Sloth Pot Video Tutorial
If you prefer you can watch this video on my YouTube channel too! 🙂 You can also find the rest of the Best Makes Ever series on YouTube too!
How to make your Sloth Pencil Holders/ Sloth Plant Pot Craft
Paint your recycled plastic pot in sloth colors
As mentioned, if you cannot get hold of paints that work on plastic, do have a go at the same process used for our Penguin Tin Cans! It is a great way to achieve more or less the same results!
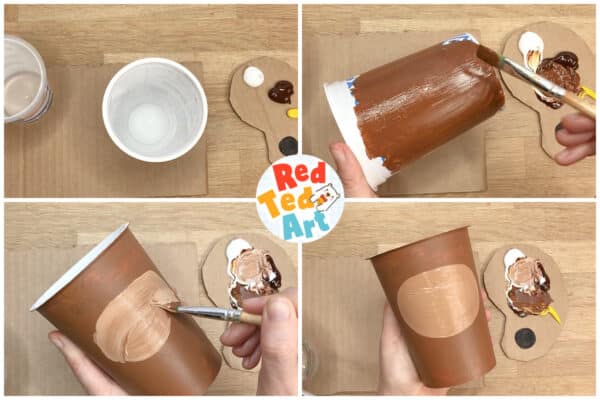
Begin by painting the pot in your body brown.
I then mixed a the SAME brown paint into some white, to make the contrasting face color.
Paint on a big oval and let it dry.
Add sloth features using basic shapes
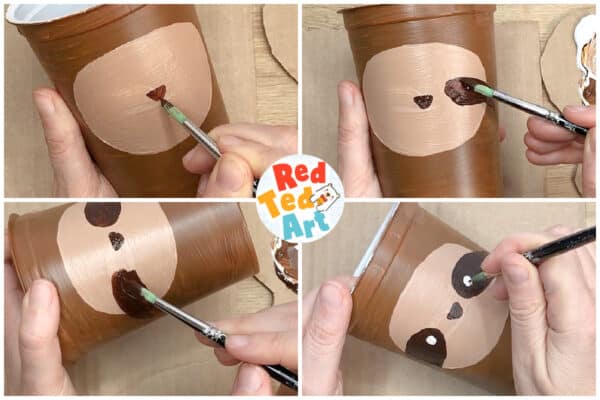
The sloths face is decorated using basic shapes:
- Make a little rounded triangle nose.
- Make “tear like” eyes
- Then add white dots for the eyes
The great thing about the Penguin Tin Cans paper method, is that you can cut out shapes and get the just right! By painting you have to be a little more condifent. But you can always sketch out pencil marks first. And also remember: that the painting method really gives your sloth pencil holders is personality and character, as they will all be different!
Add the finishing touches
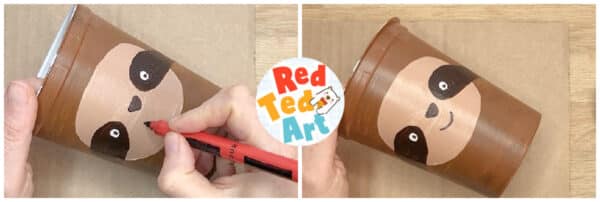
Add the finishing touch with a black felt tip pen!
Make your Sloth Pencil Holder Embellishments
Time to dress up your sloths. This is where you can have really fun decorating.
Make a paper flower – cut your shapes
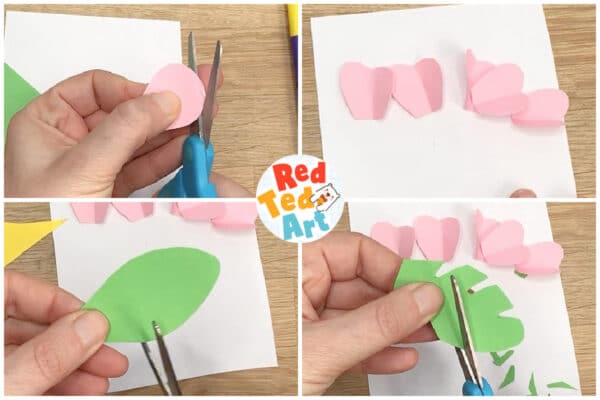
Making paper flowers is quick and easy.
First fold some paper in the desired flower color – so you have 5 layers.
Cut a tear shape. Trim off the pointy bit and cut a little indent to the top. This gives you a lovely petal shape. I folded mine in half, so they have a little 3d effect later.
Cut a green leaf – again start of with a large leaf shape and then cut some indents in for that tropical sloth feel.
Assemble your paper flower
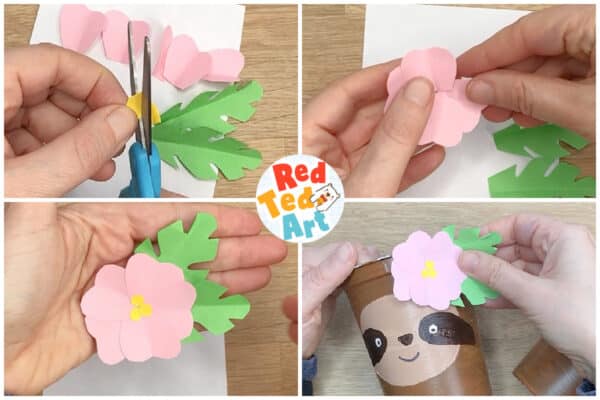
Cut some little centres for the flower – you can draw these on too or use a hole punch.
Glue your flower pieces together. And done! So cute!
Make a Paper Bow Tie from white paper
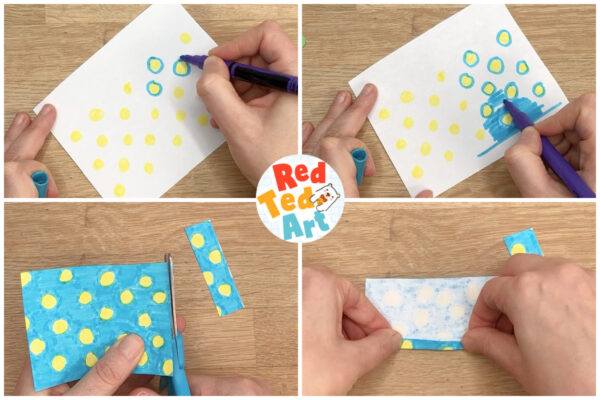
(You may recognise this cute bow from my ADORABLE paper bows featured in my Easy Paper Projects book!)
First I decided to decorate my white piece of paper – of course – if you have pretty patterned paper already, do use that!
I decided to make a spotty bow, so drew my dots first. Then colored in around them.
I neatened off my paper and cut a strip to use as the centre of the bow later.
Then I “concertina folded the paper”.
Flare the sides and make a bow tie centre
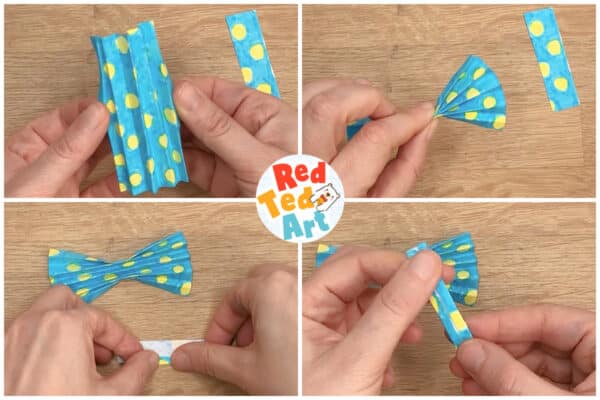
Once our concertina is ready. Squeeze the middle and flaire out the left and the right to give it that bow shape.
Take your additional strip of paper, fold in the sides – to neaten it, but also to make it “thicker”.
Then glue this strip around the centre of your bow!
Glue on your paper bow to your Sloth Pot!
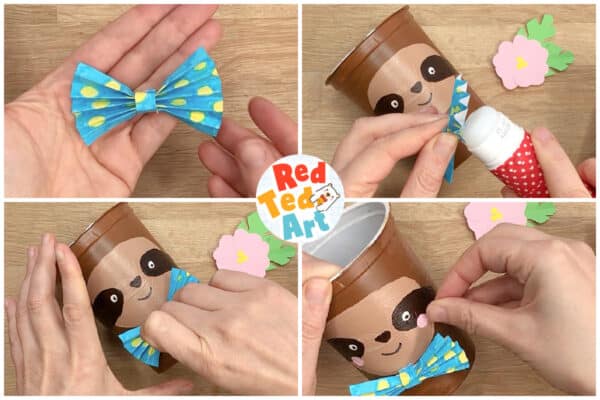
Your bow is finished!
You can now glue your bows and flowers to your sloth pen pots!
I then decided to hole punch some rosy cheeks as a little finishing touch!
Horray!
Make different sizes
Be aware…
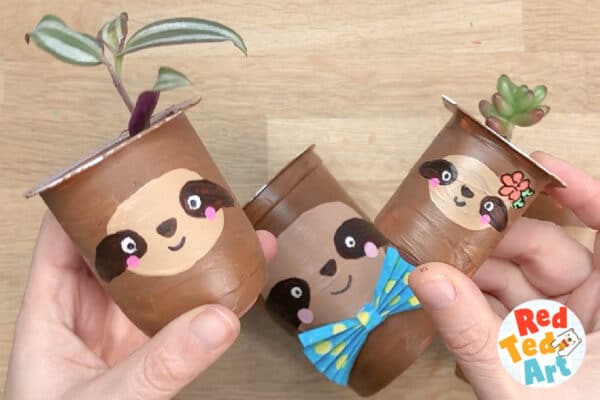
You may get carried away and will want to paint a whole set of yoghurt pots to make a whole family of Slotj Containers. These work great for your pens and pencils, but would also be cute as little sloth flower pots, don’t you think?
Fill your Sloth Pencil Holders or Sloth Flower Pots:
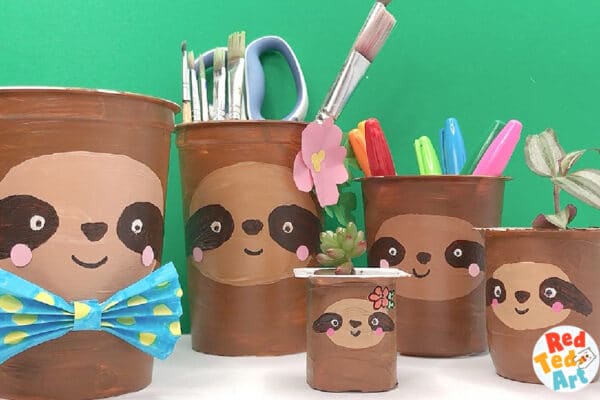
Ta-daaaa. These make so happy!
I do hope you give them a go too. Happy making!
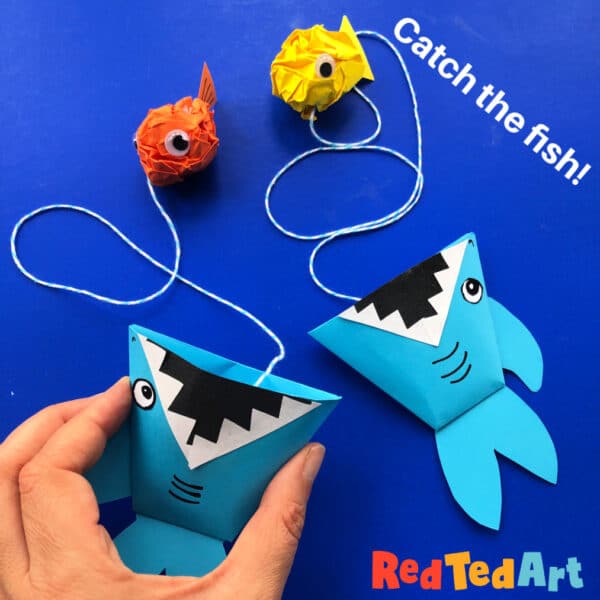
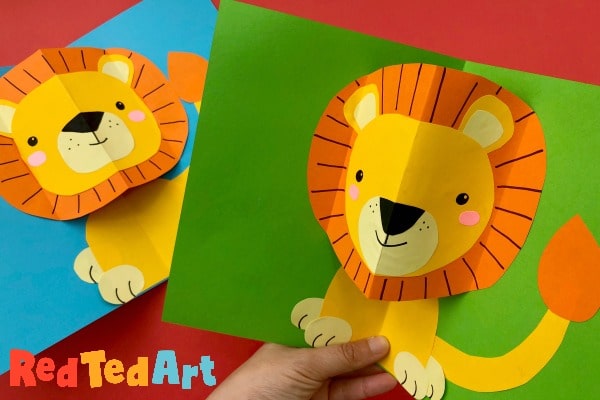
Check out more from the Best Makes Ever Series, for example we have:
- Shark Paper Toy – catch the fish
- How to make a pop up lion card (no templates needed as I guide you through the process using simple shapes)
- How to make your own checkers game/ chess game/ reversi game

x
More Cute and Easy Sloth Crafts for Kids: